¶ Account preferences
In the Account Preferences section you will be able to review and modify your company's fiscal and billing information that you have provided to EMMA. To access this section just mouse over your user name at the top right of the screen. In the drop-down menu, select the Account Preferences option.
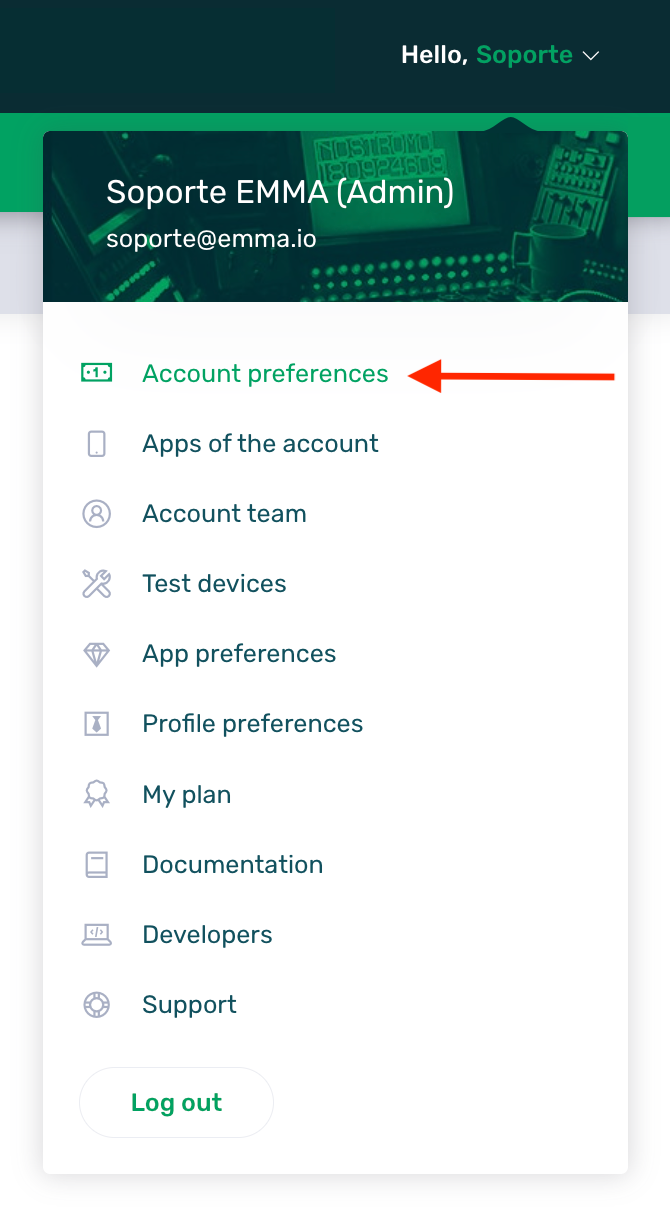
Once inside this section we can see the information broken down into three groups: General, Invoicing and Payments.
In the General section we can see the company name that we have configured at the time of registering in EMMA. This name will be the name of your app within EMMA.
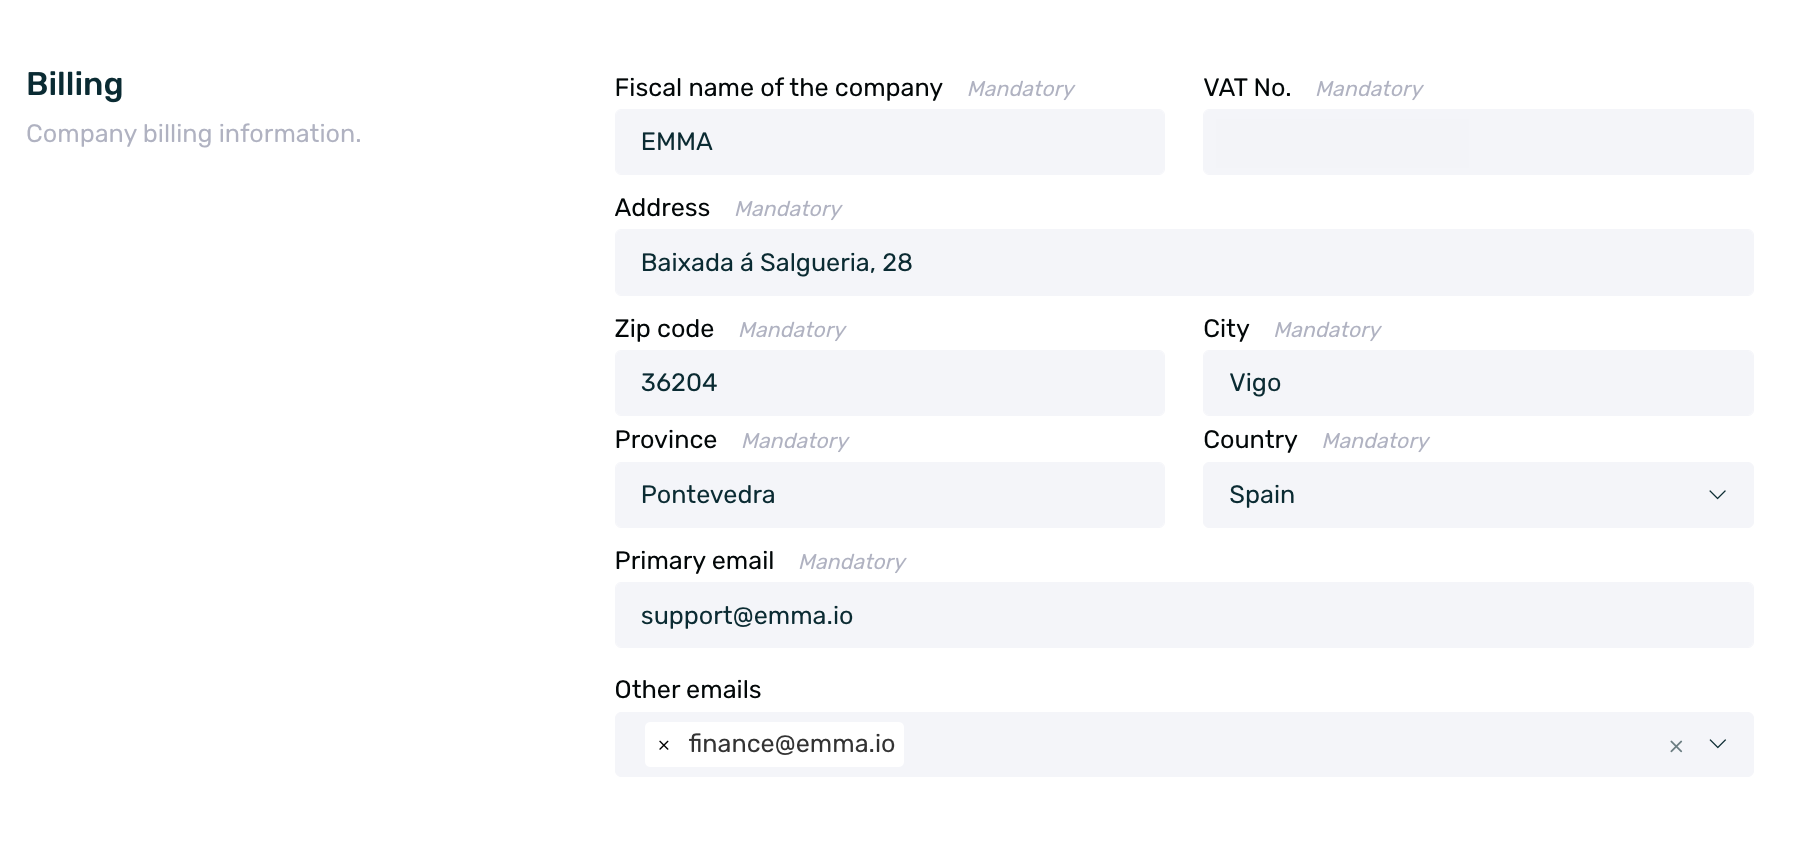
In the Billing section we can see the information related to the invoicing, the fiscal data of the company such as name, VAT number, address, zip code...
Finally, in the Payments section we will be able to see the information about the payment method entered to make EMMA payments. The credit card number (encoded for security), expiration date and CVC (also encoded).
All the information on this page can be edited at any time in order to make changes to the data provided to EMMA if necessary.
¶ Profile preferences
In the Profile Preferences section you can make basic changes to your profile information as well as make changes to your EMMA password. To access this section just mouse over your username on the top right and select the Profile preferences option from the drop-down menu.

In the General section you will see your name and surname (which are the ones you see in your user name at the top right of the screen) and the email with which you have been registered in EMMA. You can modify these fields if necessary by clicking on the Edit button.
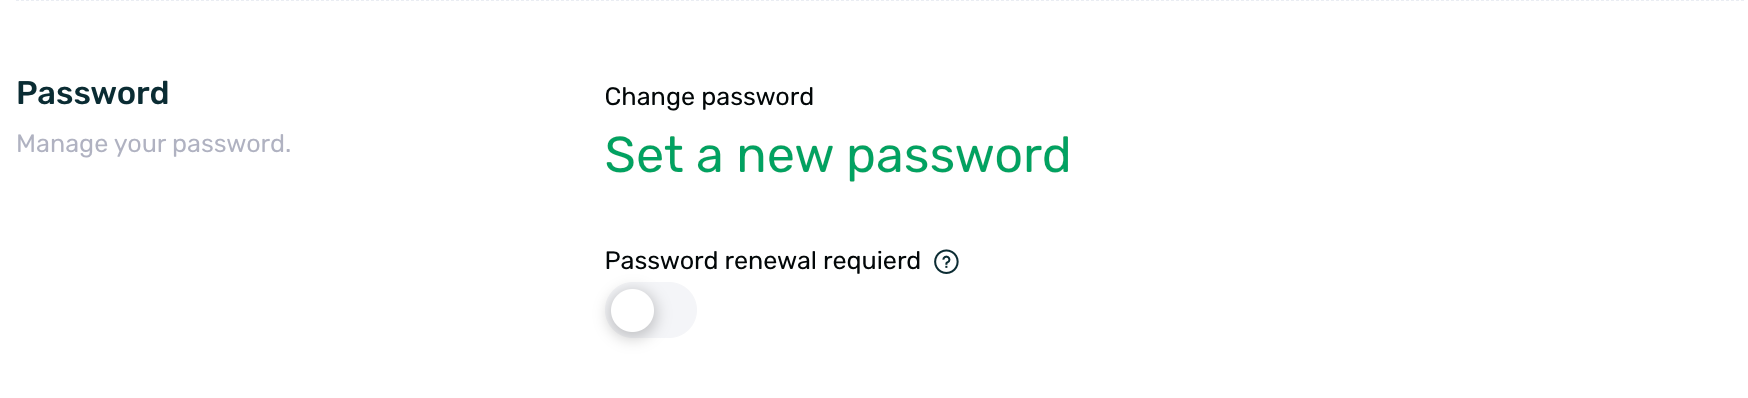
If you want to change your EMMA password, just click on Set a new password to access the password change form.
Remember that the password you set must meet the following requirements:
- At least 12 characters in length.
- At least one uppercase letter.
- At least one lowercase letter.
- At least one number.
- At least one symbol from the following: !@#$%^&*()_+¡¿?
Keep in mind that, for security reasons, you cannot reuse a previous password. It must be a new password that has not been used before.
Additionally, from this section you can enable the “update password every 45 days” mode to keep your account even more secure.
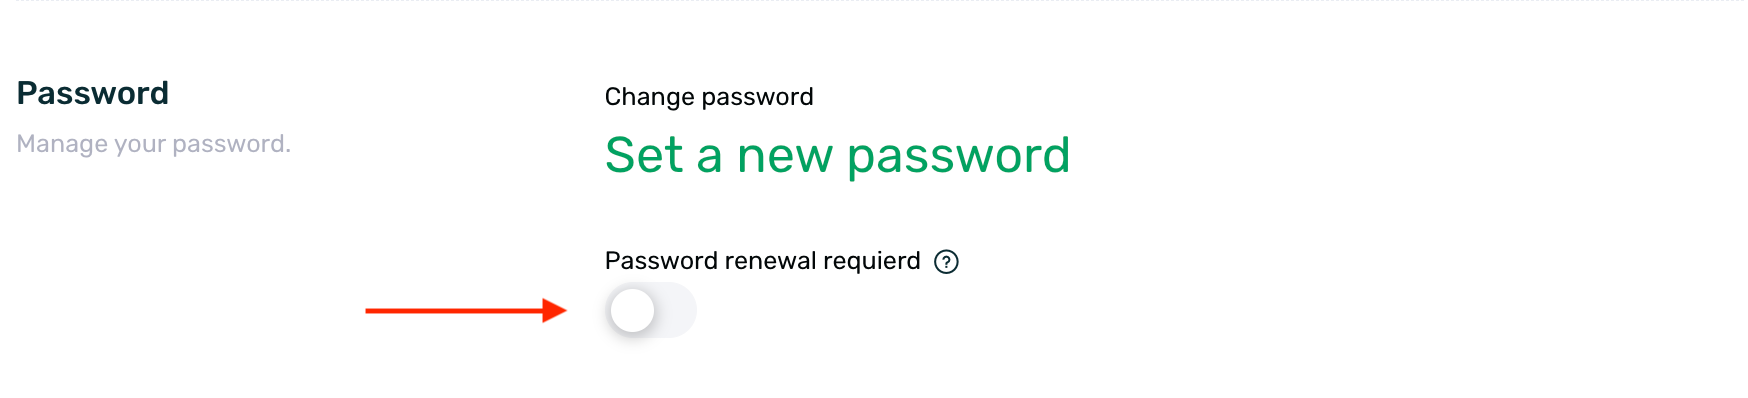
By enabling this checkbox, the password will expire after 45 days and you won't be able to access EMMA until you complete the password recovery process.
¶ App preferences
In the EMMA Preferences app section you will be able to make several configurations of the EMMA operation or make the relevant settings for the implementation of some functionalities.
In this guide, we will see what settings can be made from this section and what they affect and what they are used for.
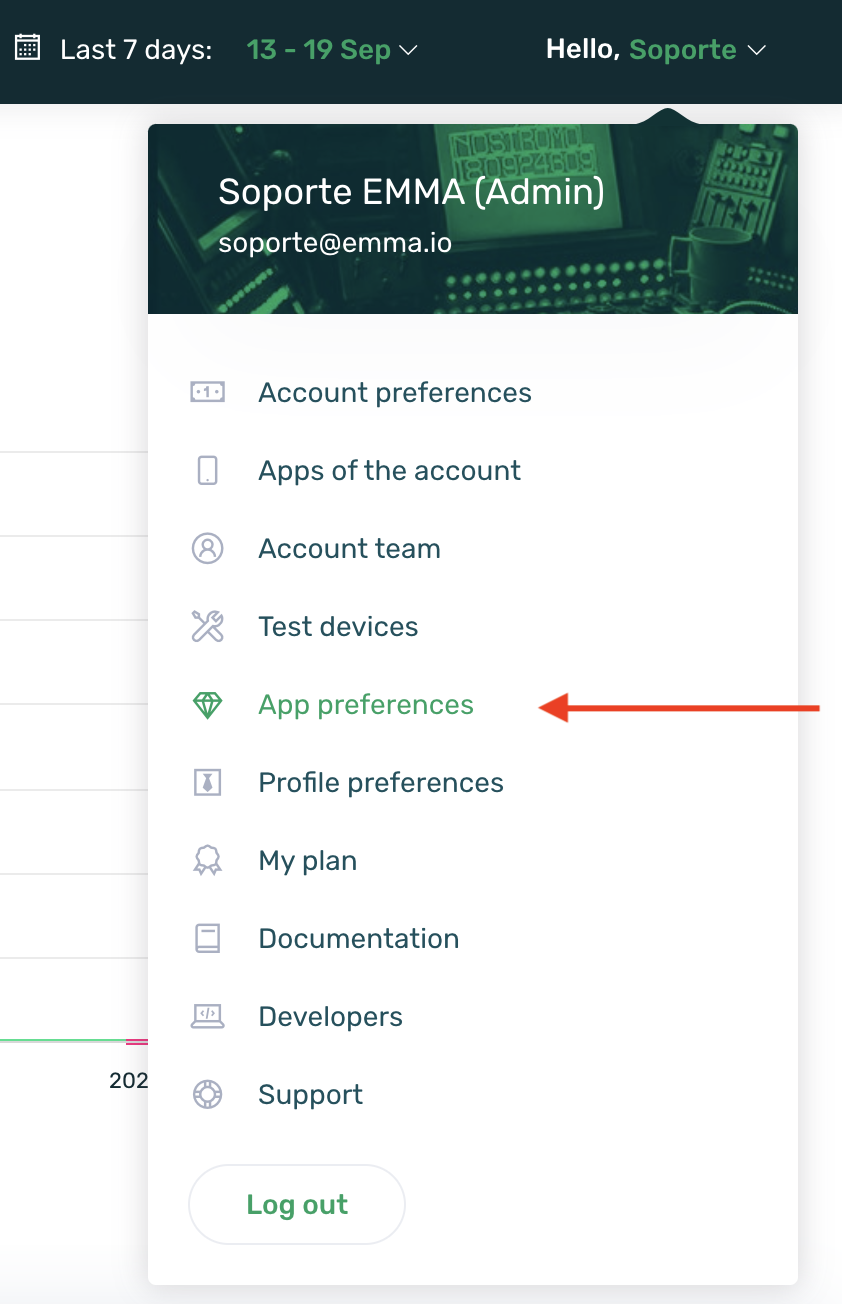
To access the preferences section of the app, click on your user name at the top right of the screen. At this point, a menu will appear where you can select the App Preferences option.
¶ General (EMMA Key and API Key)
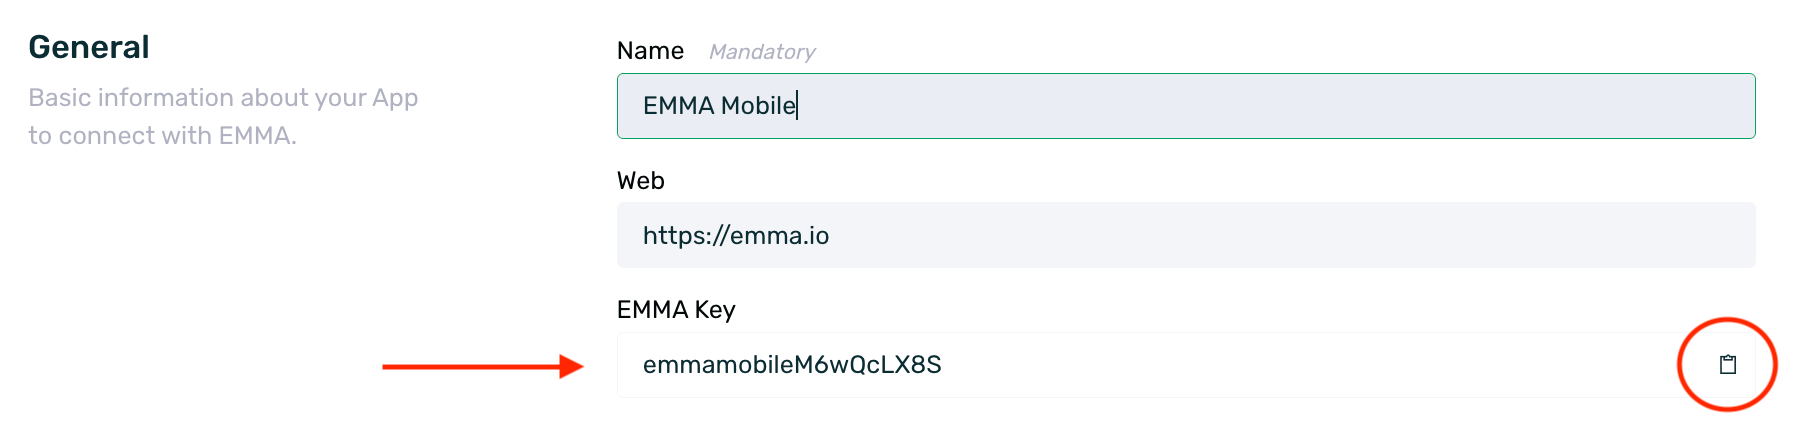
In the General section you will be able to modify the name of the app as well as the web address.
In addition, you will also have access to the EMMA Key, needed to start sending data from the app to EMMA, as well as the API Key, needed in case you use the API.
The EMMA Key is required for the implementation of the EMMA SDK. It is a unique identifier that links your app to the EMMA dashboard in order to get all the information correctly.
The EMMA Key is automatically created when you register an app (more info on how to register apps here).
You can check the EMMA Key whenever you need it from the App Preferences section in the General section. If you click on the clipboard icon shown on the right of the EMMA Key you can copy it directly to the clipboard.
In case you have contracted the use of the API, in this section, you can also access the API Key, necessary to be able to connect to our API to send and/or obtain information. In this guide you can see how to connect to our API and in this other one all the details of the calls that can be made.
¶ iOS preferences
In the iOS preferences section we can carry out the basic configuration for this operating system and the necessary configuration for some of the EMMA functionalities to work. For example, the use of powlink or push notifications.
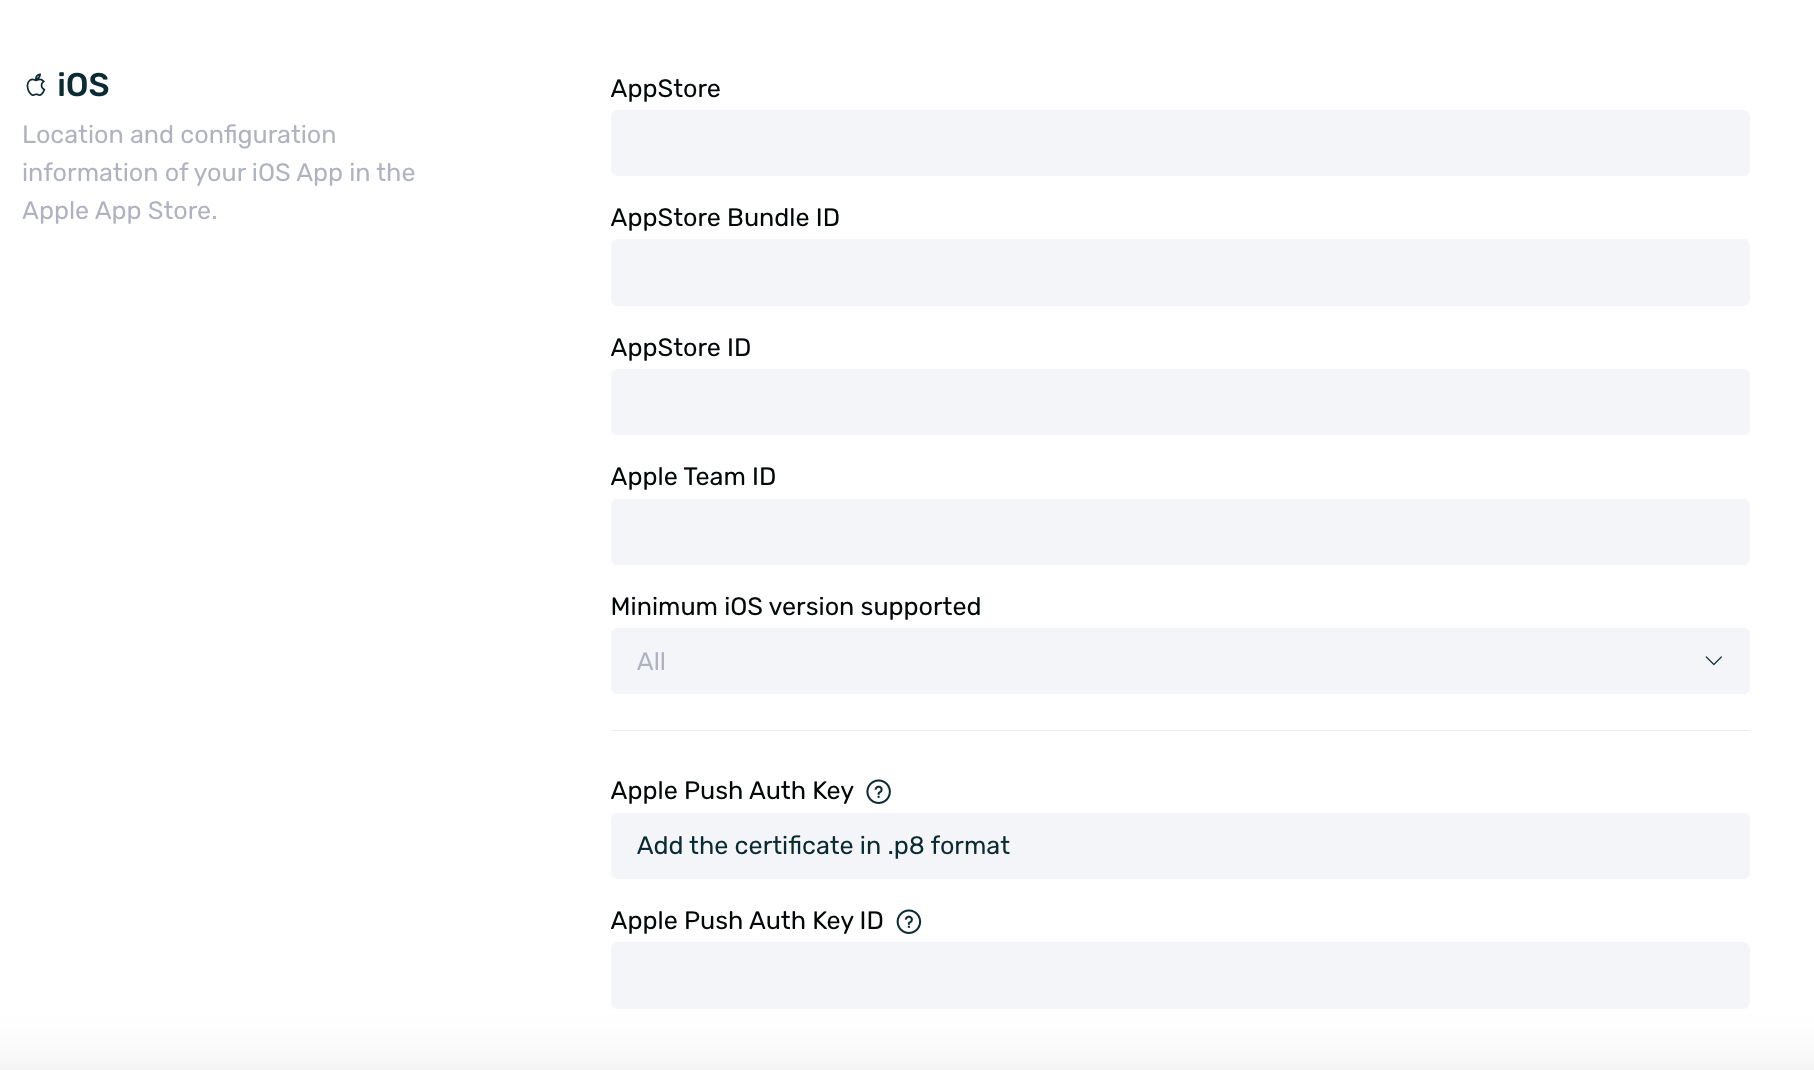
The configuration that we can do in iOS preferences is the following:
- AppStore: URL of the app in the App Store. EMMA will use by default this URL as iOS redirect url when creating Apptraker campaign.
- AppStore Bundle ID: This field is required to configure the powlink in iOS.
- AppStore ID: It is the id of the app in the store. This ID can be obtained from the store URL (https://apps.apple.com/en/app/emma-mobile/id943061465). It is necessary for example to launch campaigns with Facebook or to launch campaigns with TikTok.
- Apple Team ID: This ID is also required to integrate the powlink in iOS.
- Minimum iOS version supported: Sets the minimum version of the iOS operating system with which your app is compatible. Users with a lower version will be redirected to the alternative URL configured when creating the Apptracker campaign instead of being redirected to download the app.
- Apple Push Auth Key: It is the .p8 certificate to send push notifications to the iOS operating system.
- Apple Push Auth Key ID: It is the ID associated to the generated .p8 certificate. It is necessary to send push notifications to the iOS operating system.
¶ Android preferences
In the Android preferences section we can carry out the basic configuration for this operating system and the necessary configuration for some of the EMMA functionalities to work. For example, the use of powlink or push notifications.
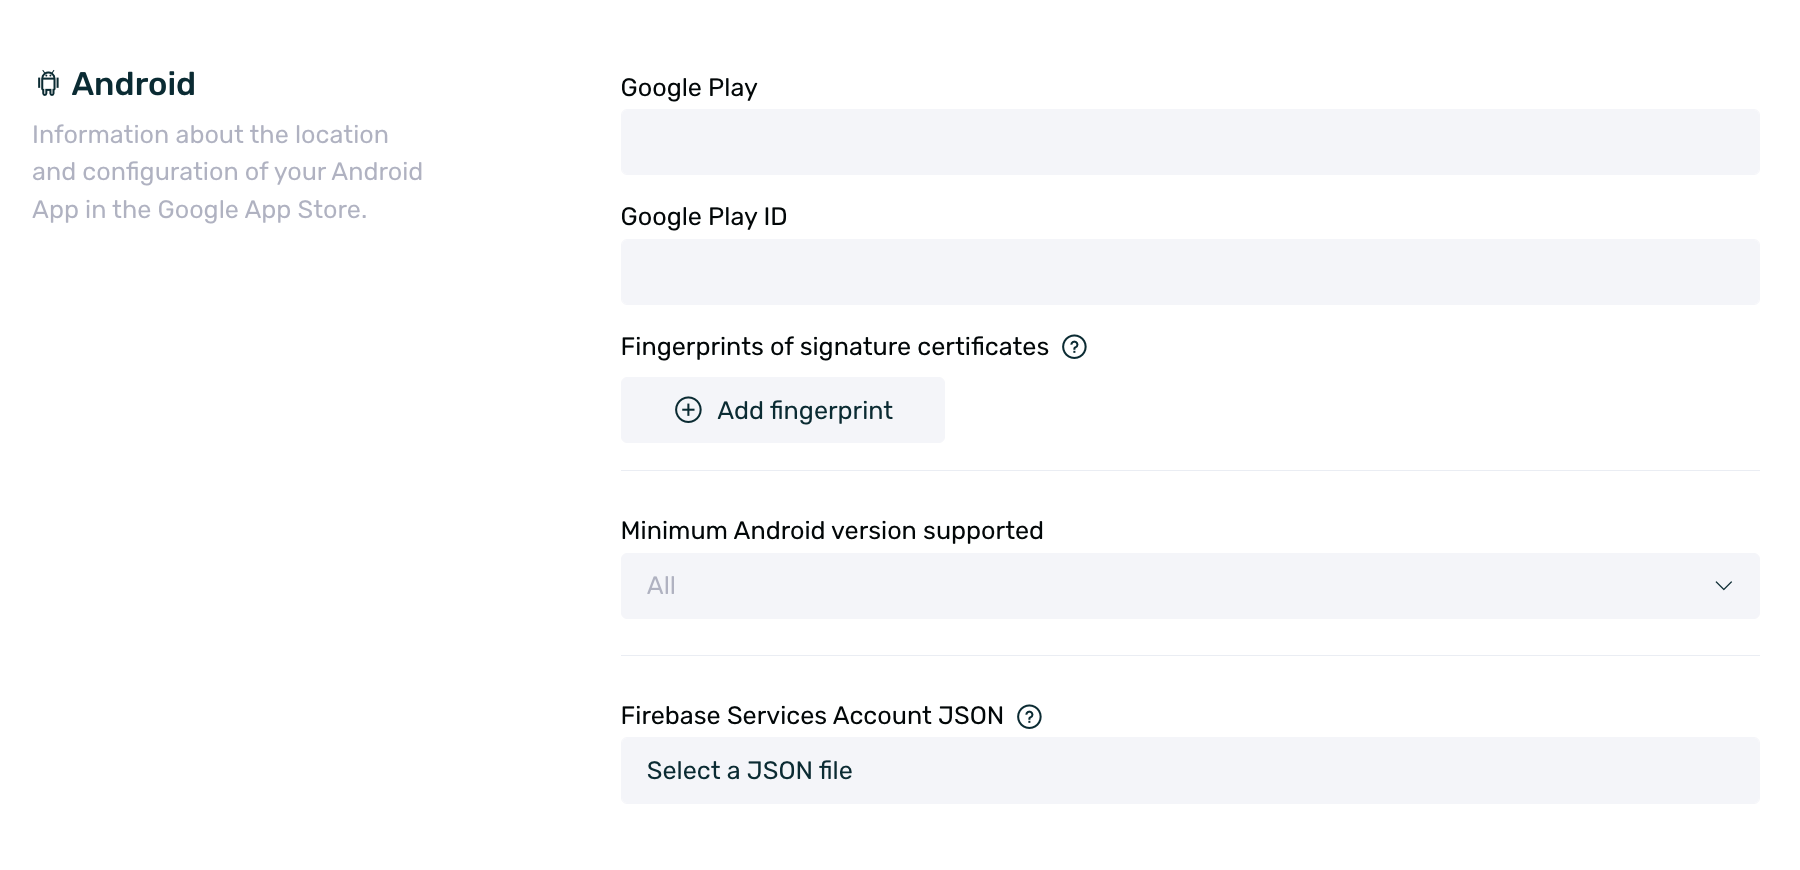
The configuration that we can do in iOS preferences is the following:
- Google Play: URL of the app in Google Play. EMMA will use by default this URL as Android redirect url when creating Apptracker campaign.
- Google Play ID: It is the id of the app in the store. This ID can be obtained from the store URL (https://play.google.com/store/apps/details?id=io.emma.emmaandroid). It is necessary for example to launch campaigns with Facebook.
- Certificate fingerprints: This identifier is also needed to integrate the powlink in Android.
- Minimum Android version supported: Sets the minimum version of the Android operating system with which your app is compatible. Users with a lower version will be redirected to the alternative URL configured when creating the Apptracker campaign instead of being redirected to download the app.
- Google Push Sender ID: Sender ID in Firebase Console. It is necessary to send push notifications on Android.
- Google Push Server Key: Server Key in Firebase Console. It is necessary to send push notifications on Android.
¶ Huawei Preferences
In the Huawei preferences section we can configure our Huawei app information with HMS if needed.
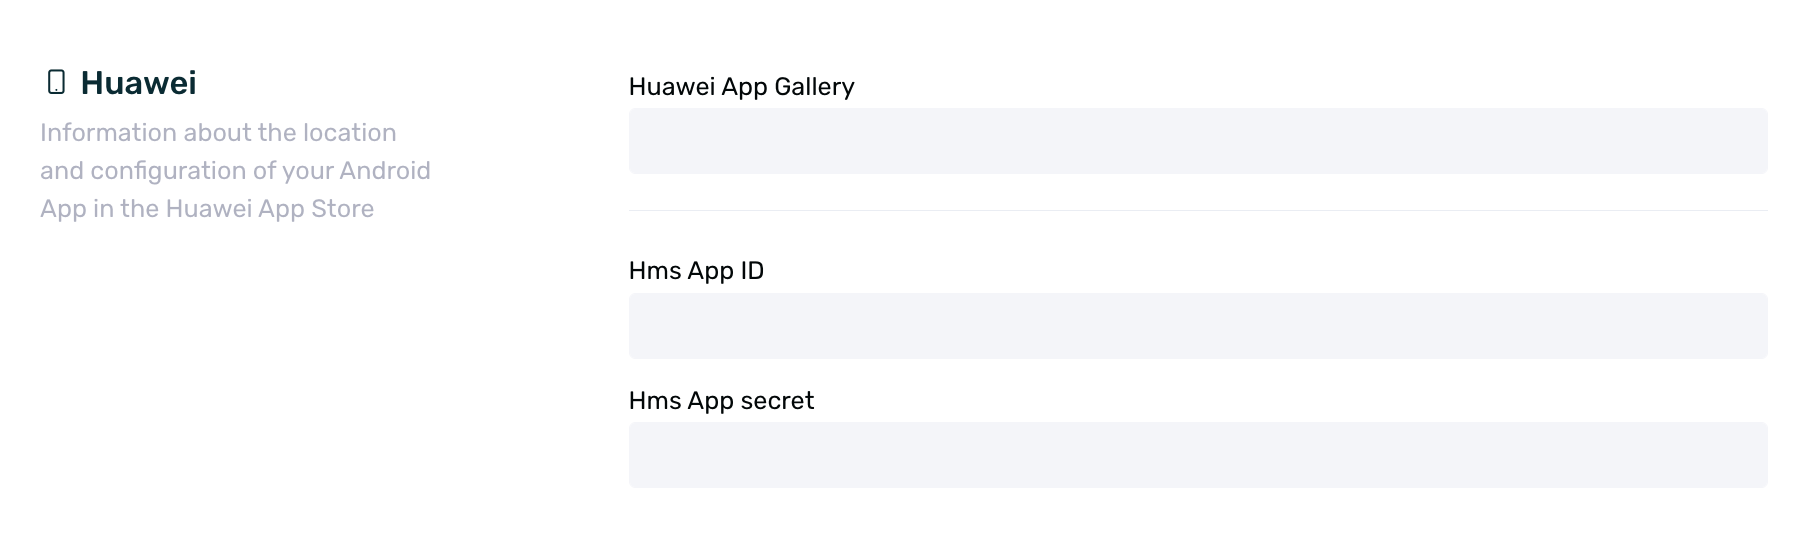
The configuration would be as follows:
- Huawei App Gallery: URL of the app in the App Gallery. EMMA will use by default this URL as Huawei redirect url when creating Apptracker campaign.
- HMS App ID: App ID in the Huawei developers console required for sending push notifications on Huawei devices with HMS services.
- HMS App Secret: App Secret of the app in the Huawei developers console required for sending push notifications on Huawei devices with HMS services.
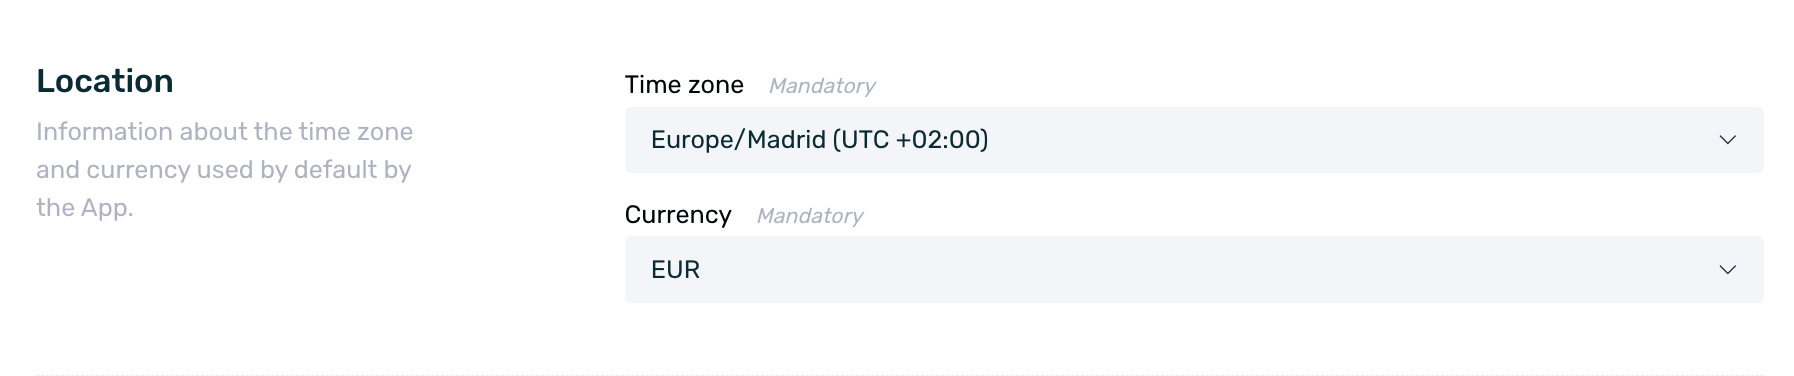
¶ Location
In the Location section you can configure the information about the time zone and currency used by the App. By default the time zone setting will be Europe/Madrid and the currency will be Euros.
Please note that the time zone and currency settings you configure here will be used for:
- Sending push notifications when the "Send scheduled user time zone" option is selected.
- Displaying monetary information on the platform related to campaign sales and costs.
- Displaying event and reporting information based on the selected time zone.
¶ Language
You can configure the languages in which your app will be available. These will also be the languages you can use when creating multilingual communications personalized for each user.

You can define:
- Default language: This will be the main language of your app and will be used when there is no translated version of a message.
- Available languages: You can select up to 10 languages (including the default one) in which your app will be available.
The default language cannot be removed and must always be present. If you change it, a notice will appear explaining that the change will only apply to new communications created from that moment on.
¶ Domain short links
In order to use the EMMA Short Links functionality (Acquisition > Short Links) it is necessary to configure a domain.

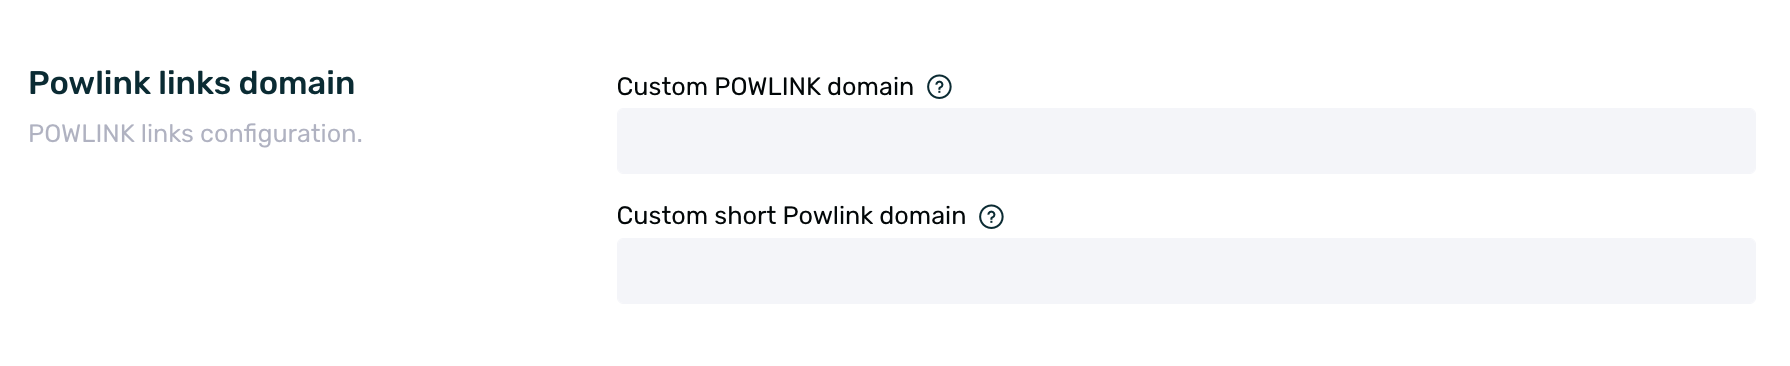
¶ Domain powlink links
In order to make use of the Powlink functionality of EMMA it is necessary to establish a domain for the Powlink and, in case it is to be used, also for the short Powlink. In this guide you can see more detailed information about the powlink and how it works as well as information about its implementation in the app.
¶ Sending emails
This configuration of the app is necessary to be able to send emails through the EMMA format.

- Sending domain: In the sending domain you must establish the domain from which the emails will be sent, for example yourcompany.com.
- Domain key prefix: In this field a name or keyword must be established (for example EMMA or yourcompany).
- Public key: It is necessary to create a public key. If you already have a public key, you can upload a file directly.
- Private key: It is also necessary to create a private key. This private key can be uploaded in case you already have one or it can be generated automatically in EMMA.
- DNS record name: This is the name of the DNS record that is automatically generated after filling in the Sending domain and Prefix fields of the domain key.
- DNS Record Content: This is the content of the TXT-type DNS record that is also automatically generated after filling the Public Key field.
Check our specific guide on email configuration for more details on the configuration.
¶ Limit the impact of push notifications
If you plan to impact several user segments or send a large number of push notifications, it is advisable to limit the frequency capping so as not to overimpact users.
Scroll down until you find the section Limit push impacts. By default the capping of push notifications is unlimited, since the switch is enabled, therefore EMMA will interpret that the user will be susceptible to receive unlimited push notifications.
If we disable the switch we will be able to select the number of times we want to impact a device per day, week and/or month.
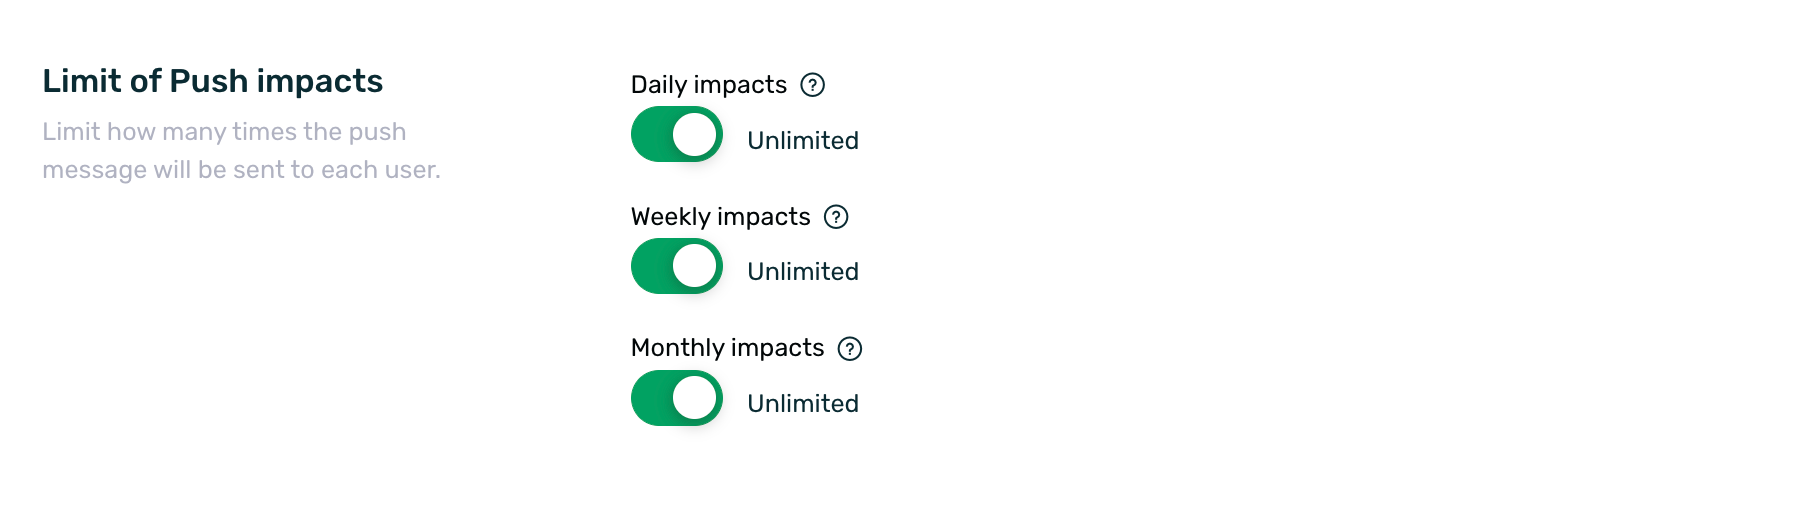
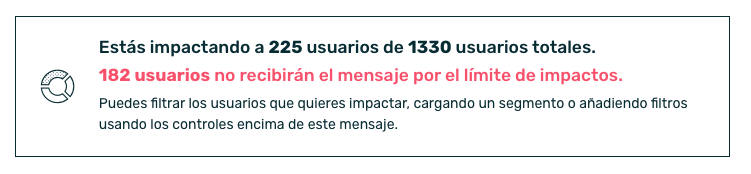
When you go to program the Push notification, if the limit of impacts is not unlimited, the number of devices that, despite belonging to the selected segment or filter, have already exceeded the established limit for receiving notifications, will be indicated.
¶ In-App Impact Limit
As with Push Notifications, EMMA allows you to configure a limit of hits for In-App formats. By default the hit limit for In-App communications is unlimited, therefore EMMA will interpret that the user will be susceptible to receive unlimited hits from In-App formats.
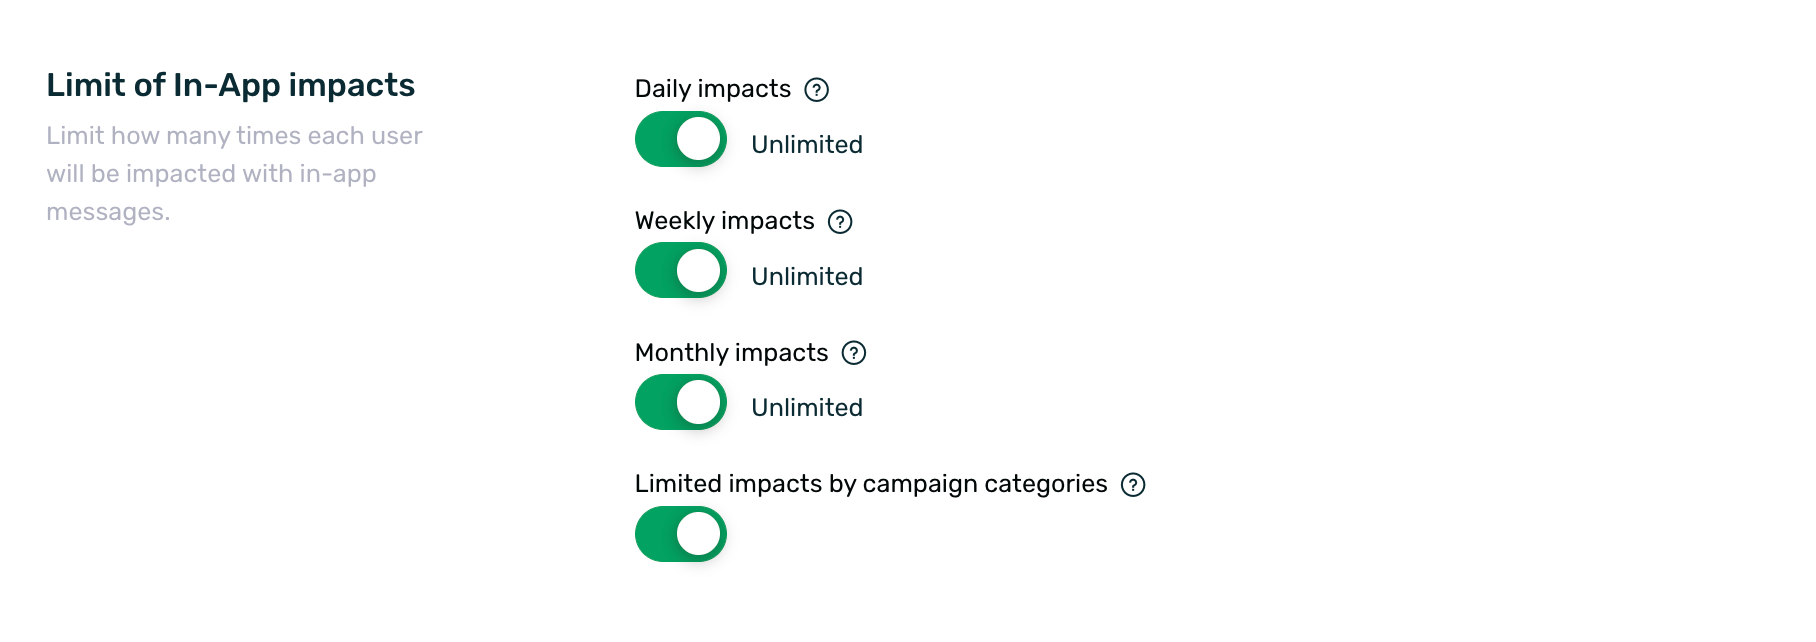
If we want to set a limit of impacts so that each device cannot receive more than X impacts per day, week or month; we only have to disable the check and set the maximum number of impacts per day, week and/or month that the user can receive.
In addition, we can also set an additional limit according to campaign categories. By default, this setting is disabled. You can see more information about this in our guide on Saturation Control.
¶ Configuration of communication campaigns
In this section you can set the period of time that must elapse for your communication campaigns to automatically change status. By default this period is unlimited, but you can set the campaigns to automatically change status after X days without changes.
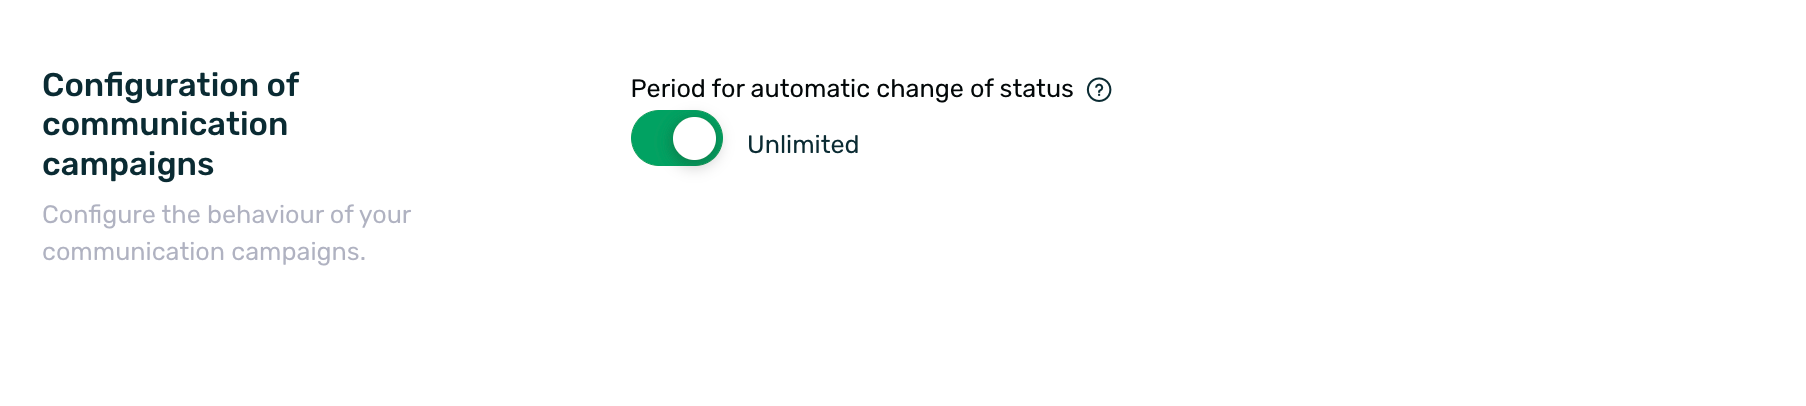
If so, this setting will have an effect on campaigns in Testing and Paused status.
- Campaigns in Testing status will automatically switch to Deleted status after the set time has elapsed.
- Campaigns in Paused status will automatically switch to Finished status after the set time has elapsed.
¶ Click tracking in communication
In this setting, you can define the default behavior for click tracking in Adball and Startview type communications.
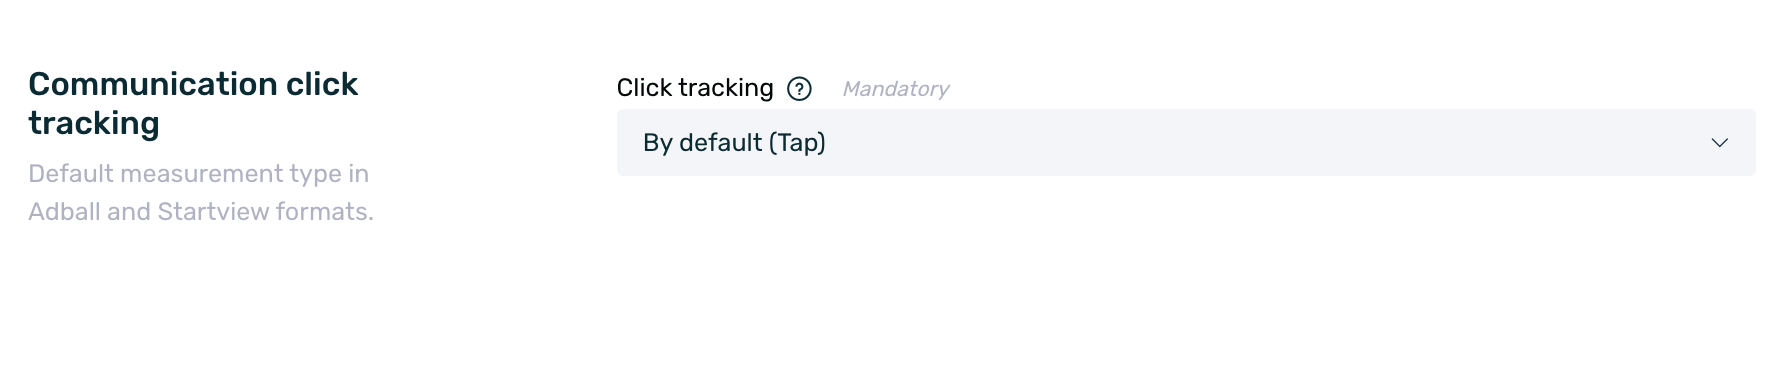
Regardless of the default option configured here, the tracking model can be changed for each specific communication at the time of its creation.
The available tracking types are:
- Tap
- URL Change
- Deeplink
- Click on URL
You can find more information about each of the different modes here.
¶ Retargeting
Select the mode type for your Retargeting campaigns. By default your Retargeting campaigns will use the Last Click mode, but you can change the mode to Single Click by enabling the check box. You can see more information about the different attribution models for Re-Targeting campaigns here.

¶ Security
If you want to set the communication campaign approval system, activate this option. By default EMMA does not use the communication campaign approval system and this option is disabled. You can see more information about this functionality here.

¶ Reports
Set the format of all reports and exports you make from EMMA. You can select the format
between:
- ZIP
- CSV
By default, the EMMA download format is ZIP.

¶ Account team
In EMMA you can give access to your account to as many different users as you need, controlling at all times the type of visibility that each one of them has to the data and the functions that each one of them has enabled.
¶ Create new users
To do so, just follow these steps:
-
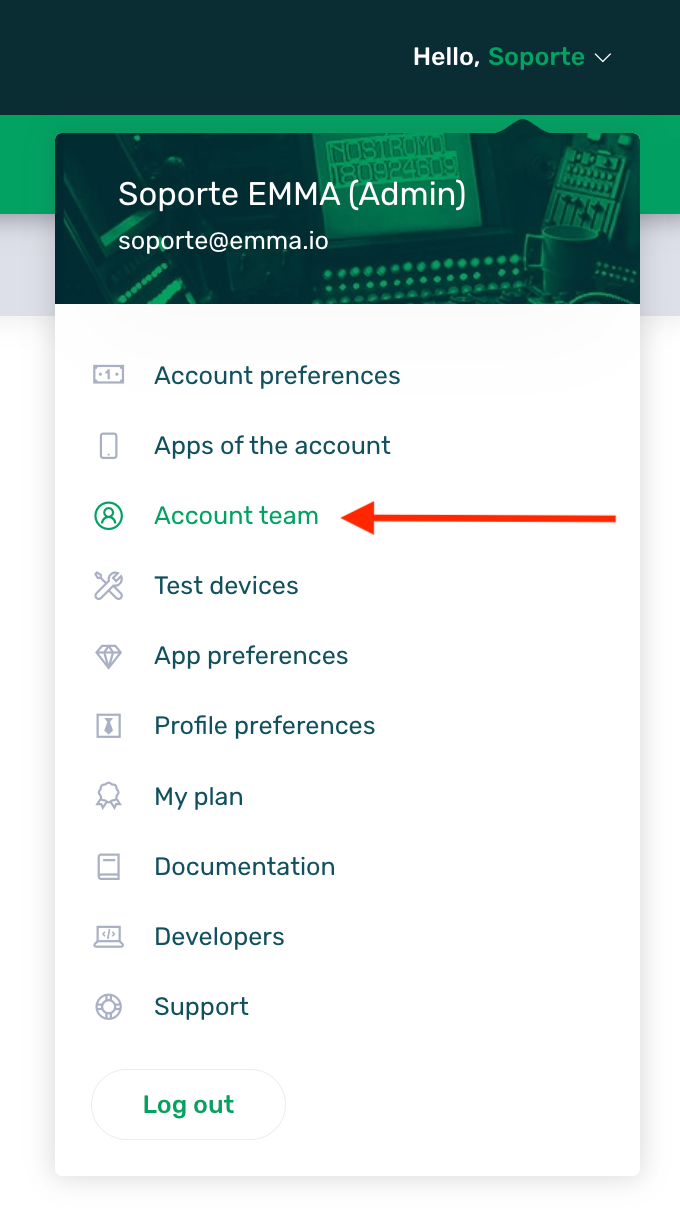
Login to your EMMA account and go to the top right where your username appears.

-
From the drop-down menu select the Account Team option and then click on the New Team Member button.
-
Next, click the New team member button.

-
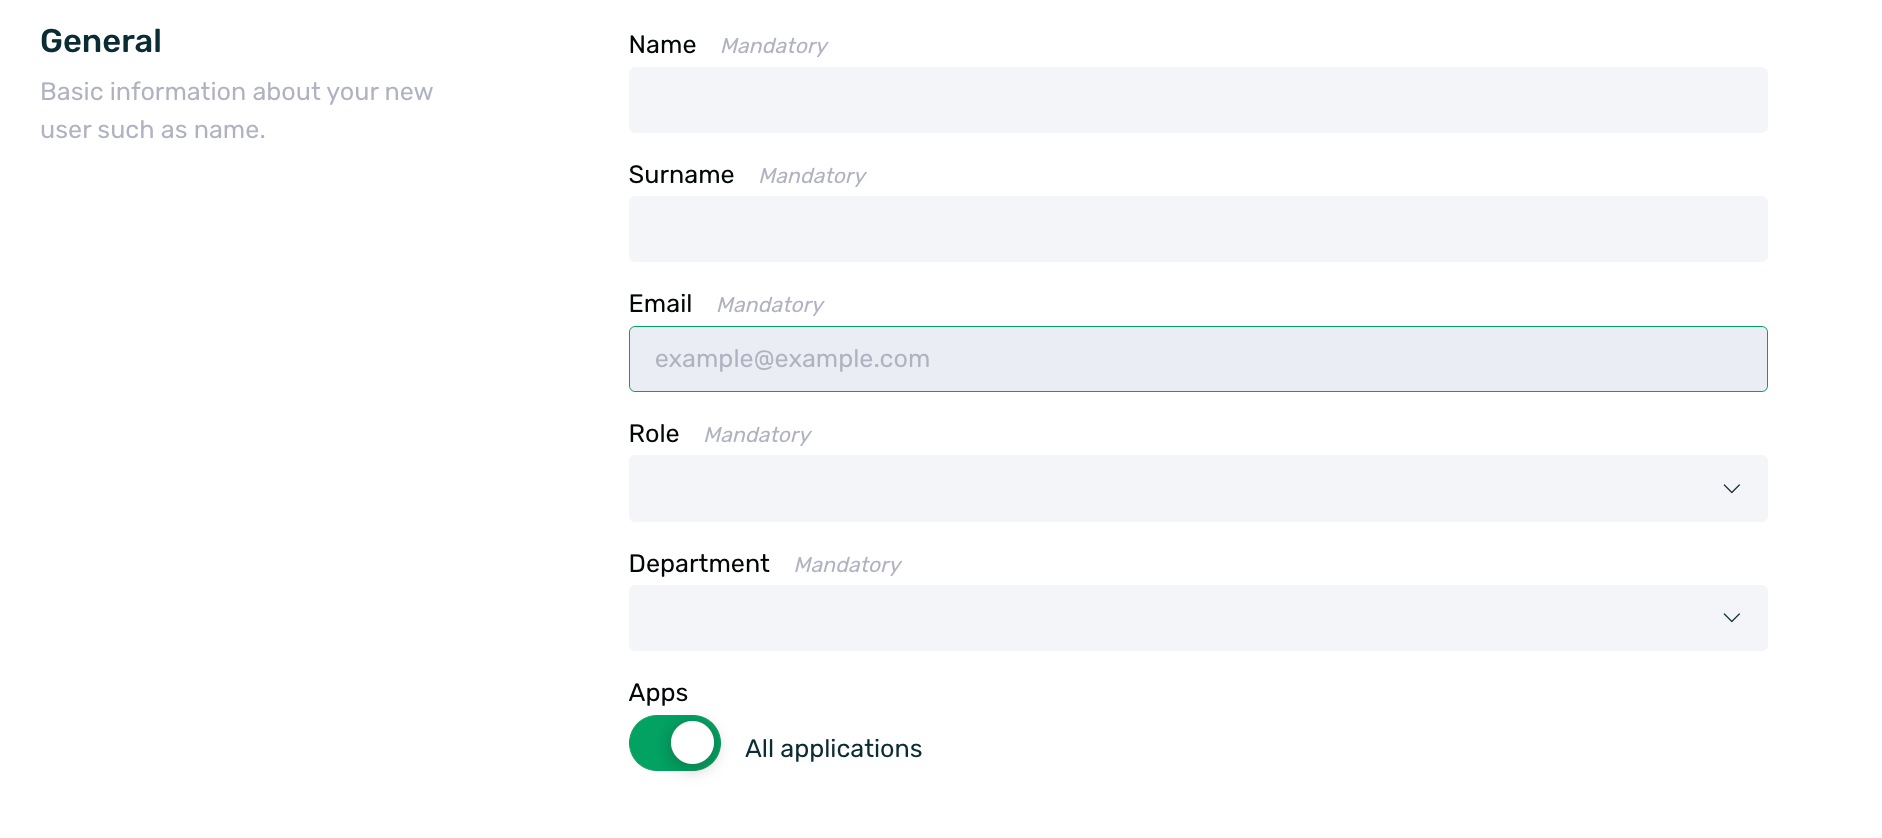
Fill in the following information from the user registration form:
-
First name: New user's first name
-
Last name: Last name of the new user
-
Email: Email of the user with which he/she will have access to EMMA.
-
Role: Select a role among the available EMMA roles:
- Administrator: Has unlimited access to EMMA data and functions. This is the only user that can make configuration modifications to the app in the App Preferences section.
- Agency: Can access and operate (create, edit, delete) in any section of EMMA. He/she can create and edit the applications and users of an account but cannot delete them.
- Analyst: This role will only be available if the Pre-validation of campaigns functionality is enabled. For more detailed information on what this user can and cannot do, see our guide on Pre-validation of campaigns.
- Author: This role will only be available if the Pre-validation of campaigns functionality is enabled. For more detailed information on what this user can and cannot do, please refer to our guide on Pre-validation of campaigns.
- Client: Can access and operate (create, edit, delete) in any section of EMMA. You can create and edit the applications and users of an account but you will not be able to delete them.
- Manager: This role will only be available if the Pre-validation of campaigns functionality is enabled. For more detailed information on what this user can and cannot do, see our guide on Pre-validation of campaigns.
- Provider: Has read-only access to the EMMA Acquisition > Apptracker section of EMMA only and exclusively to the campaigns and sources to which he/she is subsequently given access. Continue reading this guide to see how to give access to specific sources.
-
Department: Select the department that the user belongs to within your company from the available options:
-
Address
-
Finance
-
Marketing
-
Other
-
Product
-
Support
-
Technology
-
Sales
-
Apps: Select the apps within your account that they need to have access to. If you have only one app within your account, the user will be given access to that app only. If you have multiple apps, by default access will be given to all of them unless you select otherwise.
-
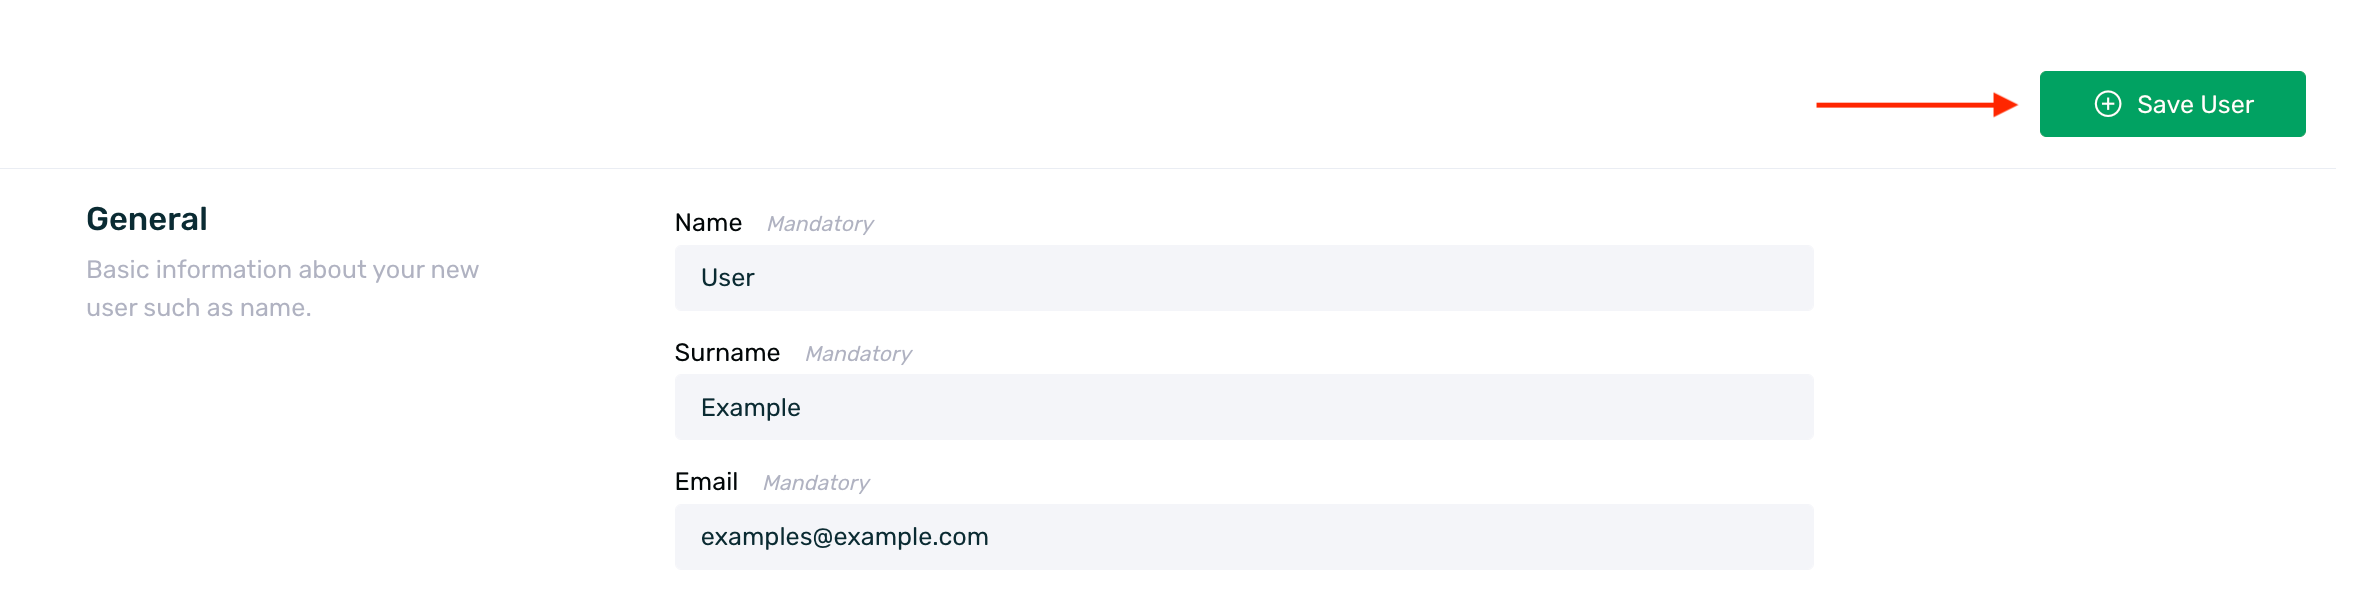
Finally, click the Save User button to create the user. The user will then receive an email with the steps to follow to validate their user.
¶ Configure vendor access to fonts
Once we have created a new user with the Provider role, we only need to give him/her access to the sources we want him/her to visualize.
To do this, we just have to follow these steps:
-
Follow the previous steps in this guide to create a new user with Provider role.
-
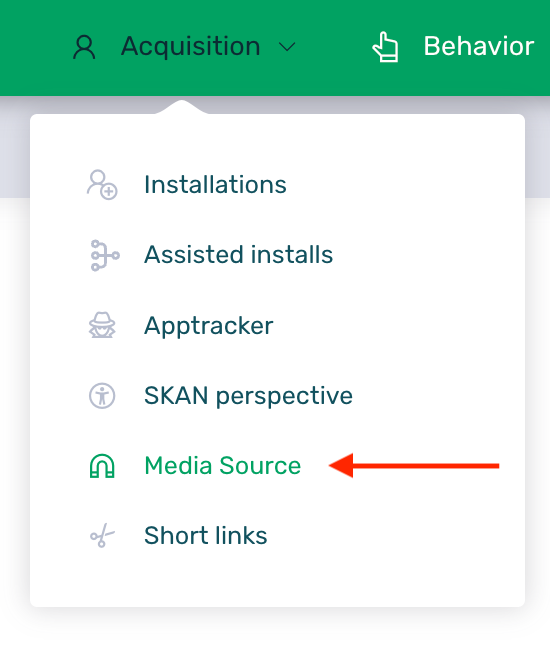
Go to the Acquisition section > Media sources.
-
Find and edit the media source in question to which we want to give the provider access.
-
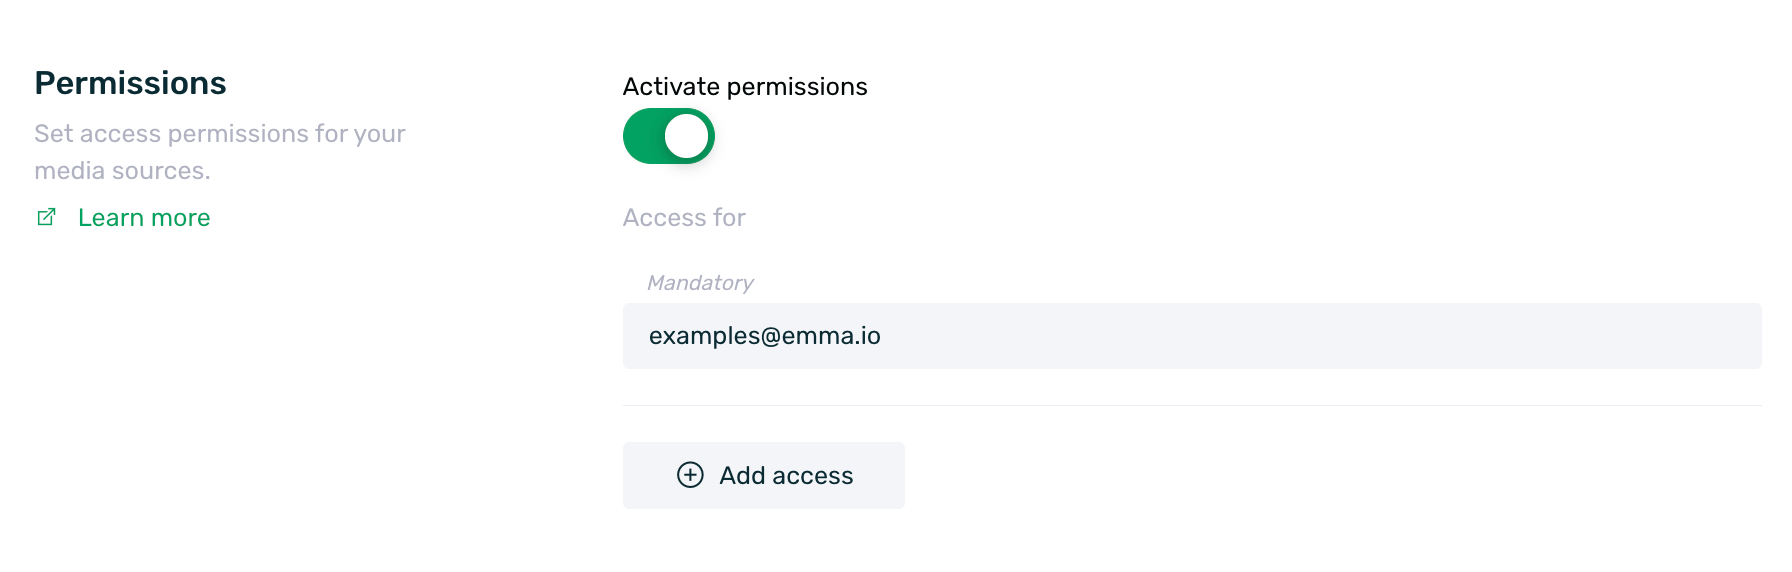
In the edit form, scroll down to the Permissions section. We activate the permissions and add the email of the user we have previously created. We can add as many users as necessary by clicking on the + Add access button.
-
Save the changes and ready, the provider will only visualize those fonts that in Apptracker have configured as provider the font that has been given from this section.
¶ Edit or delete existing users
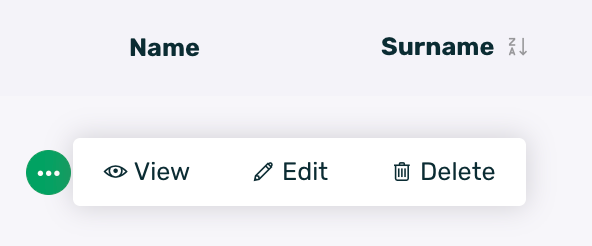
To edit or delete an existing user, just click on the side menu to the right of the user's name and select the appropriate option, Edit or Delete.
If we select the Edit option, the user editing screen will open and we only have to make the relevant modifications and save the changes made.
You can only edit the Role, Department, and Apps fields of a user.
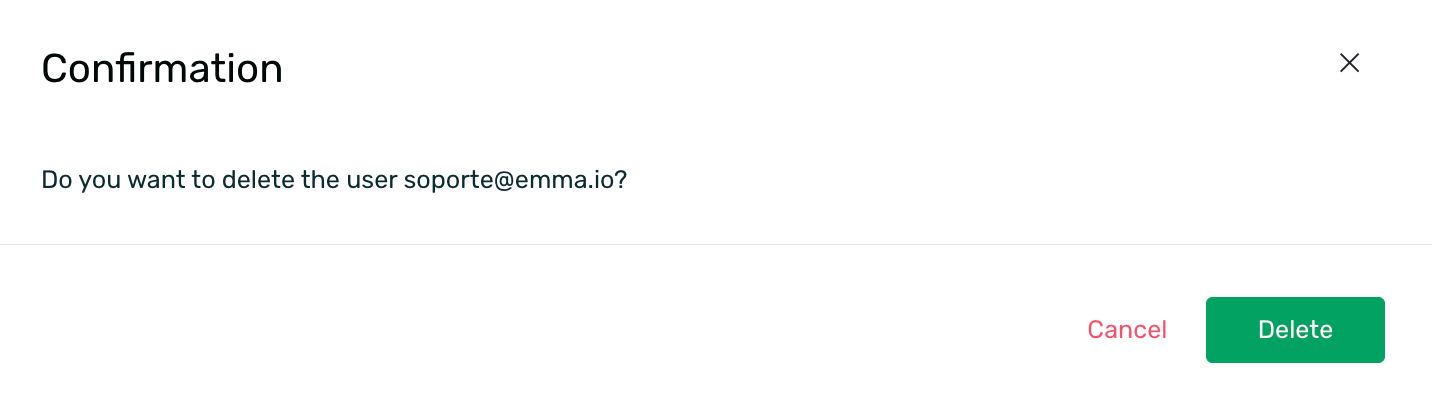
If we select the Delete option, an alert will open to confirm if we really want to delete that user or not.
¶ Test devices
In order to be able to perform multiple attribution tests without having to use devices that have never had the app and therefore are not in our database, the Test Devices feature has been born.
Thanks to this new feature, we will be able to add up to 40 test devices per account to be able to perform as many attribution tests with the same device as necessary.
Below we will see in more detail how to register new test devices, how they work and some considerations to take into account for their use.
¶ How to add test devices
Adding new test devices is very easy. To do so, just follow these steps:
-
Log in to EMMA.
-
Go to the Behavior > Explorer section and search for your device in the database. Click the Raw Export button, copy the identifier shown in the Device ID column, and save it, as we will need it later.

-
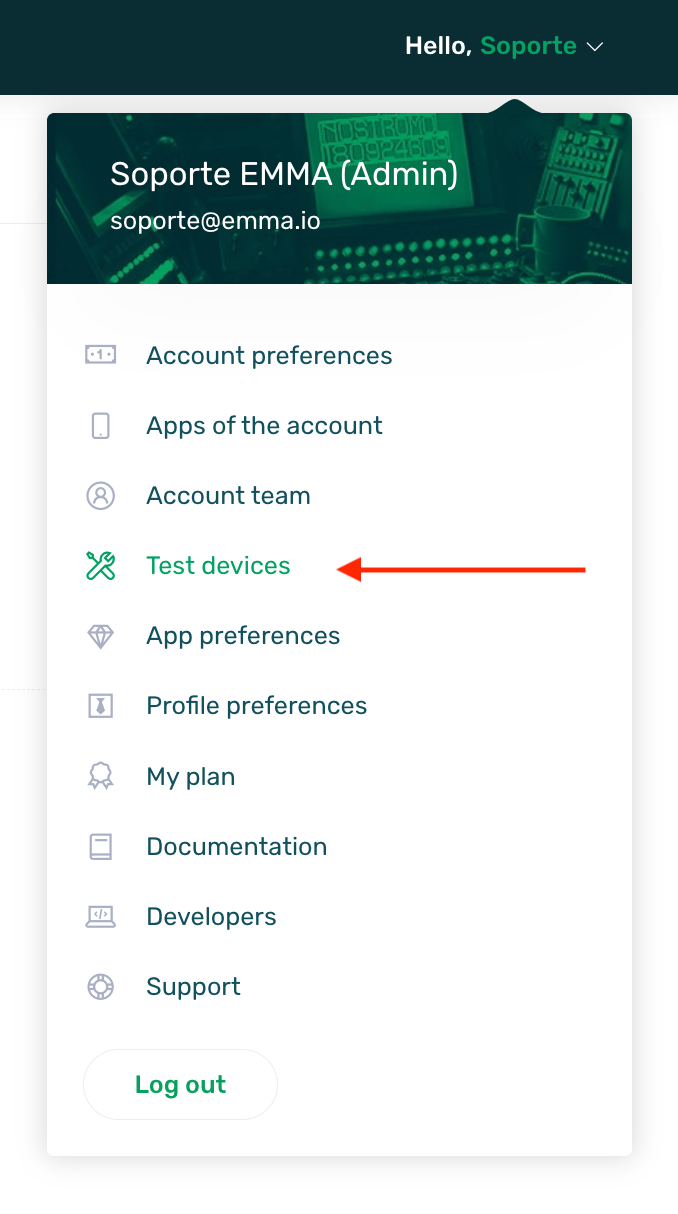
Mouse over your user name, on the right side of the screen, and in the drop-down menu select the Test devices option.
-
Click on the + New test device button.

-
Covers the fields of the registration form:
- Name: Set an identifying name for that test device.
- Operating system: Select the corresponding operating system from the available options (iOS, Android, Other).
- Identifier: Paste the identifier obtained in the People section above.
-
Save the device.
Repeat this process as many times as test devices you need to add up to a maximum of 40 devices per account.
¶ Edit and delete test devices
Once we have registered our test devices, deleting or editing them if necessary is very simple. Just click on the context menu next to the test device name and select the desired option.

-
Edit: The device editing menu will open and we will be able to modify any field: name, operating system and identifier.
-
Delete: If we click on delete, the test device will be deleted immediately (without confirmation). This means that it can no longer be used as a "new" device to measure attribution.
¶ How test devices work
When we register test devices, what we are doing is telling EMMA to treat those devices as if they were new installs in our database but keeping the identifier.
In this way, we will be able to perform as many attribution tests with EMMA powlink as necessary, since with each new click and subsequent install of the app, both the install date and the campaign and source, if applicable, to which the user is attributed, will be updated.
¶ How to do attribution testing and view the data
Once we have our device registered as a test device, the procedure to perform attribution tests and review the data is as follows:
- Uninstall the application from our device.
- Click on a previously created EMMA powlink. If you do not know how to create a powlink, visit our article on Apptracker to see how to do it.
- Install the app and open it for the first time.
- Next, we go to the Behavior > Explorer section and search for our device in the database.
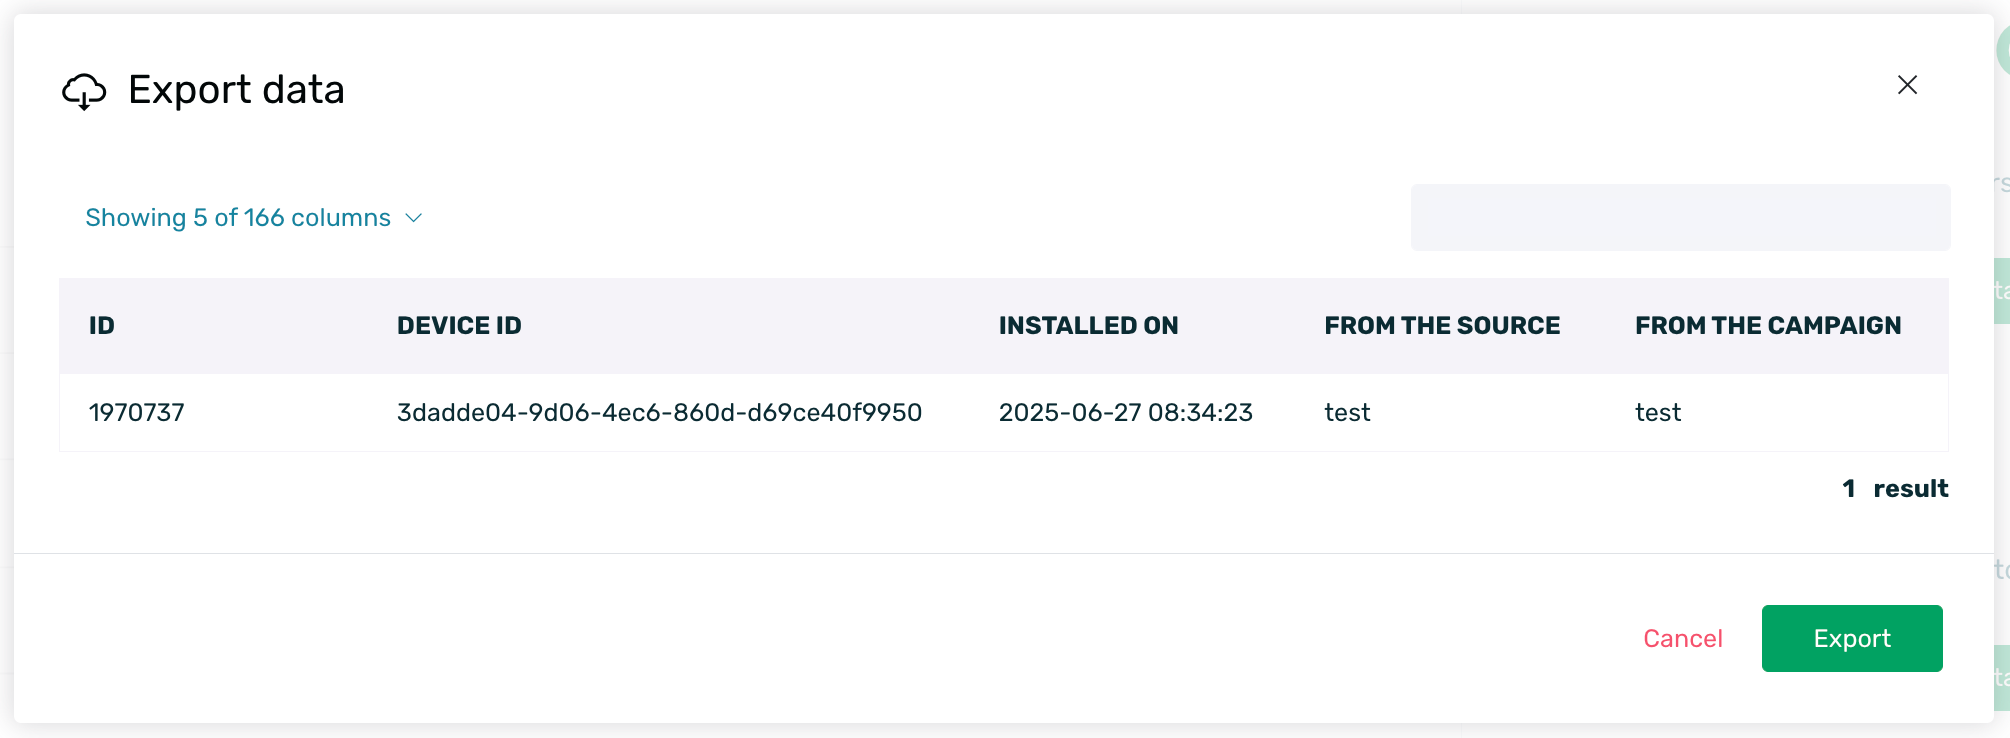
- Once our device is located we do a Raw Export and select the columns Install_at, From_campaign and From_source to check the new device attribution.
¶ What device information will be updated
The only information collected from the device that will be affected when we have a test
device will be:
- Date and time of install.
- Campaign to which the user is attributed.
- Source to which the user is attributed.
All the information related to events will remain unchanged and we will have the user's history. Likewise, the user tags will work as usual and this information will also be maintained.
¶ Extra considerations for iOS 14
With iOS 14 the operation of test devices is a bit special due to the limitations that this version of the OS is undergoing with respect to the use of IDFA.
If the device in question has not allowed IDFA collection, what will be retrieved is a vendor identifier of the device. This identifier, unlike the IDFA, is not unique per device, but is unique per developer's app group.
That is, if in our App Store or Google Play account, we have 3 apps under the same developer, as long as we have at least one of those 3 apps installed on the device, the vendor can be shared between the 3 apps and it will be the same.
However, if we only have one app, every time we install the app, a new different vendor associated to our device will be generated.
Keeping these two cases in mind:
- When we have several apps from the same developer, we can search for our vendor in database and add it as a test device, since the operation will be as in Android or iOS lower than iOS 14.
IMPORTANT: Note that if you uninstall all the developer's apps from the device, when you reinstall your vendor it will be completely different. - When the developer only has one app or we only have one of his apps installed, it is not necessary to add the device as a test device, since with each new install, a new different vendor will be generated.
¶ Invoicing
¶ Invoicing information
In EMMA we work with two different types of licenses, monthly and annual, which differ basically in the payment method as its name indicates (month to month or yearly). Below you will be able to know the characteristics of each of the current licenses.
¶ Monthly licenses
- All licenses will be invoiced at the beginning of the plan and correspond to a full month.
- The invoice will be issued to the fiscal data provided in your EMMA account, on the start date of the plan and will be sent by email to the email address(es) provided for this purpose. This invoice will be recurrent during the entire duration of the agreement. You can review what data will be used for billing in your profile in the Preferences section of the account.
- All those extra concepts or not included in your license or monthly plan, will be billed at the end of the current month in the same way and form as your current license.
¶ One-time annual licenses
- One-time annual licenses will also be invoiced at the beginning of the plan and correspond to a period of 12 months.
- The invoice will be issued to the fiscal data provided in your EMMA account, at the start date of the plan and will be sent by email to the email address(es) provided for this purpose. You can check which data will be used for invoicing in your profile in the Account Preferences section.
- All those extra concepts or not included in your license or annual plan, will be billed at the end of each month, with the issuance of an invoice that will be sent by email and must be settled by bank transfer net30.
¶ Payment methods
At EMMA we offer two methods of payment depending on the specific amount of the
license.
- The payment method for licenses < 1.000€ (tax excl.) will be net0 credit card.
- The payment method for licenses >1.000€ (tax excl.) will be bank transfer to the account number designated on the sales invoice in Net30 mode.
All our invoicing is done digitally, so EMMA does not send paper invoices or other formats.
¶ Account cancellation
To cancel your account, you must send an email to support@emma.io and finance@emma.io at least 10 calendar days before the invoice date of the next billing period so that we can proceed with deactivating your account.
You can find more detailed information on our Terms of Use page.