¶ Campaigns management
In order to know in detail the origin of the users it is necessary to create campaigns that allow us to measure all traffic sources. Subsequently, you can edit, clone or delete any of the campaigns that have been registered in the system.
- Create campaigns
- Edit and clone campaigns
- Delete campaigns
¶ Create campaigns
To create campaigns, simply click on the New campaign button in the campaign summary table.
![]()
Next, it is necessary to fill in the information requested in the form in order to register a new campaign in the system. It is important to fill in all the fields marked as Required, otherwise the changes cannot be saved and the campaign cannot be created.
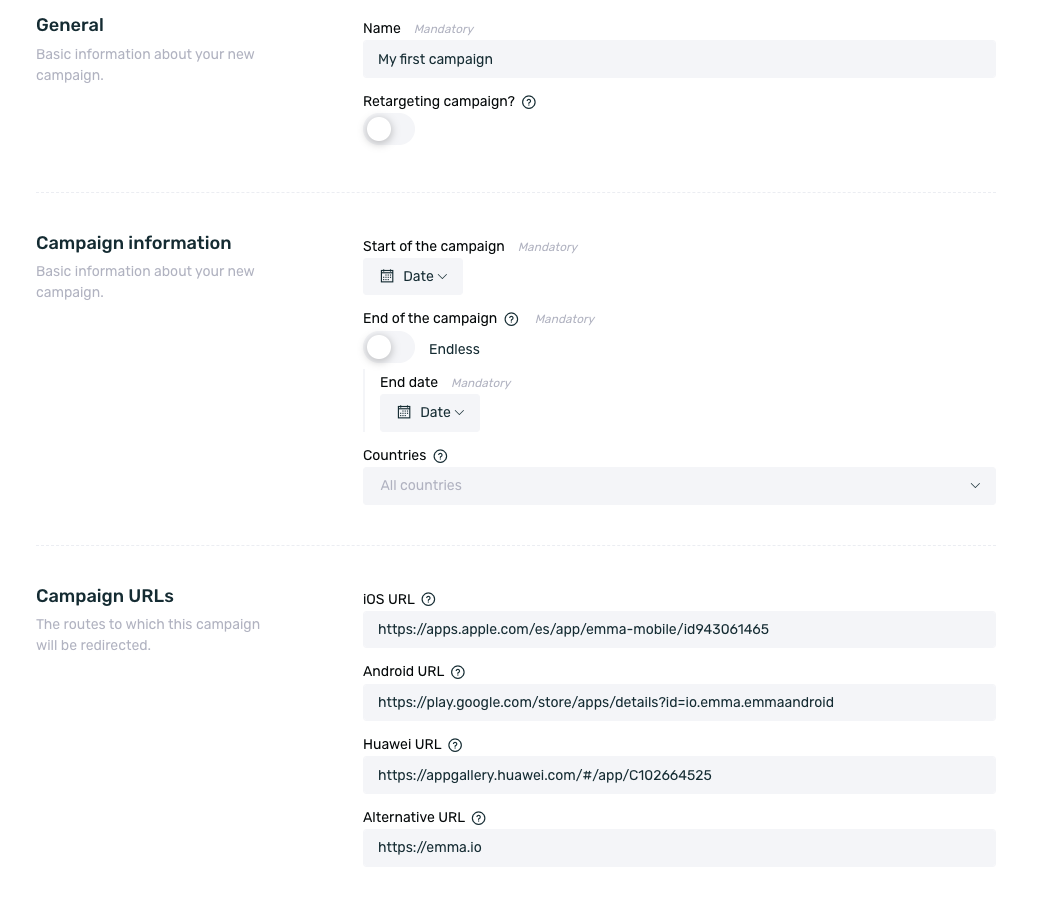
| Name | Establish an identifying name for your campaign. It is for internal use, the final user will never see this name. |
| ¿Re-Targeting Campaign? | If you are going to launch a campaign in Re-Targeting attribution mode, activate this option. In this article, you have more information about the different attribution modes. |
| Campaign start | Set a start date for your campaign. This date is important because it is the moment when you will start measuring activity for that campaign. |
| Campaign end | Set an end date for your campaign. This date is important because when a campaign ends, it will stop attributing installs/events and, if you work with advertising networks, it will stop notifying any activity to them. In case it is an action that does not have an end date, you can enable the No end checkbox so that the campaign does not have an end date. |
| Countries | Select one or more countries to be targeted by your campaign. It is an optional field, but if you configure it, the powlink will have the usual behavior only in those selected countries. If any click is made from another country, the powlink will be blocked internally and will not perform the relevant redirects. In this way, fraudulent traffic is avoided in the campaigns. |
| Attributed events | In case the Re-Targeting check is enabled and the Re-Targeting attribution is configured in Unique Click mode, one or several target events must be selected for the attribution to be performed. Learn more about Re-Targeting campaigns in Unique Click attribution mode here. |
| iOS URL | Sets the URL to which iOS users will be redirected when clicking on the ad. This is usually the URL of the app in the App Store. If you have configured the iOS store URL in App Preferences, by default EMMA covers this field with the configured URL. |
| Android URL | Sets the URL to which Android users will be redirected when clicking on the ad. This is usually the URL of the app in GPlay. If you have configured the Android store URL in App Preferences, by default EMMA covers this field with the configured URL. |
| Huawei URL | Set the URL to which Huawei users will be redirected when clicking on the ad. This is usually the URL of the app in App Gallery. If you have configured the URL of the Huawei store in App Preferences, by default EMMA covers this field with the configured URL. |
| Alternative URL | Set the URL to which users of any other operating system than the above will be redirected when clicking on the ad. If you have configured your web address in App Preferences, by default EMMA covers this field with the configured URL. |
If a new Re-Targeting campaign is going to be created in unique click mode (more info by clicking here) it is necessary to establish the events that are going to be attributed to that specific campaign. When the Re-Targeting campaign check is enabled and the unique click mode is set, a selector will be enabled to select the events to be attributed.

In the selector shown, you must select all those events that you want to attribute. The events available for selection will be the EMMA default events + all those custom events that are integrated in the app to be measured with the EMMA SDK.
In this way, it will be possible to select among the following events:
- Registration
- First Login
- Login
- Sale
- Custom Events
Events are unique and can only be selected once in all campaigns. That is to say, if in campaign A it has been selected that the event Registration is to be attributed, this event will no longer be available for selection in another campaign.
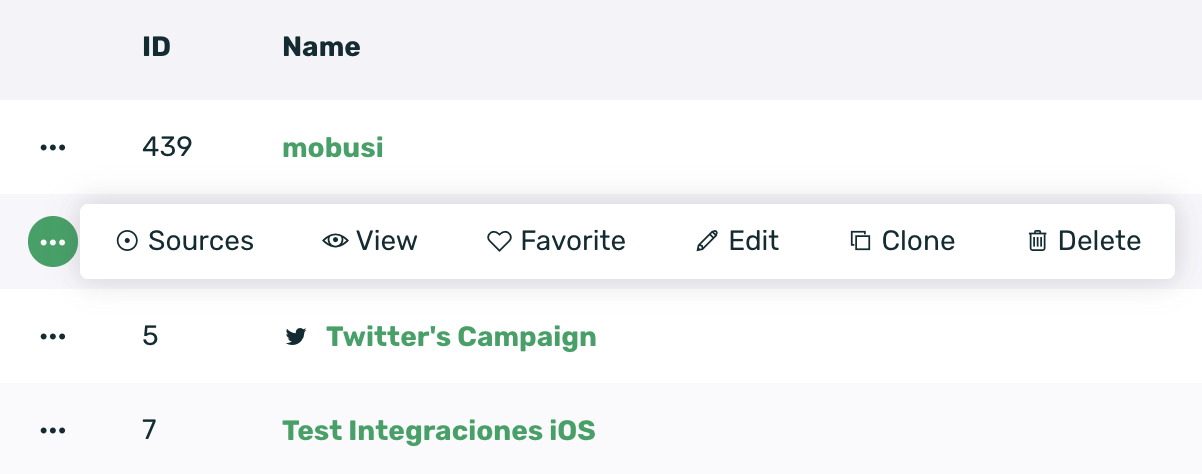
The campaign settings can be edited at any time from the context menu of the campaign summary table.
It is not mandatory to cover all the redirection URLs, setting one redirection URL is enough to launch the campaign. However, it is important to keep in mind that if, for example, only the iOS URL is configured and an Android user clicks on the campaign, a 404 error will be displayed since we have nowhere to take those users. This will happen whenever any URL field is left empty and the corresponding users click on the powlink.
Once the campaign is created, EMMA automatically redirects us to the Sources screen so that we can create all the necessary powlinks (tracking links).
¶ Edit and clone campaigns
If it is necessary to make any modification to the campaign or to create another one with the same characteristics, it is possible to edit or clone the campaign quickly and easily.
Just click on the contextual menu and select the specific Edit or Clone option.
If the campaign has been edited, the campaign creation form will open with the established configuration in order to make the pertinent modifications. Once the changes have been made, just click on the Save campaign button to save the changes made.
If the campaign has been cloned, the campaign creation form will open, copying the configuration of the cloned campaign. In this way, with this option we will be able to save time in the creation of campaigns that have the same configuration.
¶ Set favorite campaigns
¶ Delete campaigns
If we need to delete a campaign for any reason, we only have to go to the contextual menu and select the Delete option.
Once the Delete option is selected, the campaign will be immediately removed from the system.
¶ User redirection according to OS version
If your application is not compatible with certain versions of Android or iOS you can set a minimum version required for users to be redirected to the corresponding landing.
The usual redirection flow is that, when a user clicks on an EMMA tracking link and does not have the application installed, they are redirected to the corresponding store so that they can download the app.
But what happens if your app is not compatible with certain versions of the operating system? The only thing you will have to do is a small configuration in EMMA so that only users with a minimum version of the operating system are redirected to the stores.
To do this, you must follow these simple steps.
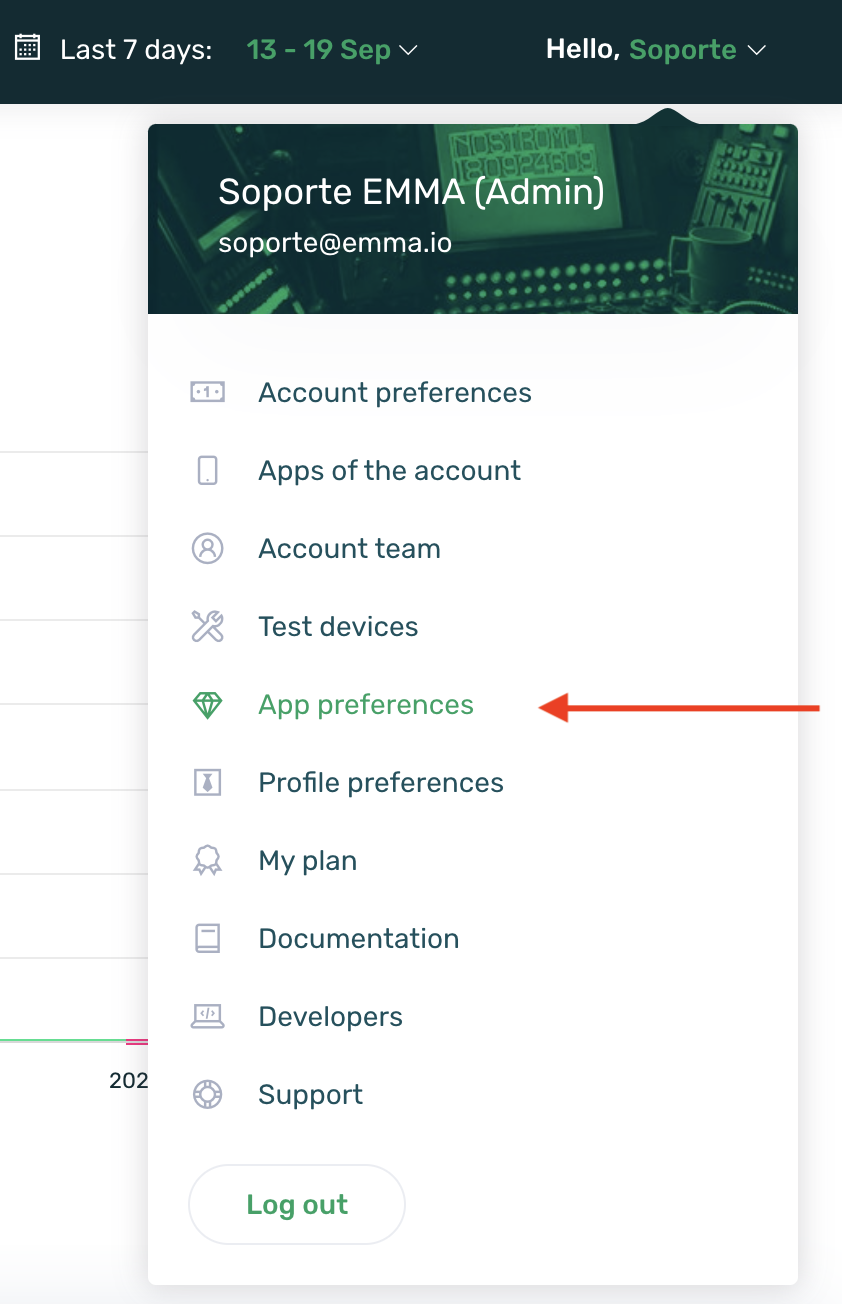
- Login to EMMA and go to the App Preferences section.
- Edit your app settings by clicking the Edit button.
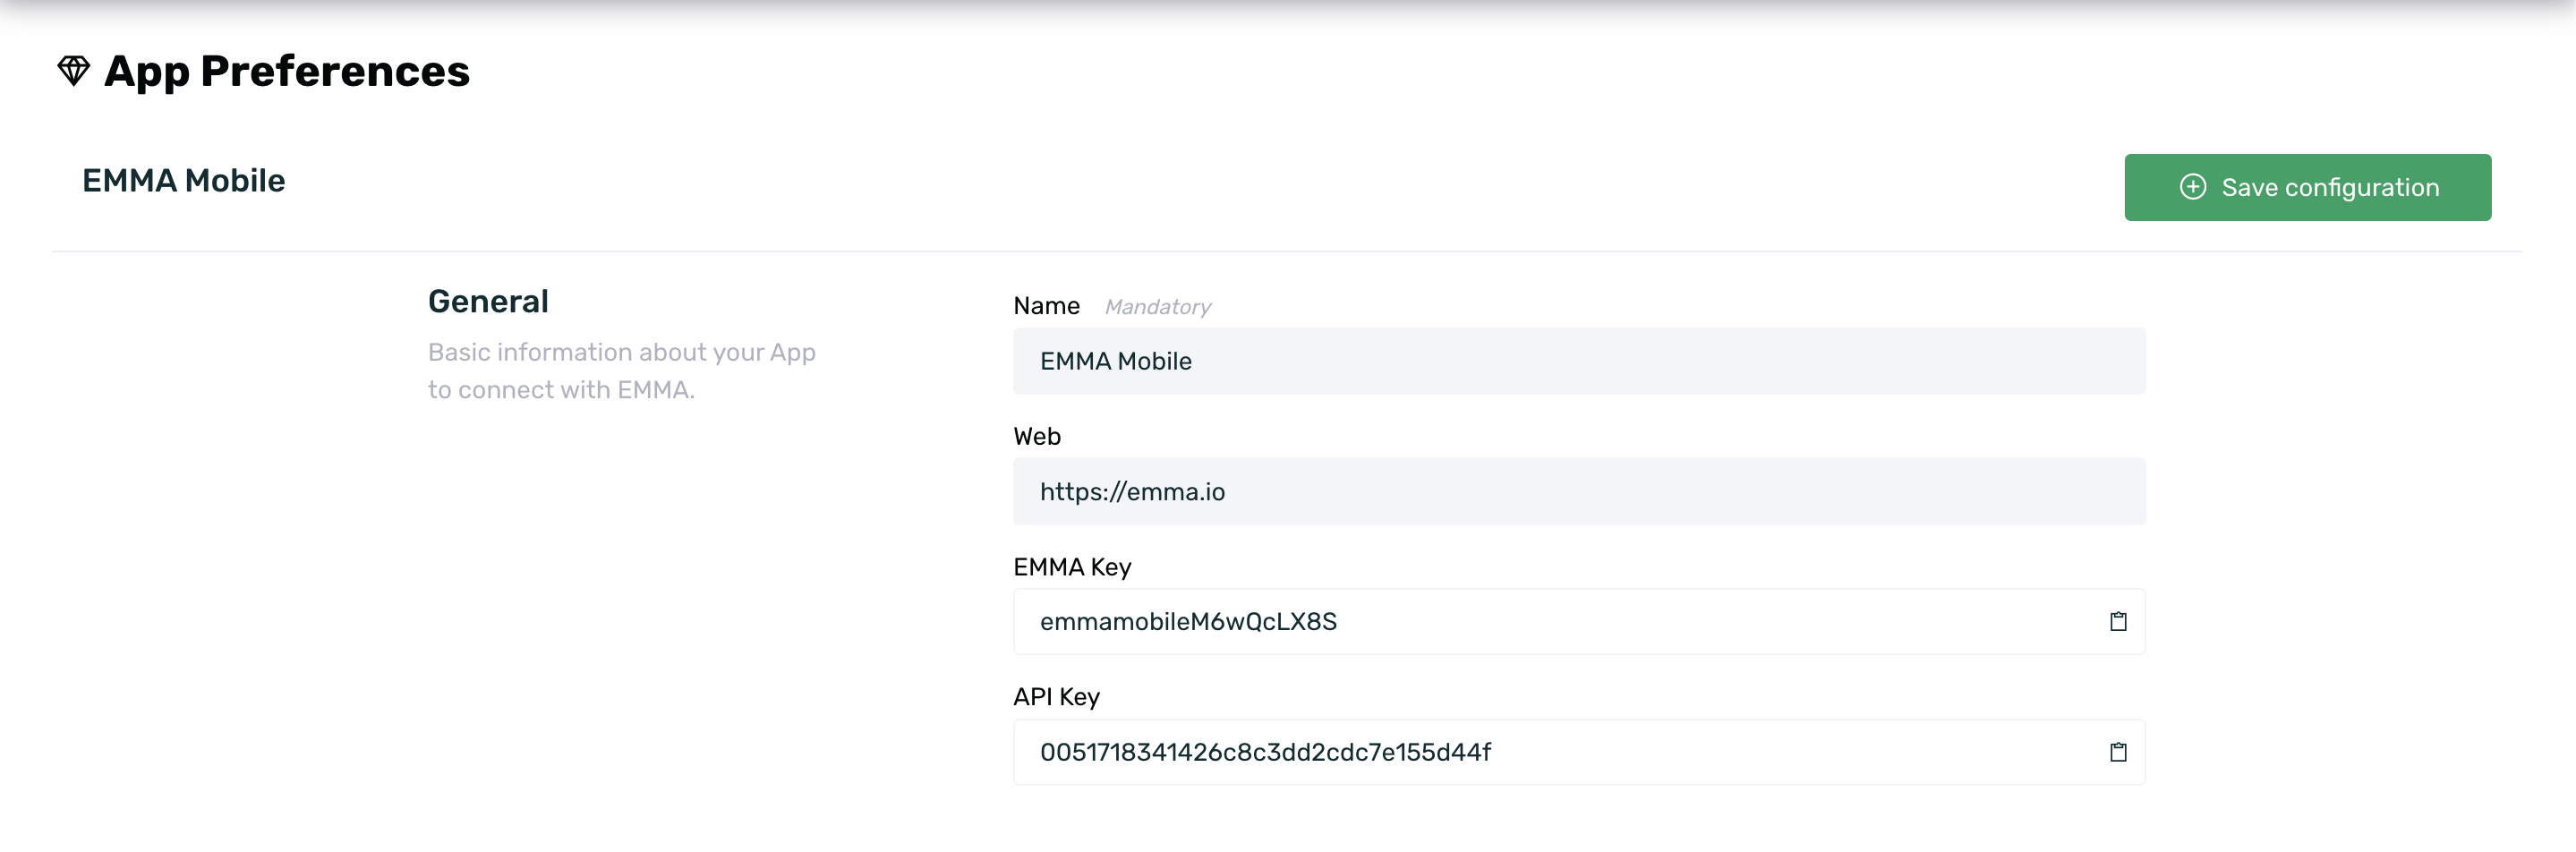
Go to the Android and/or iOS settings section depending on whether or not you want to add a minimum version for each operating system. Select the desired version and save the changes.
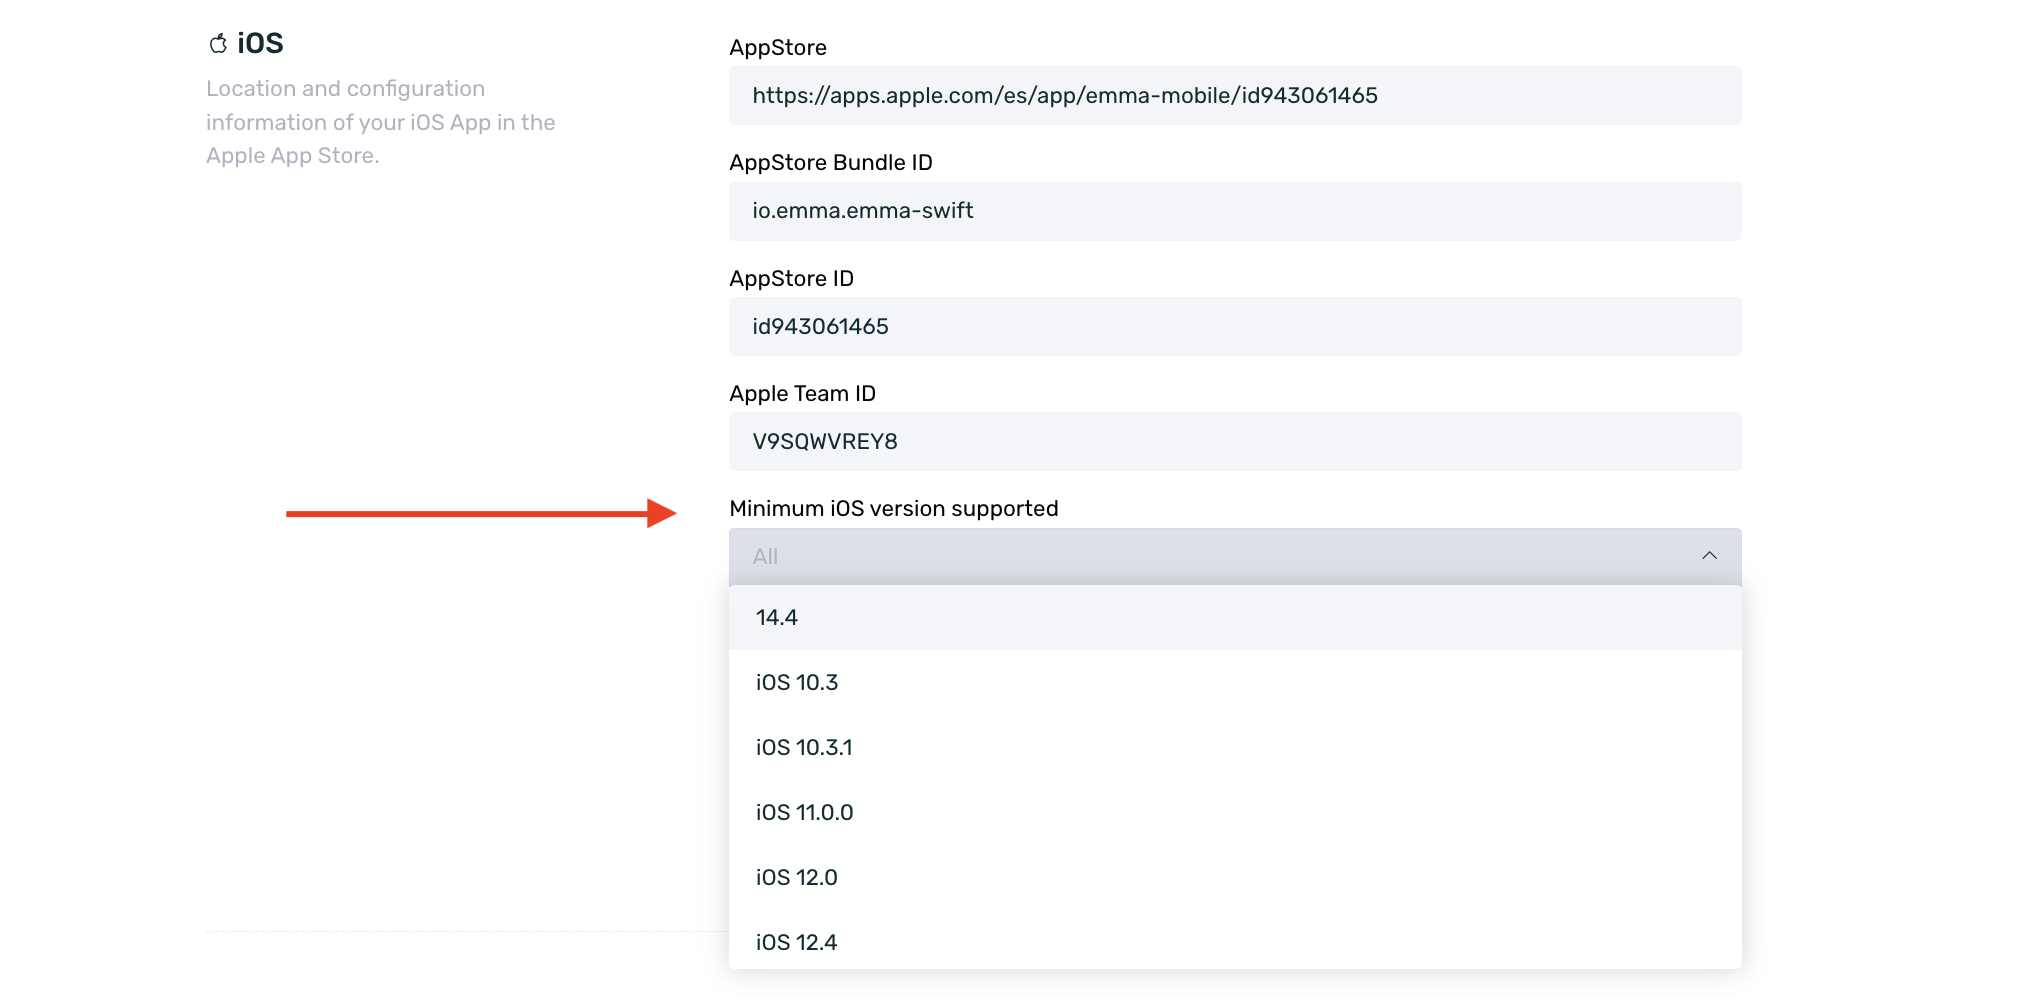
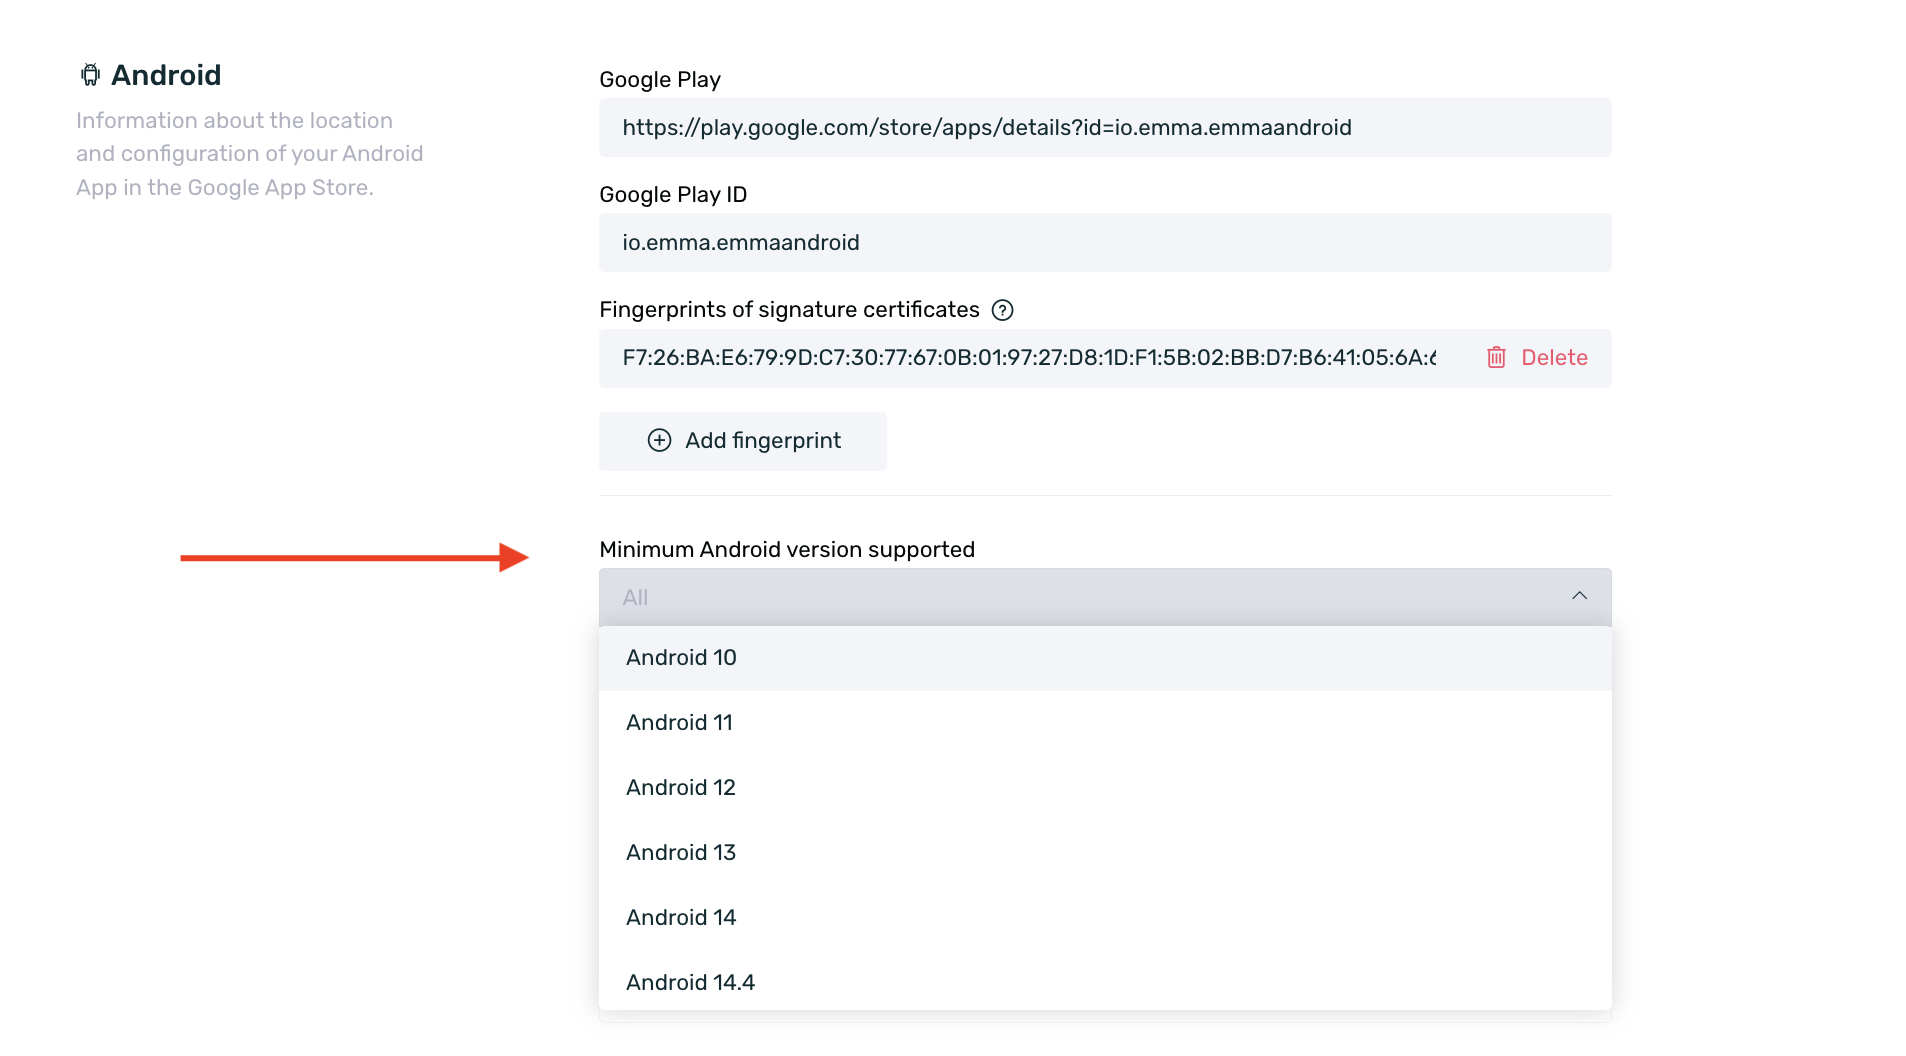
Once this small configuration is done, only those users whose devices meet the minimum version will be redirected to the store to download the app. Users who have a lower version than the minimum required will be redirected to the alternative URL configured in your campaign. In this article you can see more information about recruitment campaigns.
¶ Redirects in Apptracker
When registering a new campaign in the EMMA Apptracker, it is necessary to establish the redirections that we want that particular campaign to make.
This way you can set the exact URL to which iOS, Android, Huawei and other users using a different operating system will be redirected.
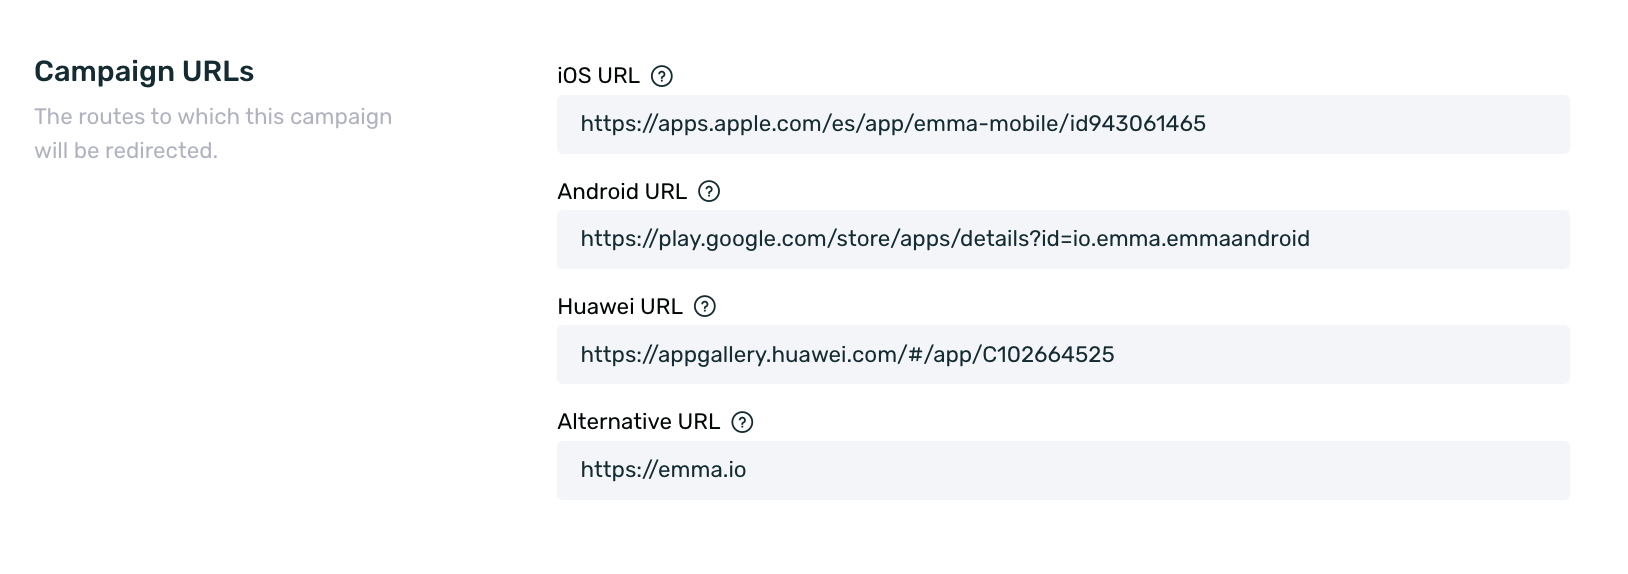
The most common is to perform the following configuration as far as redirect URLs are concerned:
- iOS URL: Typically set the app URL in the App Store so that users are redirected to the app download.
- Android URL: Typically set the app URL to Google Play so that users are redirected to the app download.
- Huawei URL: Typically set the app URL to App Gallery so that users are redirected to the app download.
- Alternative URL: Normally a landing page is set, which is usually the company's website. But it is also very common to set the URL of the Android store since it is the operating system with more weight.
If your main need is not to lead the user to download the app, you can set the URL you consider appropriate for each OS without any problem.
¶ Powlinks finder
If we need to locate to which campaign a powlink belongs in the apptracker, having only the powlink, instead of the EMMA campaign it belongs to, we just have to follow these steps:
-
Login to your EMMA account.
-
Go to the Acquisition > Apptracker section.

-
Set the Basic or Retargeting filter in the grey filtering bar (more info here), depending on whether you are going to query a basic or a retargeting campaign powlink.
The powlinks of a basic campaign have this structure: https://eat.emmasolutions.net/?entw=150991e32f7d4b2b3fa349d31ec70893
The powlinks of a retargeting campaign have this other one: https://emmaio.powlink.io/?ecid=6f43813a1ad6e509a3b915e791c53ce0&rt=true&aw=720 -
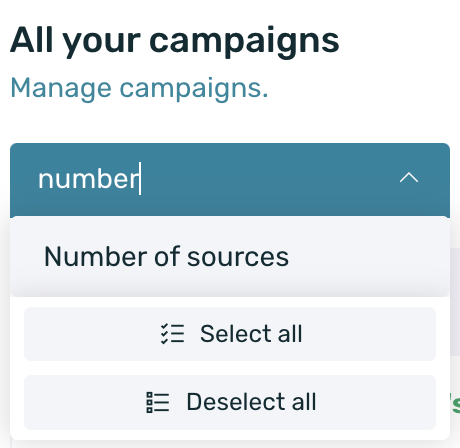
In the campaign summary table in the column selector to show, find and enable the column Number of sources.
-
Once this column is activated, go to the search engine at the top right of the campaign table and paste the entw or ecid code of your powlink.
https://eat.emmasolutions.net/?entw=150991e32f7d4b2b3fa349d31ec70893
https://emmaio.powlink.io/?ecid=6f43813a1ad6e509a3b915e791c53ce0&rt=true&aw=720
