¶ Email deliverability
To use EMMA's email sending functionality, a small initial setup is required.
Before proceeding with this configuration, it is important to note that EMMA's email service can only be used if, when using EMMA's default login or register feature, the user's email information is sent. You can verify whether your app is sending this information by checking the EMAIL field when performing a RAW Export.
To ensure maximum email deliverability, EMMA uses the DKIM (DomainKeys Identified Mail) and SPF (Sender Policy Framework) protocols. DKIM is an email authentication protocol that allows the sender to be recognized as the responsible party for sending a particular email.
How does it work? It's very simple. The email provider receives the email and performs a verification using a public and a private key to authenticate the email by matching both keys, ensuring that the email is attributed to the correct sender. This helps prevent emails from unnecessarily ending up in the user's SPAM folder.
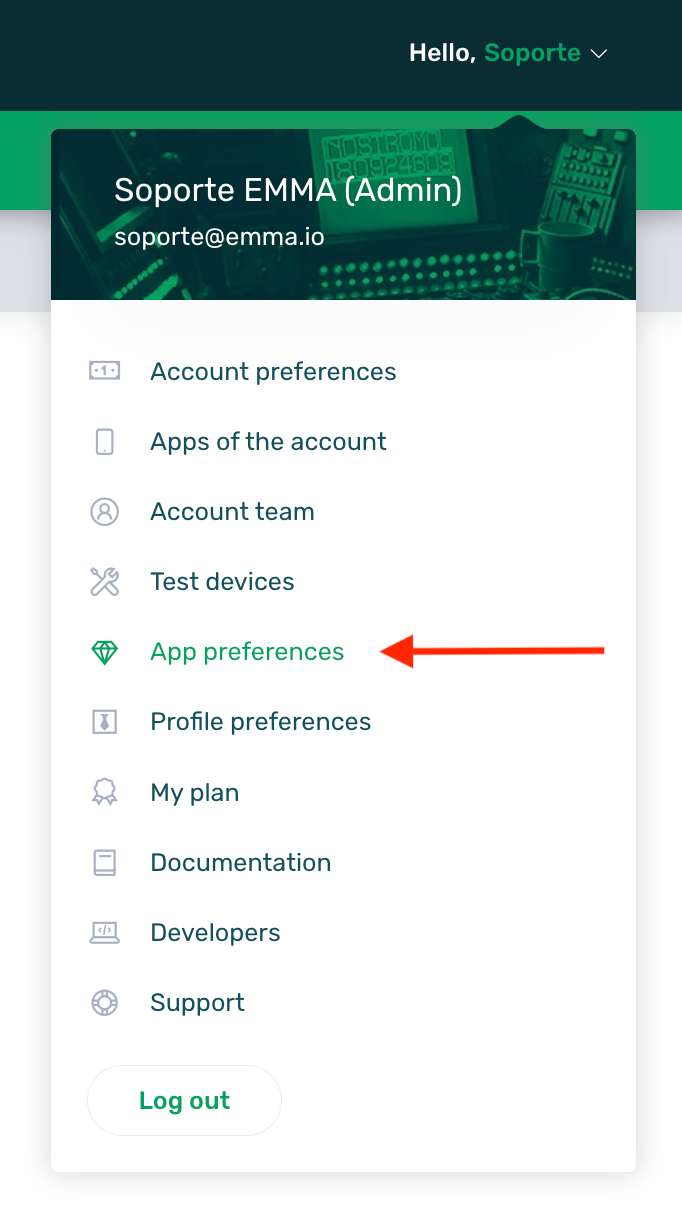
To configure DKIM in EMMA, once logged in, go to the App Preferences section and configure the specific Email Sending settings.
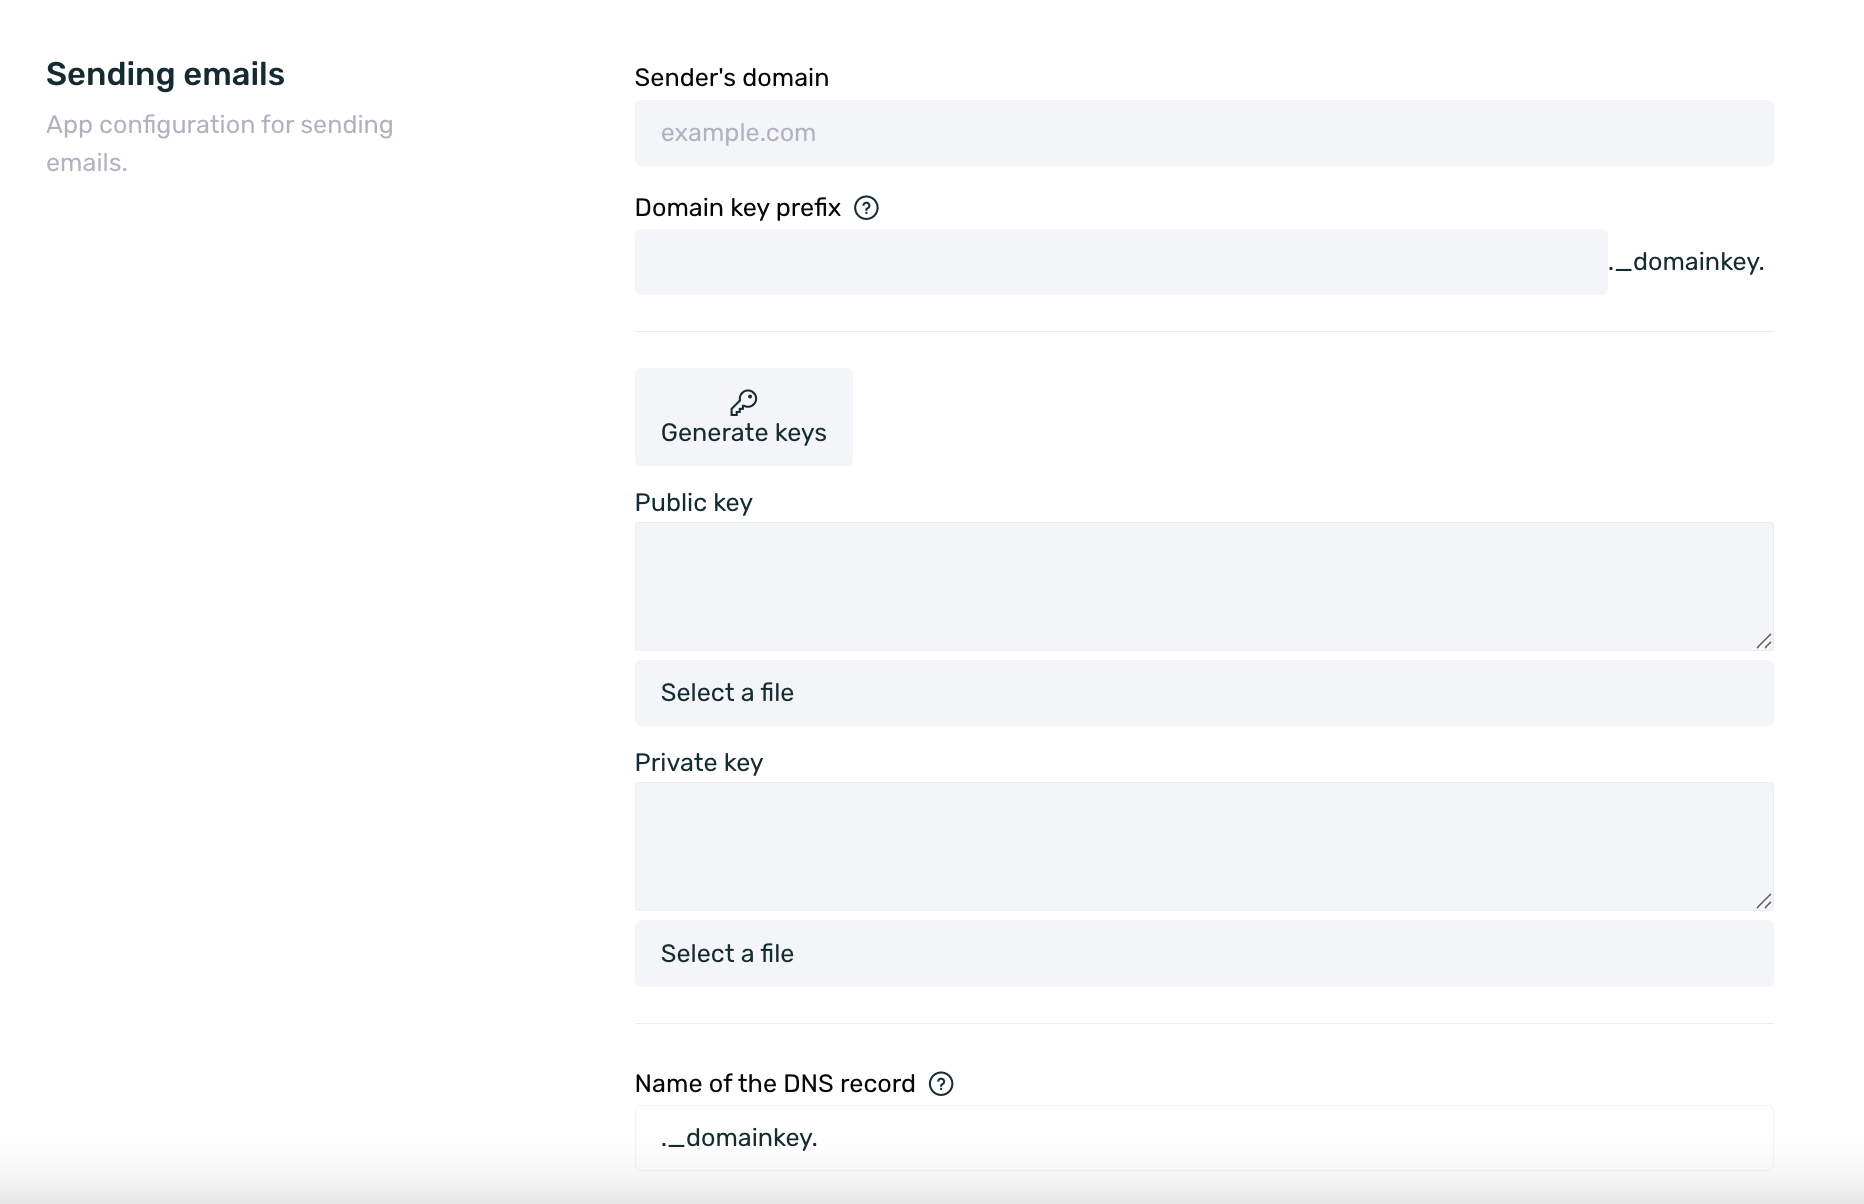
The specific configuration for emailing consists of the following points:
-
Sending Domain: Set the domain from which emails will be sent, e.g., yourcompany.com. This setting applies at the application level, not the account level. If multiple applications exist under the same account, different sending domains can be assigned as needed.
-
Domain Key Prefix: Enter a name or keyword (e.g., EMMA or yourcompany) to help identify the sender and confirm its authenticity.
-
DNS Record Name: This is the DNS record name generated automatically after filling in the Sending Domain and Domain Key Prefix fields. This record must be configured in your DNS for DKIM authentication. Contact your DNS provider for assistance with creating this record.
-
Public Key: A public key must be created. If you already have one, you can upload it directly. Otherwise, EMMA allows you to generate one automatically.
-
Private Key: A private key is also required. If you already have one, you can upload it; otherwise, EMMA can generate it automatically. This key is used to sign parts of the email, allowing it to match the public key and verify email authenticity.
-
DNS Record Content: This is the TXT-type DNS record content that is automatically generated after entering the Public Key. It must be configured when creating the DNS Record in the previous step.
SPF is another email authentication protocol that authorizes SMTP servers for message delivery.
How to authorize EMMA's SMTP servers? Simply include smtp.emma.io in your SPF DNS record.
If you don't have an SPF record yet, you will need to create one.
If you do not have a public and private key, EMMA provides the option to generate them automatically. However, both keys are generated simultaneously—you cannot generate only the public key or only the private key separately.
¶ Create email providers
To send emails from EMMA, an email provider is required. By default, if no provider is configured, EMMA will use a default provider for sending these emails.
EMMA recommends using a custom SMTP to avoid email deliverability issues. Additionally, if you want to send emails from a Gmail domain, it's best to configure Gmail's SMTP to ensure proper email delivery.
To set up your own email provider (SMTP), simply follow these steps:
-
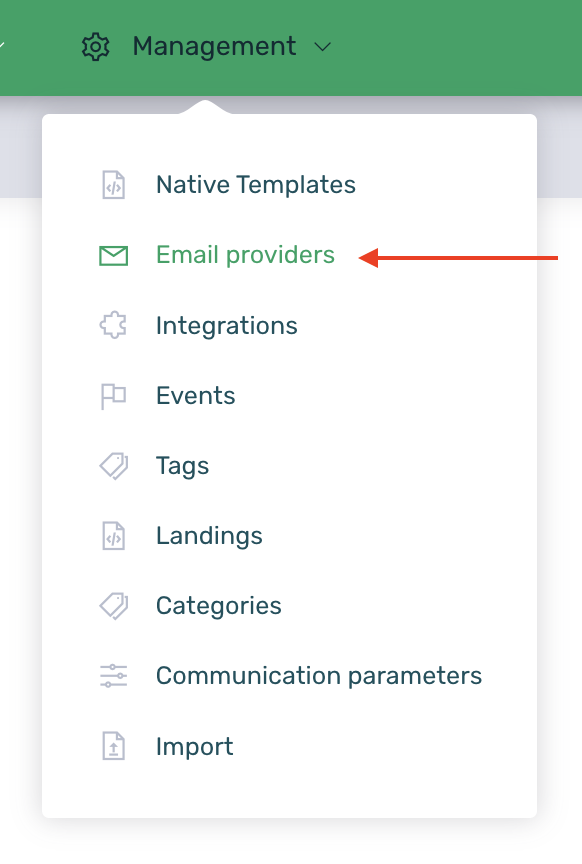
Log in to EMMA and go to the Management > Email Providers section.
-
Click on the New Provider button and fill in all the required fields in the form.
-
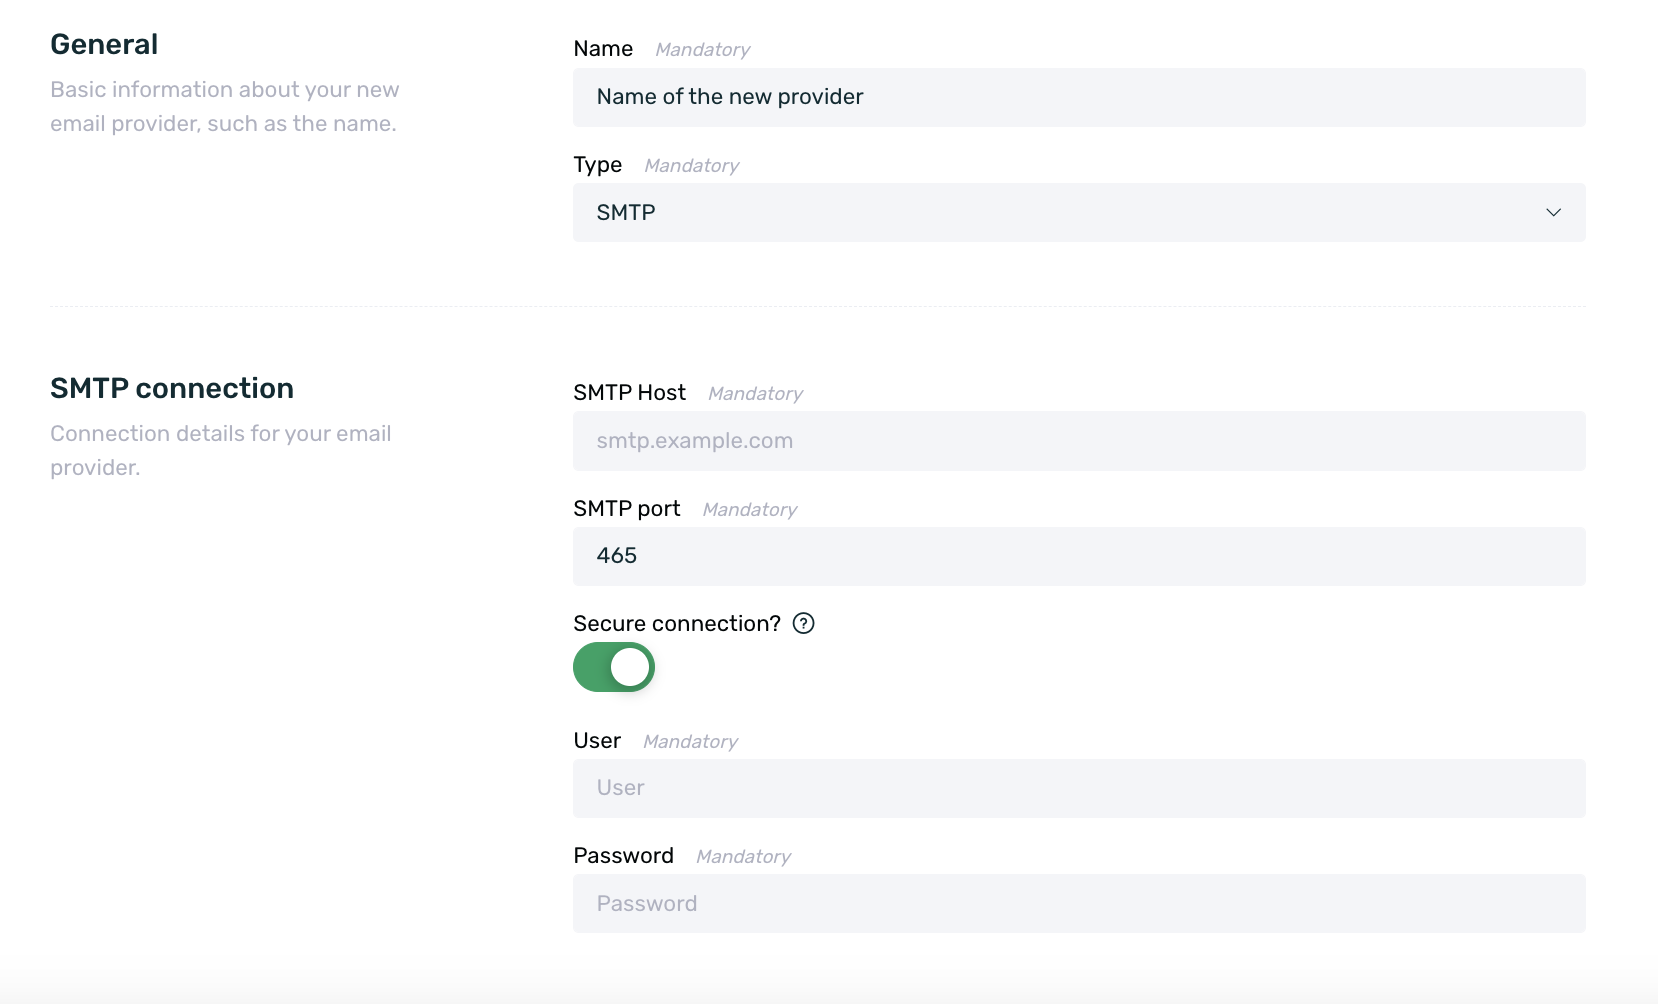
The form for registering a new provider is divided into two distinct sections. On one hand, we have the general configuration of the provider, and on the other hand, we have the configuration of the SMTP connection of the email provider.
-
Name: Set a name to identify the email provider.
-
Type: The type is SMTP. It is a non-editable input, so changes cannot be made to the type.
-
SMTP Host: Set the name of the outgoing SMTP server host. For example, smtp.domain.com.
-
SMTP Port: Set the port number used by the outgoing mail server. By default, the port is 465, but it can be modified to the appropriate port.
-
Secure Connection?
-
User: Set the full email address of the email provider you are configuring.
-
Password: Set the password you use to access the email address established in the previous point.
- Save the configuration set and, done! Your email provider is now created.
¶ Create an email
Once we have completed the email setup, it’s time to send our first email. If you haven’t completed the configuration explained earlier in this guide, the email will not be sent.
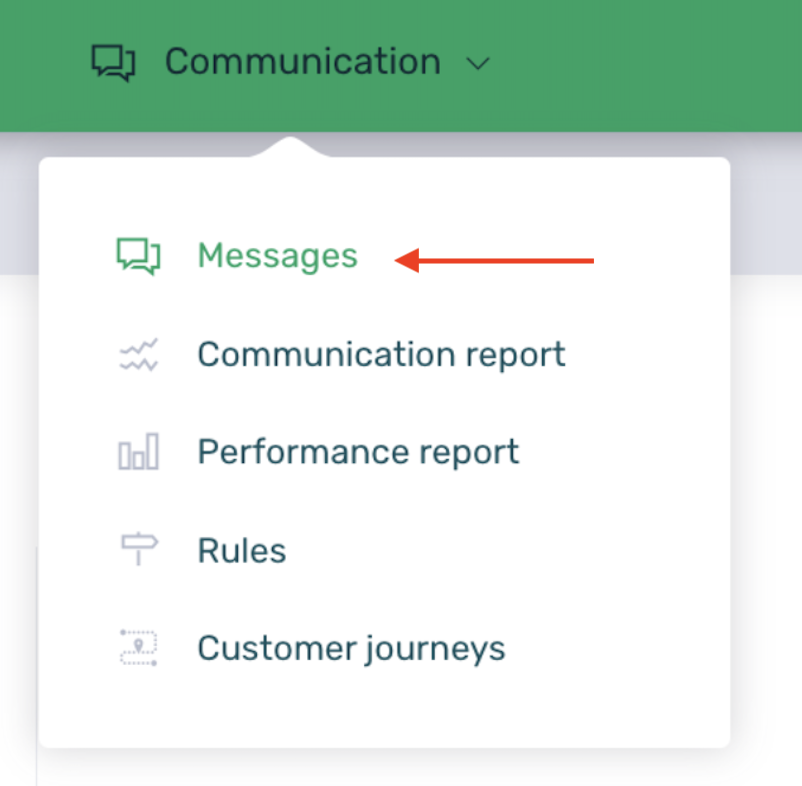
To create an email in EMMA, you need to log in to the platform and go to the section Communication > Messages.
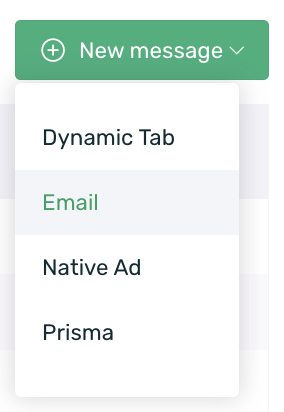
Once inside the Messages section, we should click the + New Message button to select the communication format from the available options. In this case, Email.
The communication setup is divided into five steps:
- Properties
- Content
- Objective
- Scheduling
- Confirmation
¶ Properties
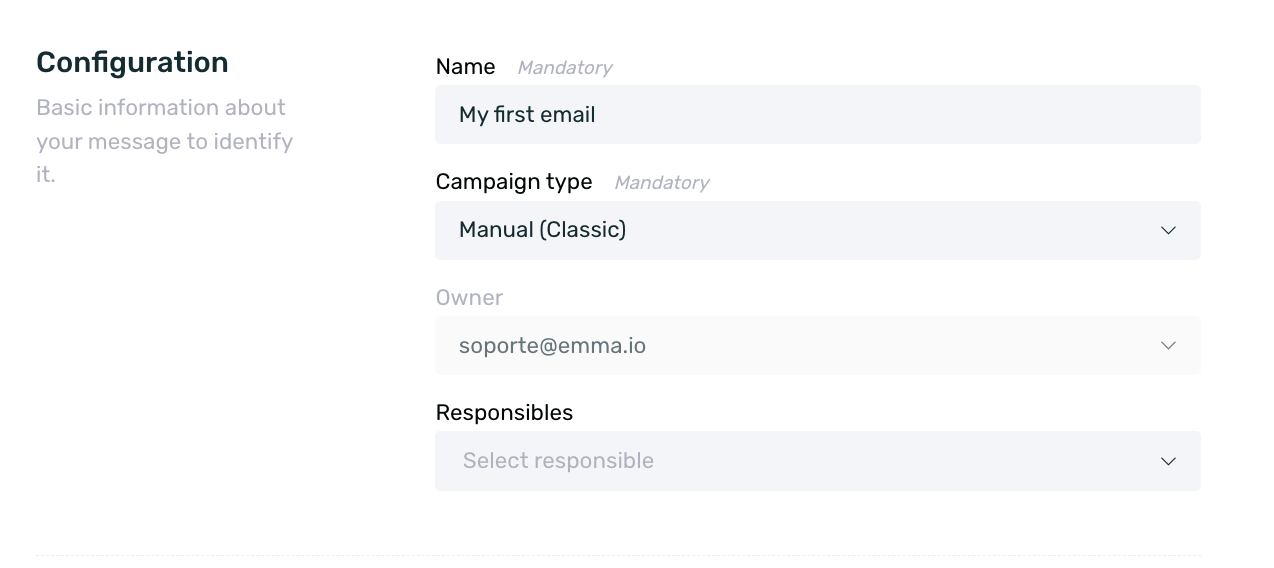
In the Properties section, we will carry out the most basic configuration of the communication. This is where we will set a name (which is an internal name) and select the campaign type (classic or automated).
-
Name: This is a mandatory input to continue with the communication setup. The name will help locate the communication later. It will be very useful to have the communication identified by a unique name to easily search for it in case changes need to be made to the configuration or for reporting analysis. The name is an internal identifier that the app user will not see at any point.
-
Campaign Type: There are two different campaign types to choose from. On one hand, there are Manual Classic Campaigns, and on the other, there are Automated Campaigns for Customer Routes.
¶ Content
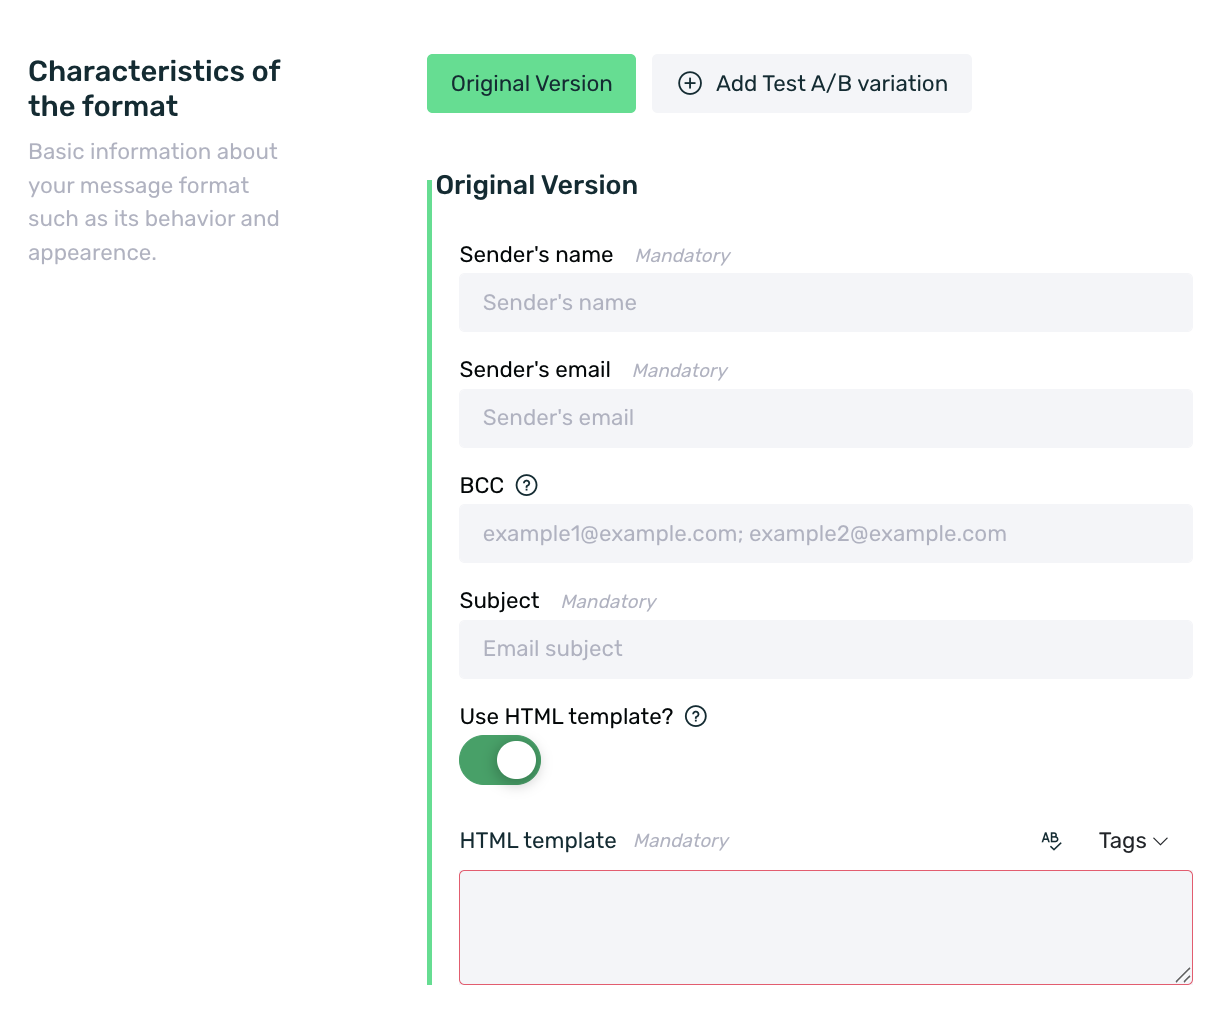
In this Content section, the actual message configuration will be carried out. This is where information such as the sender, recipients, subject, and other elements that make up the email will be set.
-
Sender Name: In this input field, you must enter a name that identifies the sender. This name will be displayed to the recipient in their email inbox.

-
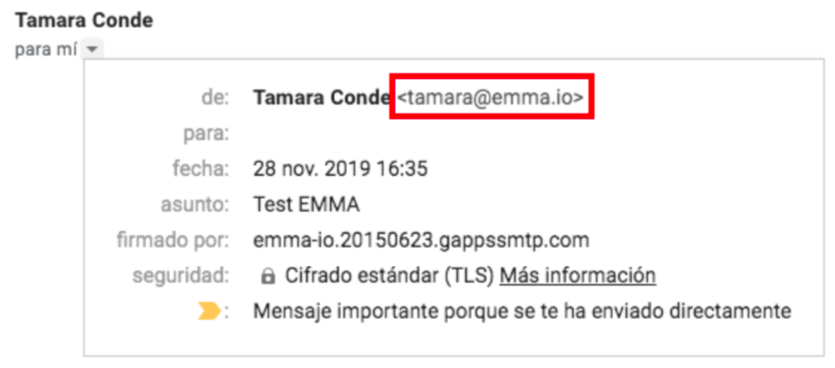
Sender Email: You must set the email address that will send the email. The domain of this email must be the same as the one used for the DKIM configuration. This email will be visible to the recipient in the details of the received email.
-
BCC: The Black Carbon Copy or Blind Carbon Copy (BCC) field allows you to add email addresses of users who will receive the communication without the main recipients seeing them. For example, you can add team members' emails to verify that the email is sent correctly.
-
Subject: This field is where you set the headline that summarizes what the user will see when they open the email. The best email subject lines provide a concise summary of the message. Never include false or misleading information in the email or the subject line.
-
Use HTML Template: A switch to enable or disable the use of an HTML template.
-
HTML Template: If the HTML template option is enabled, its content must be entered in this field.
If the HTML template contains images, it is important that they are hosted on a server.
Body: If an HTML template is not used, this will be the input where the email content should be detailed. When drafting the body of the email, the functionality is the same as in common email writing, allowing you to set a specific font, font size, text justification, lists, etc., enabling email customization.
A/B Testing: As with any other communication, it is possible to generate A/B test versions of the email. Up to 3 variations can be created, allowing for necessary modifications in each. You can find more information about A/B Testing here.
Images inserted in an email must be hosted on an external server outside of EMMA, as EMMA does not store images. This is the only way to ensure they display correctly in the email. If you upload an image stored on your computer, it will not be visible in the email.
¶ Scheduling
Once the email message and its target audience have been established, it is time to schedule the communication. This means determining when the communication will be sent, whether it will be repeated, and setting daily, weekly, and monthly impact limits.
The scheduling configuration is divided into sending date, recurring sending, and impact limit.
- Sending date: The first step is to decide whether the email will be sent immediately or scheduled. If the email is not to be sent immediately, the switch must be disabled, and a specific date and time must be selected for the scheduled send.

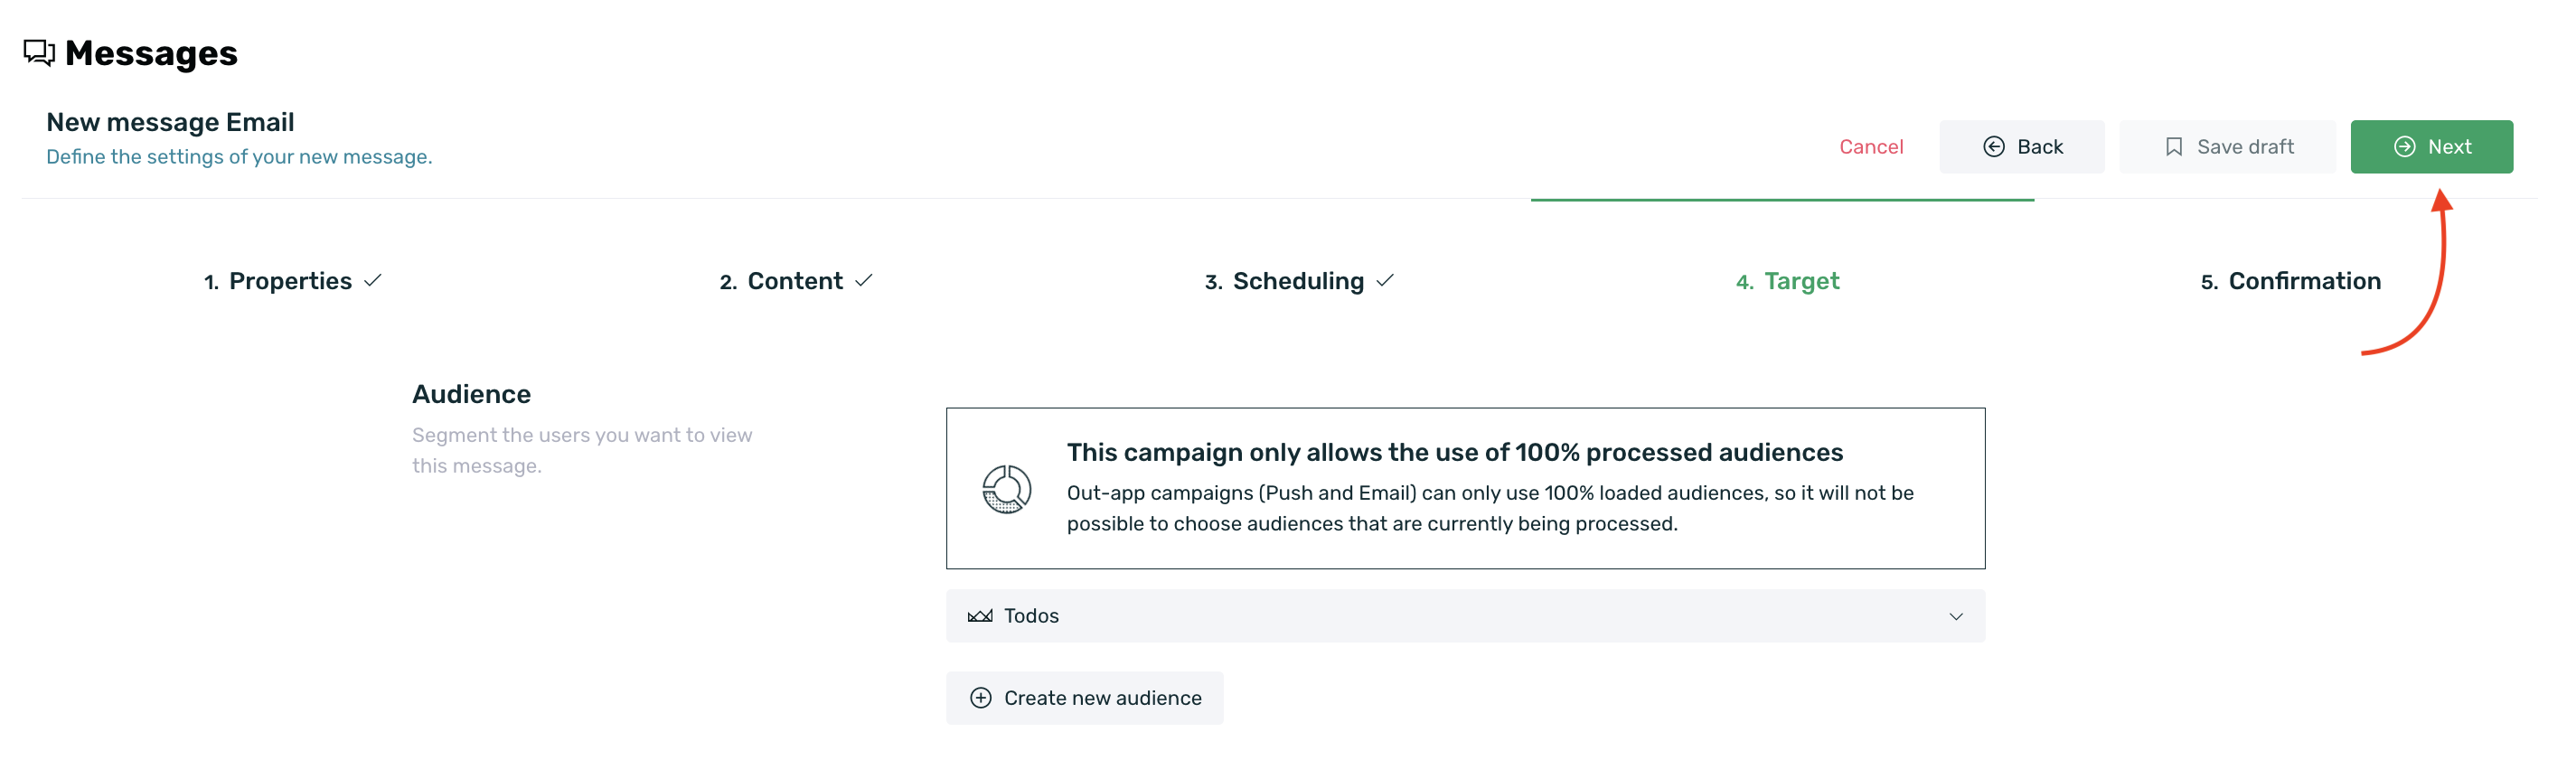
¶ Target
In the Target section, the target audience for the communication will be established. To do this, we need to select an audience from the available list or create a new one.
If the audience list is empty, it means there are no available audiences to use or you haven’t created any audience yet. You can find more information on how to create audiences in this guide.
In the first half of the screen, you can upload or create the segment that will be the target audience receiving the communication. On the other hand, in the second half of the screen, you can set a control group if desired. To learn more about Control Group, click here.
To send emails, EMMA needs to retrieve the user's email information. Therefore, the filter result will only show those users who, in addition to meeting the filter criteria, have an email associated.
If a control group is set, it will be possible to determine what percentage of users will be impacted by the communication and what percentage will be in the control group and therefore will not be impacted by the communication. You can refer to this article for more detailed information about the control group and its functionality.
¶ Confirmation
Finally, to complete the email scheduling, we will review the confirmation section, where you can check the details of everything configured previously and, in case of any errors, correct them before launching the communication.
You will be able to see the detailed information configured in each section, such as type, name, sender name, sender email, BCC, subject, target audience, control group, send now, repeat, daily impacts, weekly impacts, and monthly impacts.
Once you have reviewed all the configuration, simply click the Send Message button to send it.
¶ Frequently ask questions
-
Can I replace Mailchimp if I use EMMA’s email feature?
No, EMMA is not intended to replace Mailchimp. We are not a platform for mass email sending. EMMA's email feature is just another communication format, similar to the others offered by the platform, and it’s designed as a complement to reach users who do not have push notifications enabled. -
Can I sync EMMA’s email with Mailchimp?
No, synchronization between the two technologies is not possible. Remember that EMMA’s email feature is designed as just another communication format, not as a platform for mass email sending. -
How do I impact users?
To send emails with EMMA, in addition to the configuration described in this guide, you need to collect the user's email information and send it to EMMA. This information should be sent in the specific email field that EMMA receives during user registration and/or login within the app (you can find more information about this here. If the user's email information is not available, email sending cannot be performed. -
Can I use the email field information to exclude users from an audience?
No, you cannot create filters or audiences based on the email KPI in EMMA, either to include or exclude users from these communications. If you wish to exclude users, you will need to create an audience based on events and tags that the app sends to EMMA. -
If a user wants to unsubscribe from emails, how is this handled in EMMA?
EMMA does not have an automatic way to manage email unsubscriptions. It is the client's responsibility to configure HTML or specific content for these emails, and if desired, to add an unsubscribe button within the HTML. This button can then send the information to EMMA through a user tag, or the information can be manually uploaded via a user tag. You can find more information on how to send tags from the app here.
To learn how to manually ingest data into EMMA, please review this article. -
What is SMTP?
SMTP (Simple Mail Transfer Protocol) is the server that sends emails. It is also responsible for performing the necessary validations to identify the authenticity of both the sender and the receiver. That’s why it is important to create an email provider / SMTP in EMMA to ensure the proper functioning and delivery of emails. -
If a user uninstalls the app from their device, will they still receive emails?
Yes. EMMA will still have the user’s email information linked to the device, and will continue to send emails as long as the device meets the conditions established for email sending (whether classic emails or via customer journeys). EMMA does not have any system to stop sending emails to users who have uninstalled the app.