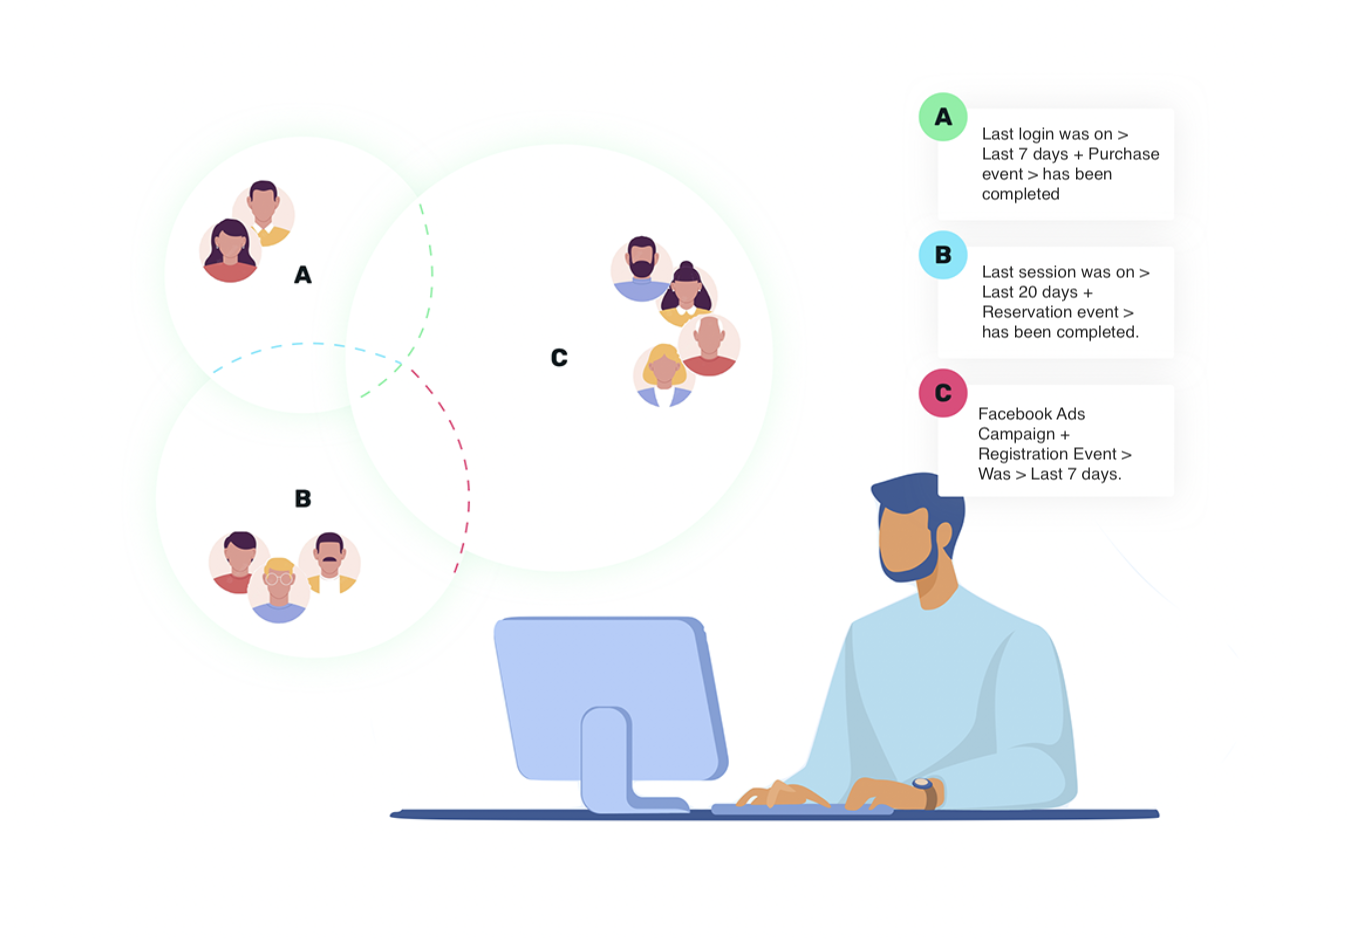
With EMMA's Audience functionality, you can create user segments to later use them in your In-App and Out-App communications, allowing you to target the desired users. With Audiences, you'll have the advantage of creating all the user segments you need first, and then linking them to a communication, allowing you to launch it without waiting for the segment to be 100% processed. Much faster and more dynamic.
¶ Create audiences
To create a new audience, simply follow these steps:
-
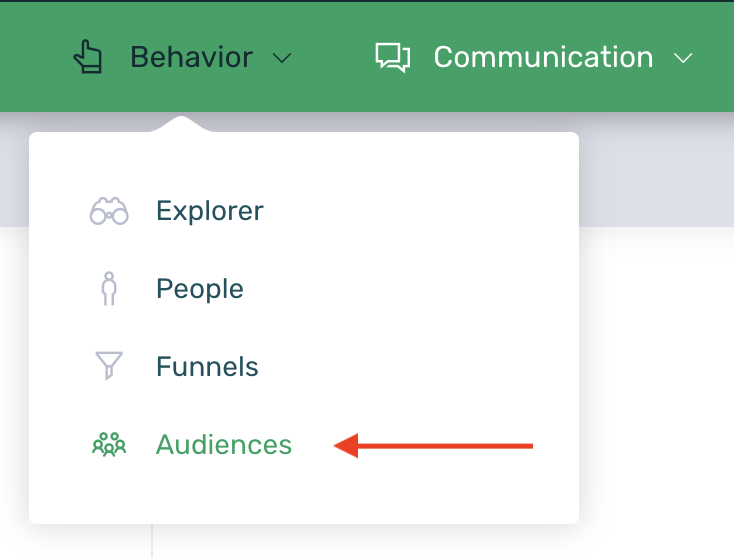
Go to the section Behavior > Audiences.
-
Click on the + New Audience button.

-
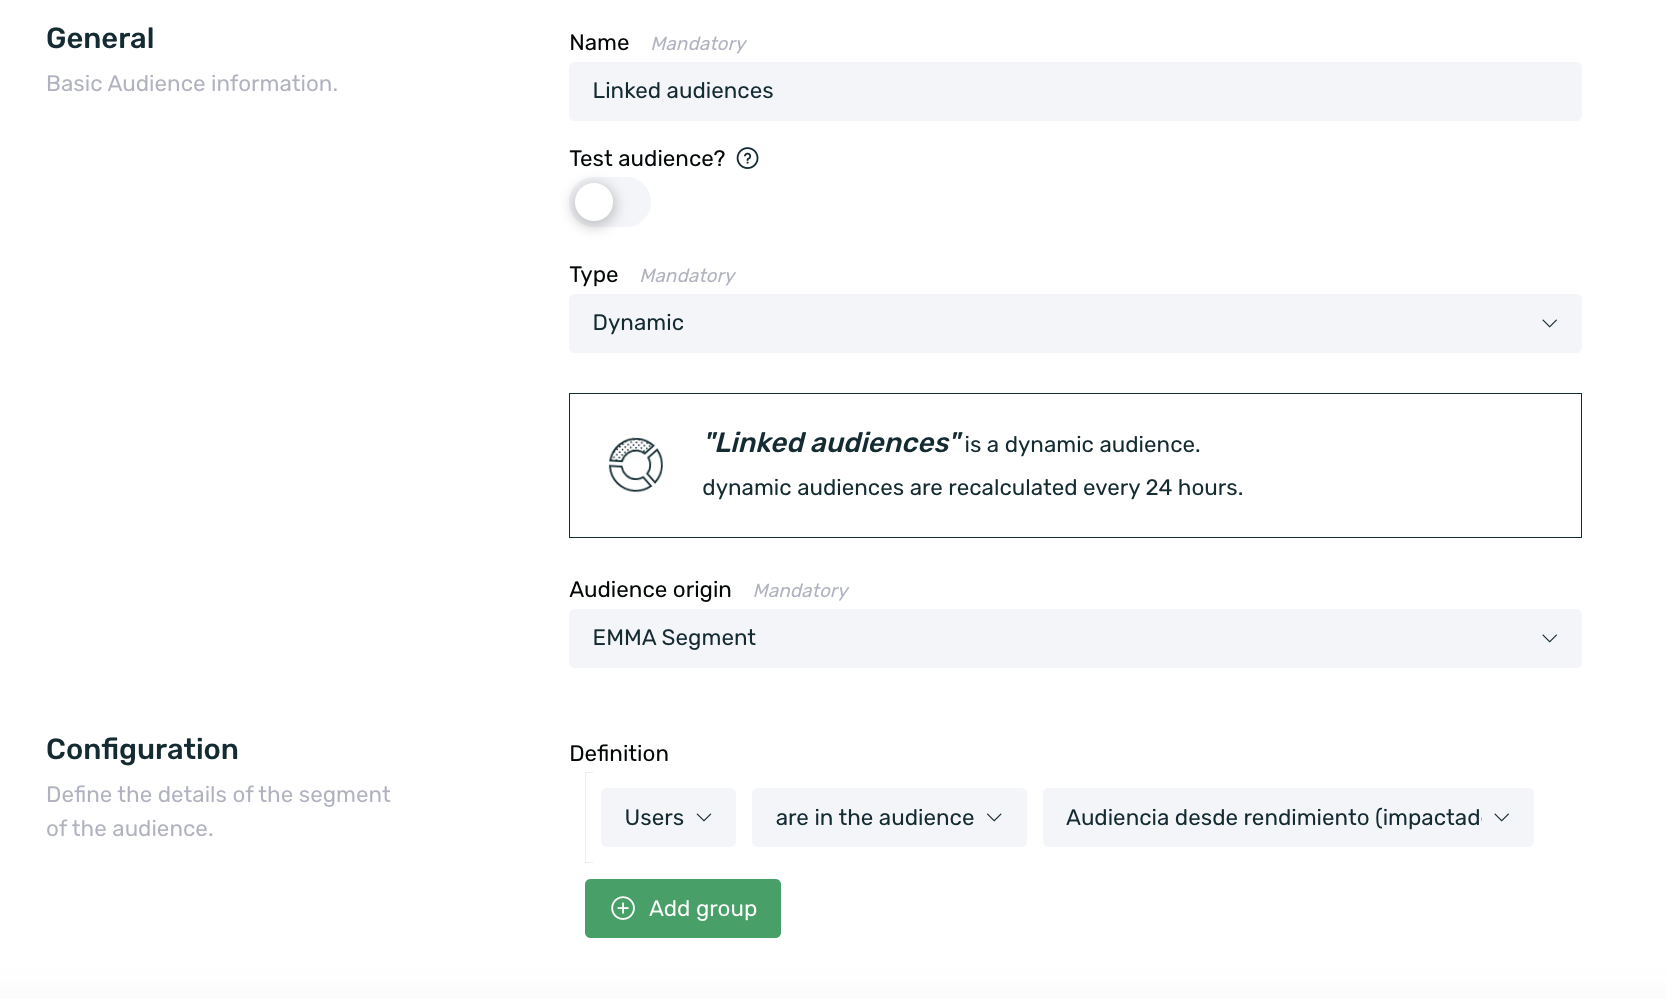
Fill out the audience creation form.
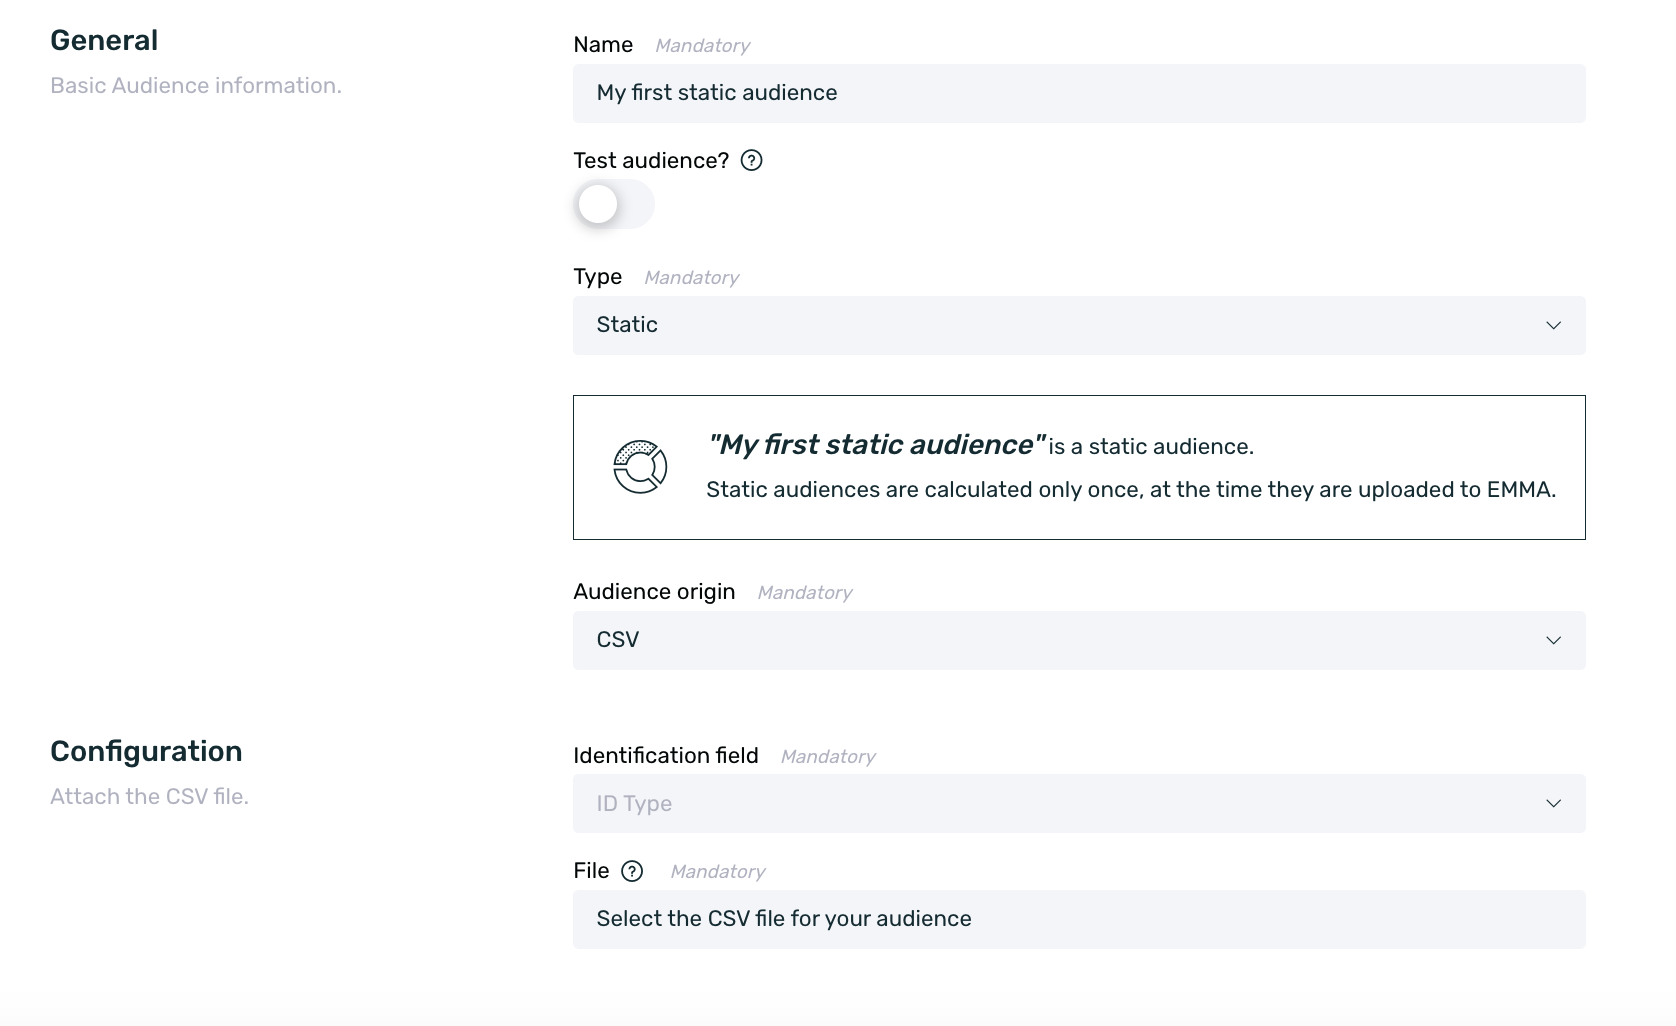
- Name: Set an identifiable name for your audience.
- Test audience?: Enable this checkbox if you are using campaign pre-validation and want a user with the Author role to use this audience to create campaigns.
- Type: Select the audience type. It can be dynamic or static. A dynamic audience is based on filters, and users will join or leave the audience as they meet or stop meeting the established filters. A static audience is based on a CSV file, and the users in the audience are those who meet the criteria at the time of audience creation and cannot join or leave the audience after that.
- Origin: Select the origin of the audience.
If you selected a dynamic audience, you can choose from the following sources:- EMMA Segment: Based on EMMA's filters, and users will join or leave the audience as they meet or stop meeting the established filters. Add the necessary filters to complete your audience. The Audience functionality does not allow the use of sub-filters when creating segments. In this guide, you can see more about how to use filters.
- S3: To use a dynamic audience of type S3, you must first have an S3 connection established. Here’s how to set up this connection. You can host a CSV of your audience in an S3 bucket and link it in EMMA with an identification field. The identification fields can be:
- Customer ID
- Device ID
- EMMA ID
- Custom tags that are in text or numeric format. Tags in date format cannot be used.
You can see more information on the meanings of the different identification fields here.
- HTTPS: You can host a CSV of your audience on a server and link it in EMMA with an identification field. The identification fields can be:
- Customer ID
- Device ID
- EMMA ID
- Custom tags that are in text or numeric format. Tags in date format cannot be used.
You can see more information on the meanings of the different identification fields here.
- CSV: Allows creating a dynamic audience based on a loaded CSV. The CSV dynamic audience is exclusively designed for use with the Customer ID identifier. For example, if a customer ID is in the uploaded CSV, and three months later the user installs the app on another device and logs in with their credentials (retaining the same customer ID), unlike static audiences, the user will see the corresponding communications on this new device.
- External Source: Allows creating an audience to which users are sent via the API. In this type of audience, data is received in real-time. Additionally, these audiences are only available to be used as an entry source for customer routes. To feed an external audience, you must connect through our API endpoint, adding the customer ID and the corresponding tags if necessary. You can refer to the documentation for our endpoint here.
- FTP: You can link a CSV hosted via FTP by providing the following information:
- Identification Field: Select the desired identification field:
- Customer ID
- Device ID
- EMMA ID
- Custom tags that are in text or numeric format. Tags in date format cannot be used. You can find more information about what the different identification fields mean here.
- Host: Set the domain where the CSV is hosted (e.g., ftp.domain.com).
- Port: Set the port number used by the FTP server. By default, it is 21, but you can modify it to the appropriate port.
- User: Set the user that has access to the FTP where the CSV is hosted, so EMMA can access the file.
- Password: Set the password for accessing the FTP where the CSV is hosted, so EMMA can access the file.
- File Path: Set the path of the CSV file hosted on the FTP so that EMMA can access that specific file. Example: /myFolder/myFiles/file.csv (make sure to include the .csv file extension).
- Identification Field: Select the desired identification field:
It is important that the file hosted on the FTP, which is linked to an audience, is never deleted. If it is deleted, the audience will give an error, and a new audience will need to be created once the file is uploaded again.
Instead of deleting the file, it should be replaced with one that has the same name and is empty. This way, the audience will not give an error, and when the file with data is uploaded again, the same audience can still be used.
-
If you have selected a static type audience, you should select the CSV option as the audience's source. Remember that a static audience is calculated only once at the time of its creation, and it translates the loaded IDs to the number of devices that meet the condition at the exact moment it was loaded. If, 2 days after uploading the CSV, a user meets one of the loaded IDs, they will not see the communication, as the static audience is only calculated at the time of upload and returns the devices that meet the condition at that exact moment. You must select the identification field on which the CSV file you are uploading is based, from the following options:
- Customer ID
- Device ID
- EMMA ID
Finally, you must upload the CSV file that you want to use for the audience.
-
The last step to save the created audience is to click the Save Audience button.
It is important to note that once audiences are created, they cannot be edited or cloned.
The upload of CSV files is allowed for both dynamic and static audiences, but in the case of dynamic audiences, it is limited to CSVs with a maximum of 5,000 rows.
If your CSV exceeds this limit, you will need to create a static audience with that CSV. Remember that in the case of static audiences, the CSV file is limited to 500MB.
The filters Customer ID, Device ID, and EMMA ID are available for use in both dynamic and static audiences.
The CSV file you upload must have the correct format to be processed. In other words, it must be a .CSV file with a column of identifying data. The file you upload to EMMA Audiences should only contain one column of data.
¶ Linking audiences
If you have a CSV with more than 5,000 lines and had to create a static audience but want to use that CSV along with filters to obtain the target audience, simply follow these steps:
- Create a static type audience as explained in the previous step.
- Create a dynamic type audience and select the "Users" filter.
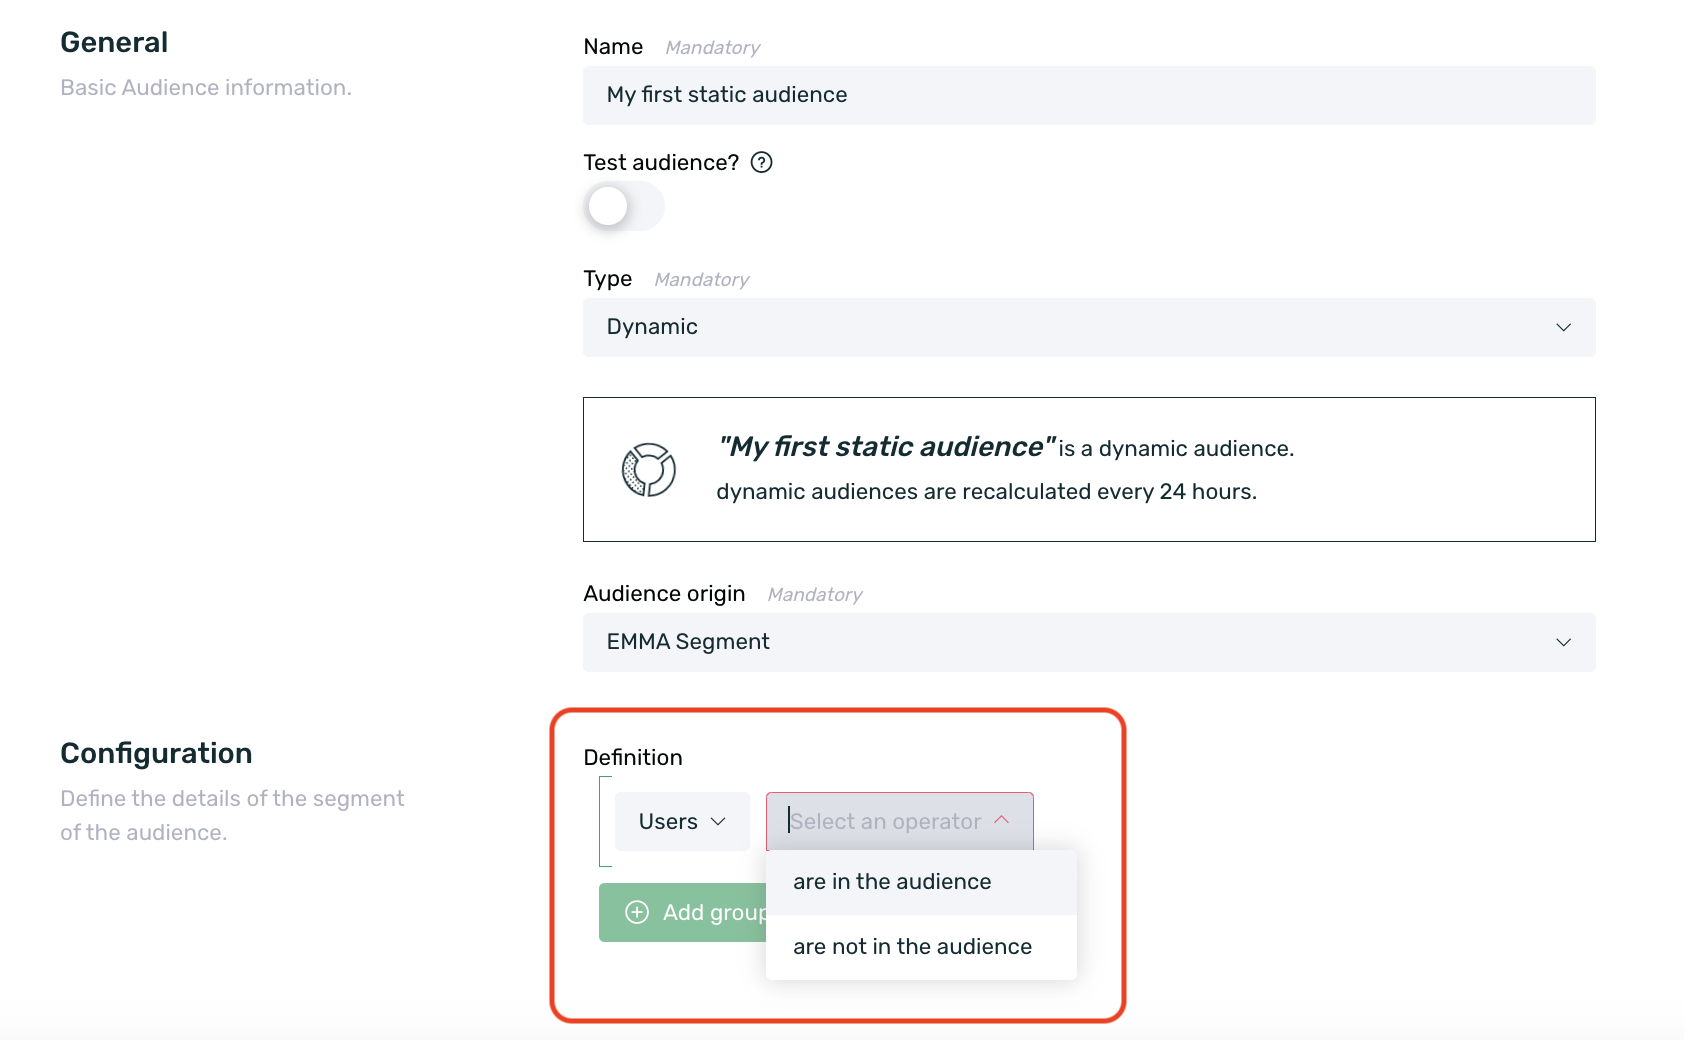
- Select the operator that matches the type of audience you want to create between "are in the audience" or "are not in the audience."
- Then, select the CSV you want to use to create your new dynamic audience.
- Add the filters you consider necessary to segment the users.
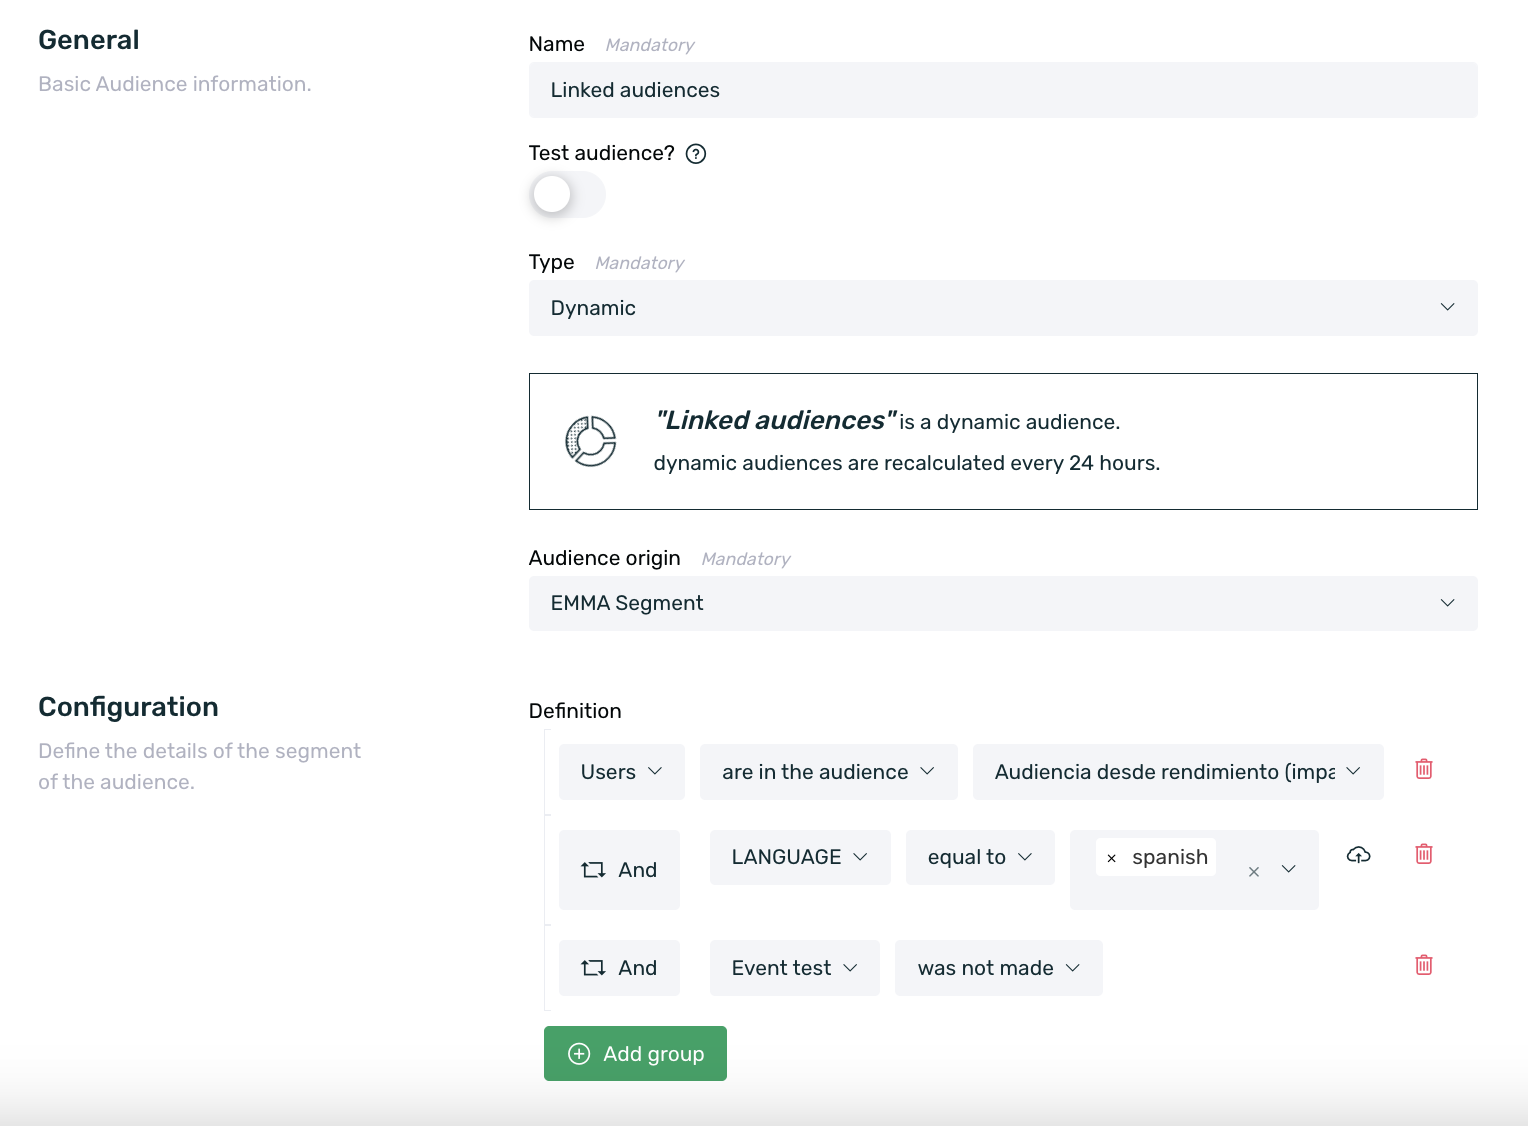
And that's it, you now have your static audience linked to a dynamic audience with filters.
¶ Clone audiences
With the audience cloning functionality, you can quickly duplicate any audiences you need. To do so, just follow these steps:
-
Locate the audience in question.
-
In the context menu, select the Clone option.

-
Save the same configuration directly or make the necessary changes to the configuration.
-
Save the changes.
And that's it! Your audience has been cloned and is ready to be used.
¶ Using audiences in communications
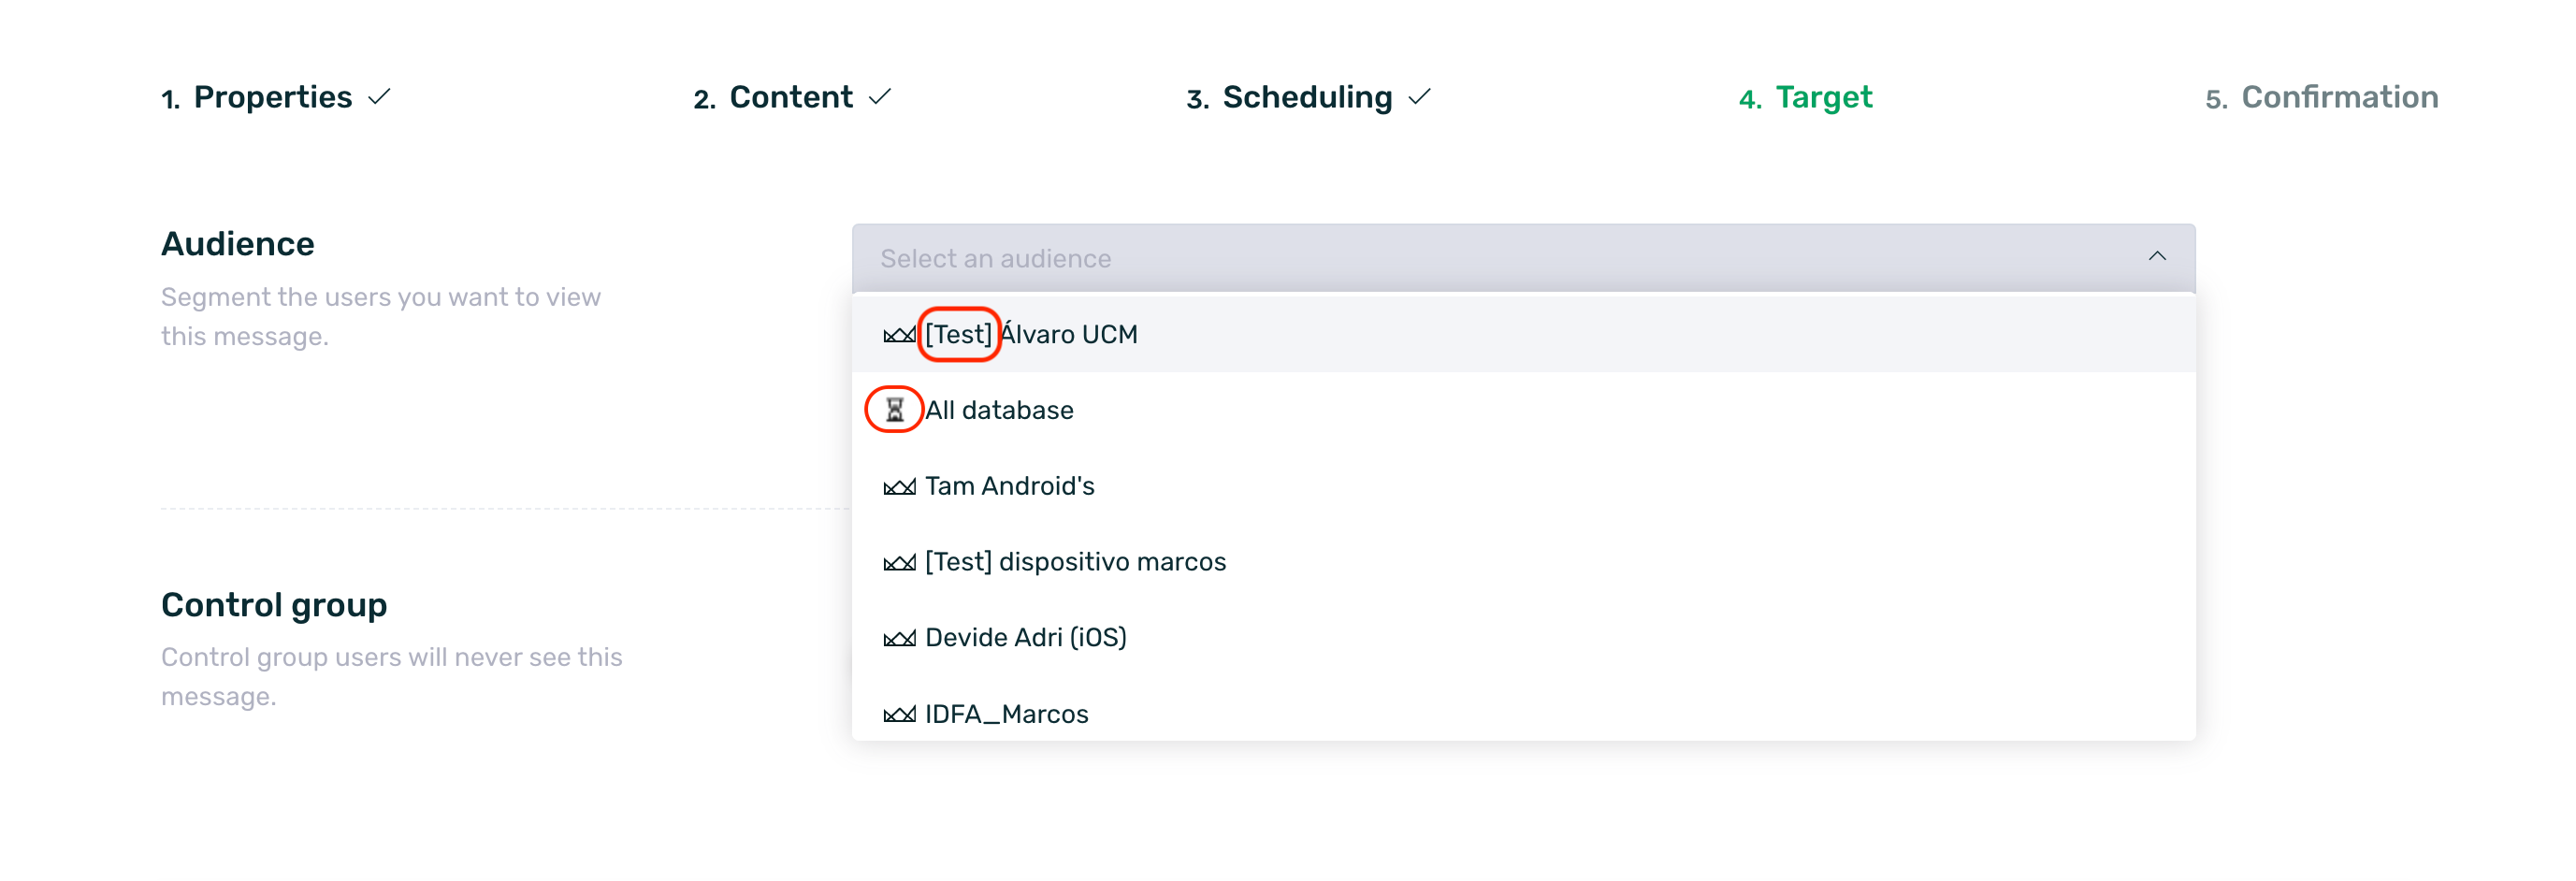
Once we have created the audiences, we can now use them in communications. To do this, simply follow the usual communication creation flow (more information here), and in the Target step, select one of the audiences created previously. You can use either a dynamic or static audience, as long as it is in a state that is ready for use.
Keep in mind that for OutApp communications (Push and Email), only audiences that have been 100% processed are allowed. If your audience does not appear in the list, wait until it is fully loaded.
In the segmentation selector, we will have a list of all the audiences that are ready to be used in a communication. Audiences in the "New" state will not appear in this list. We can only use audiences that are in the "Ready" or "In Progress" states.
Audiences marked as Test so that they can be used by Author users are marked with the text [Test] before the audience name.
Audiences that are in progress are marked with a timer icon, but we can use them without any problem to launch our communications.
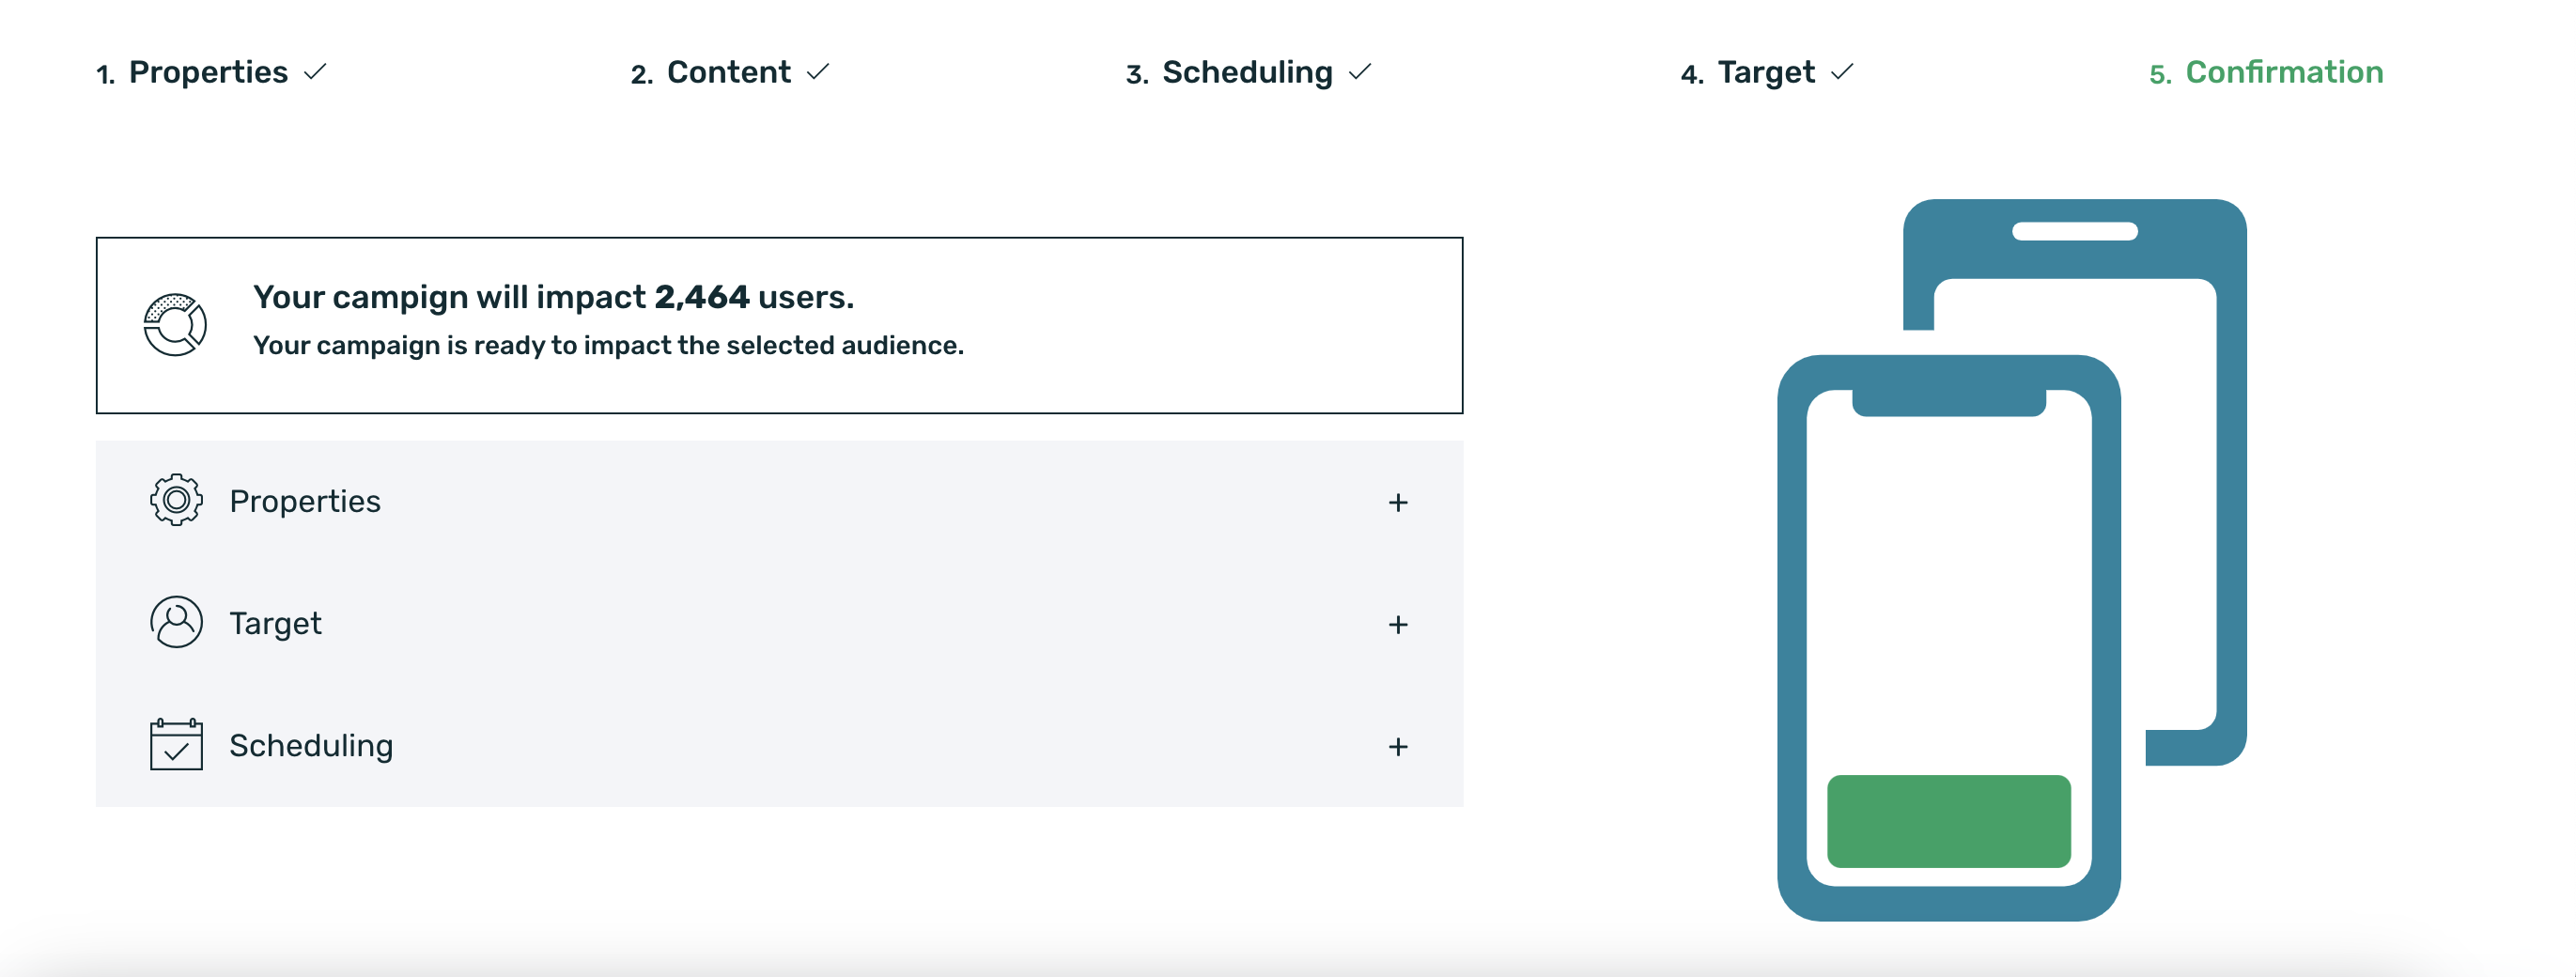
If we use an audience in Ready status, the Confirmation step will display a message indicating the number of devices we will reach. Keep in mind that if it is a dynamic audience, this number may vary as users meet or stop meeting the conditions of the selected dynamic audience.
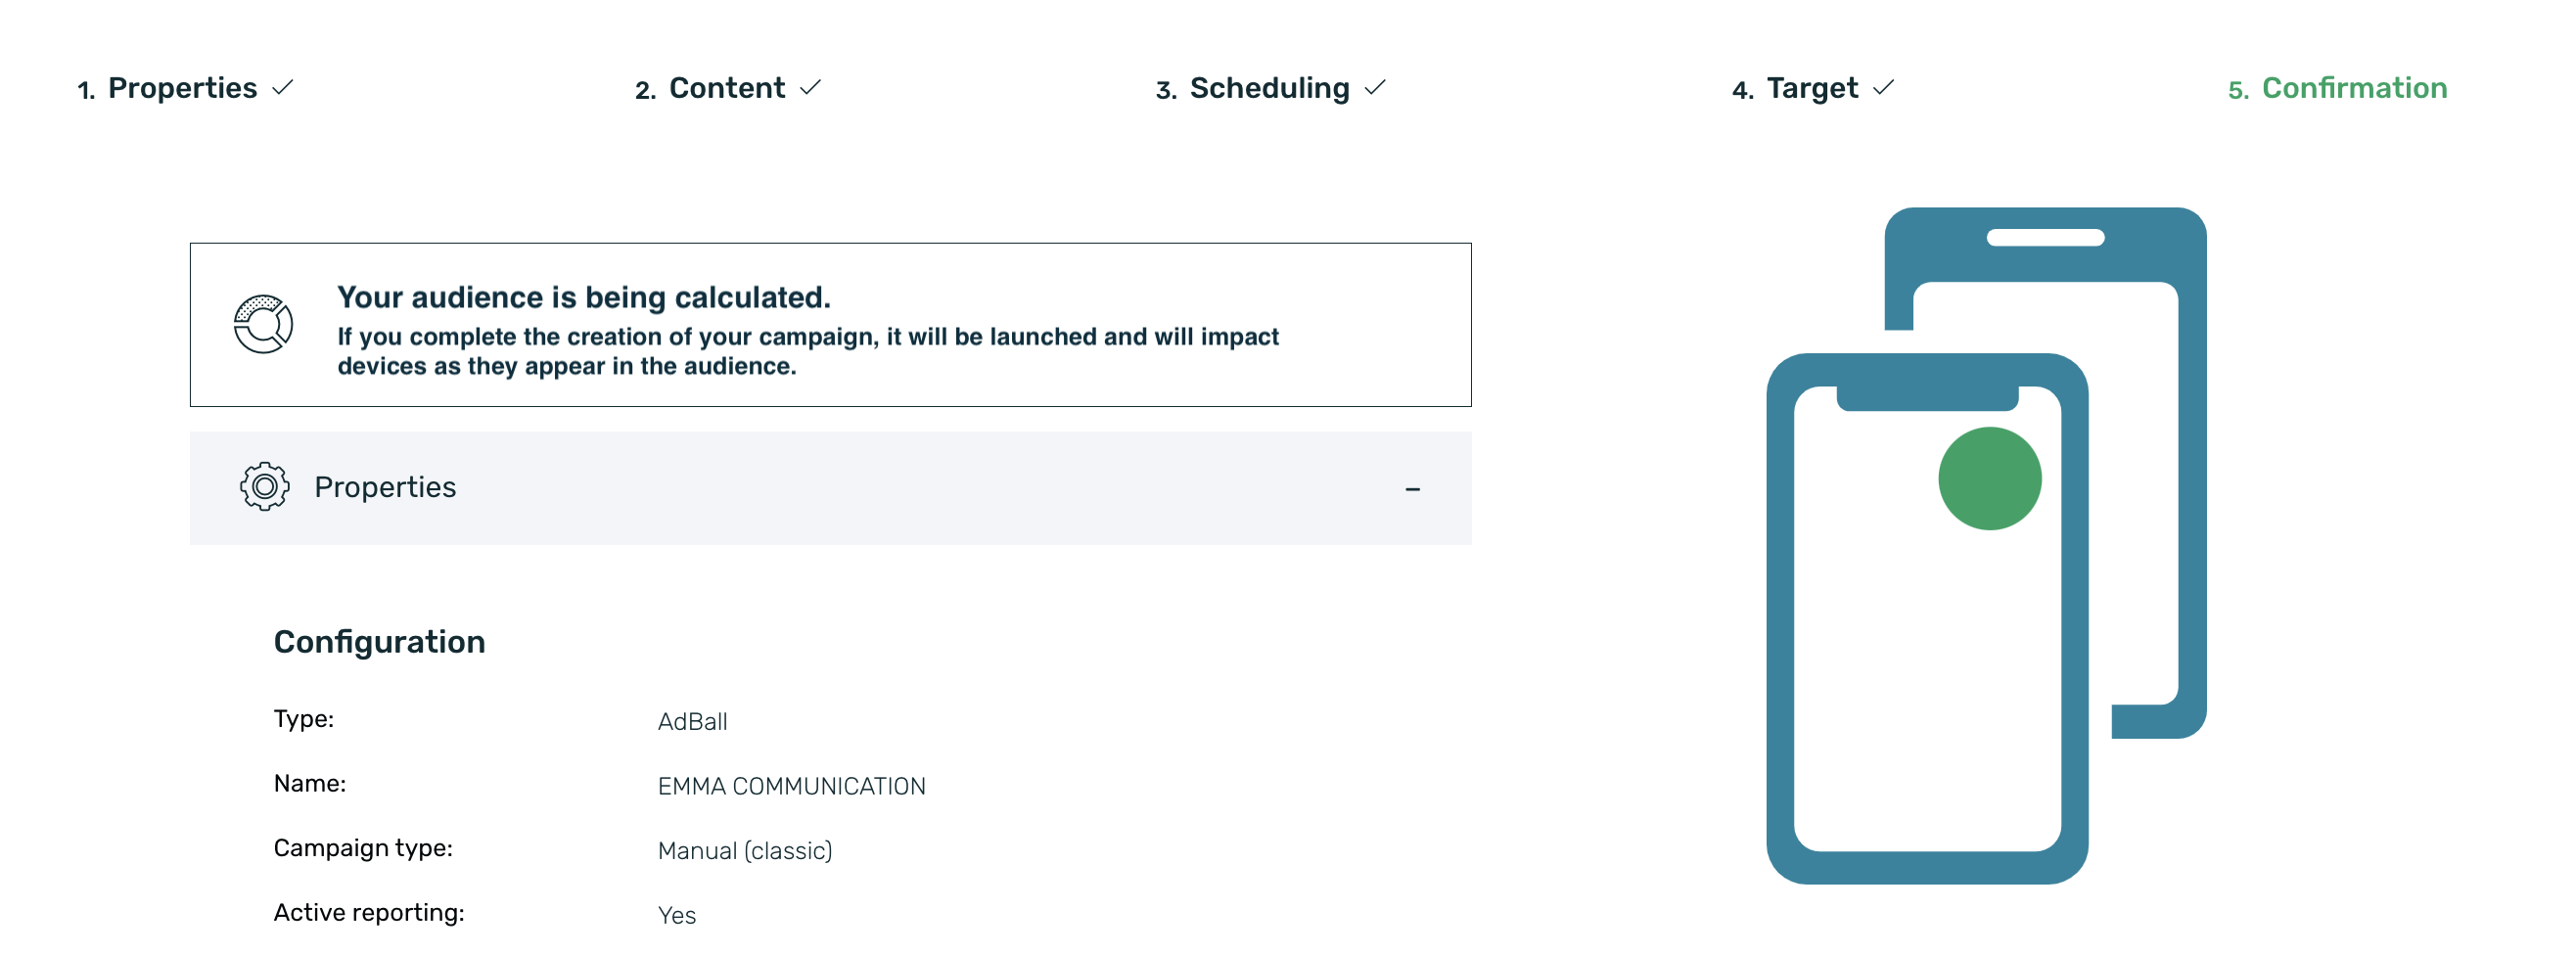
If we select an audience in In Progress status, meaning it is still being calculated, the Confirmation step will display a message notifying us of this situation.
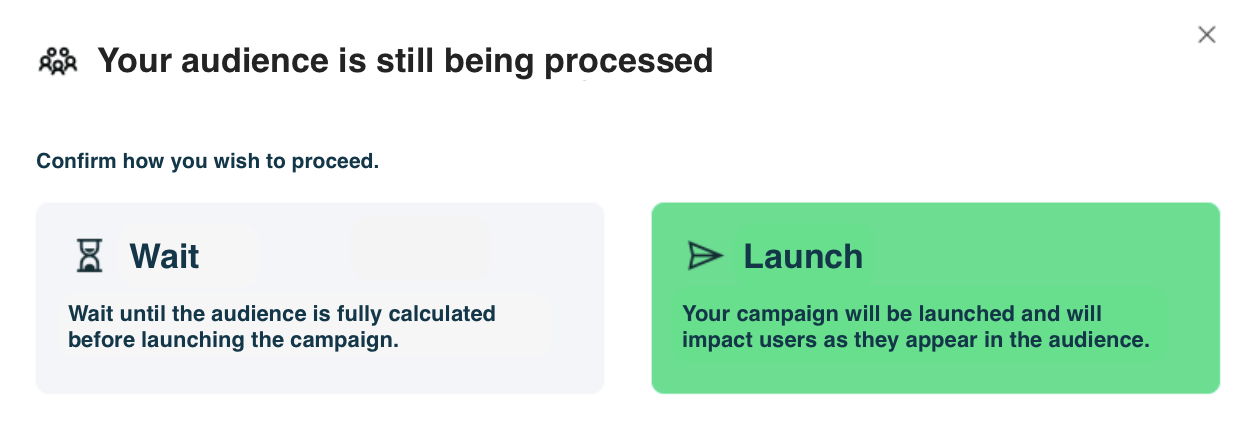
If we click on the Send Message button, a pop-up window will immediately appear, notifying us that the audience is being processed. At this point, we have two options:
- Select the Wait option and cancel the communication until the audience has been fully calculated.
- Select the Launch option. With this option, we don’t have to wait—the campaign will be launched immediately, impacting the users already in the audience and continuing to reach the rest of the users as they appear in the audience.
¶ Audience screen
On the Audiences screen, in addition to creating new audiences, we can view a table with all the audiences created so far.
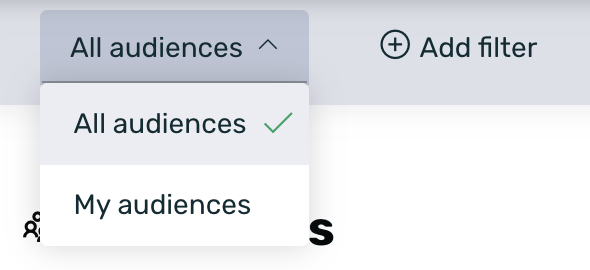
By default, all created audiences are displayed, but if we prefer, we can add a filter to show only the audiences we have created ourselves.
Likewise, we can add other types of filters, such as the status or origin of the audience.
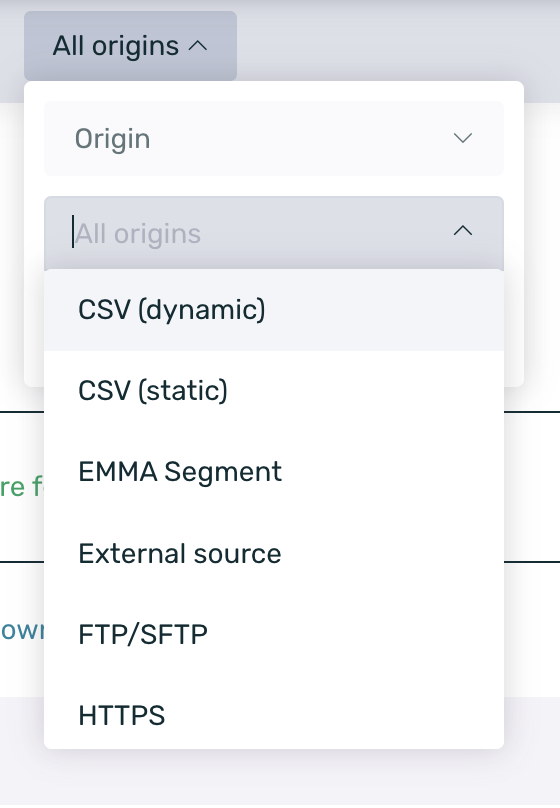
When filtering by origin, we can choose from the following values:
- CSV (static): Filters audiences whose origin is a static CSV file.
- CSV (dynamic): Filters dynamic audiences whose origin is a dynamic CSV file.
- EMMA Segment: Filters dynamic audiences whose origin is an EMMA segment.
- FTP: Filters dynamic audiences whose origin is a file hosted via FTP.
- HTTPS: Filters audiences whose origin is a HTTPS URL.
- S3: Filters dynamic audiences whose origin is a file hosted in S3.
- External source: Filters dynamic audiences whose origin is an external source.
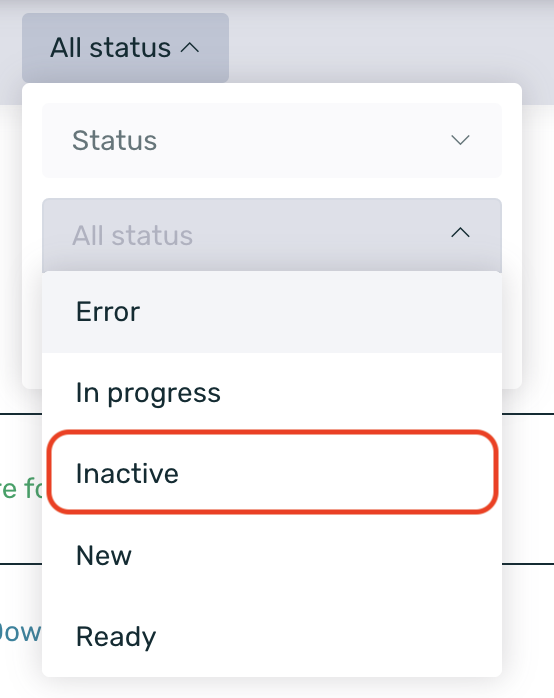
When filtering by audience status, we can choose from the following options:
- New: Filters audiences that are new and not yet in progress.
- In Progress: Filters audiences that are still being processed by the system.
- Ready: Filters audiences that have finished processing and are ready to be used in communications.
- Inactive: Filters audiences that have been deactivated because they are not in use. You can find more information about inactive audiences here.
- Error: Filters audiences that failed to process. This could be due to an incorrect FTP URL or an invalid CSV file format, for example.
In the summary table of the audiences, we will see the following information related to them:
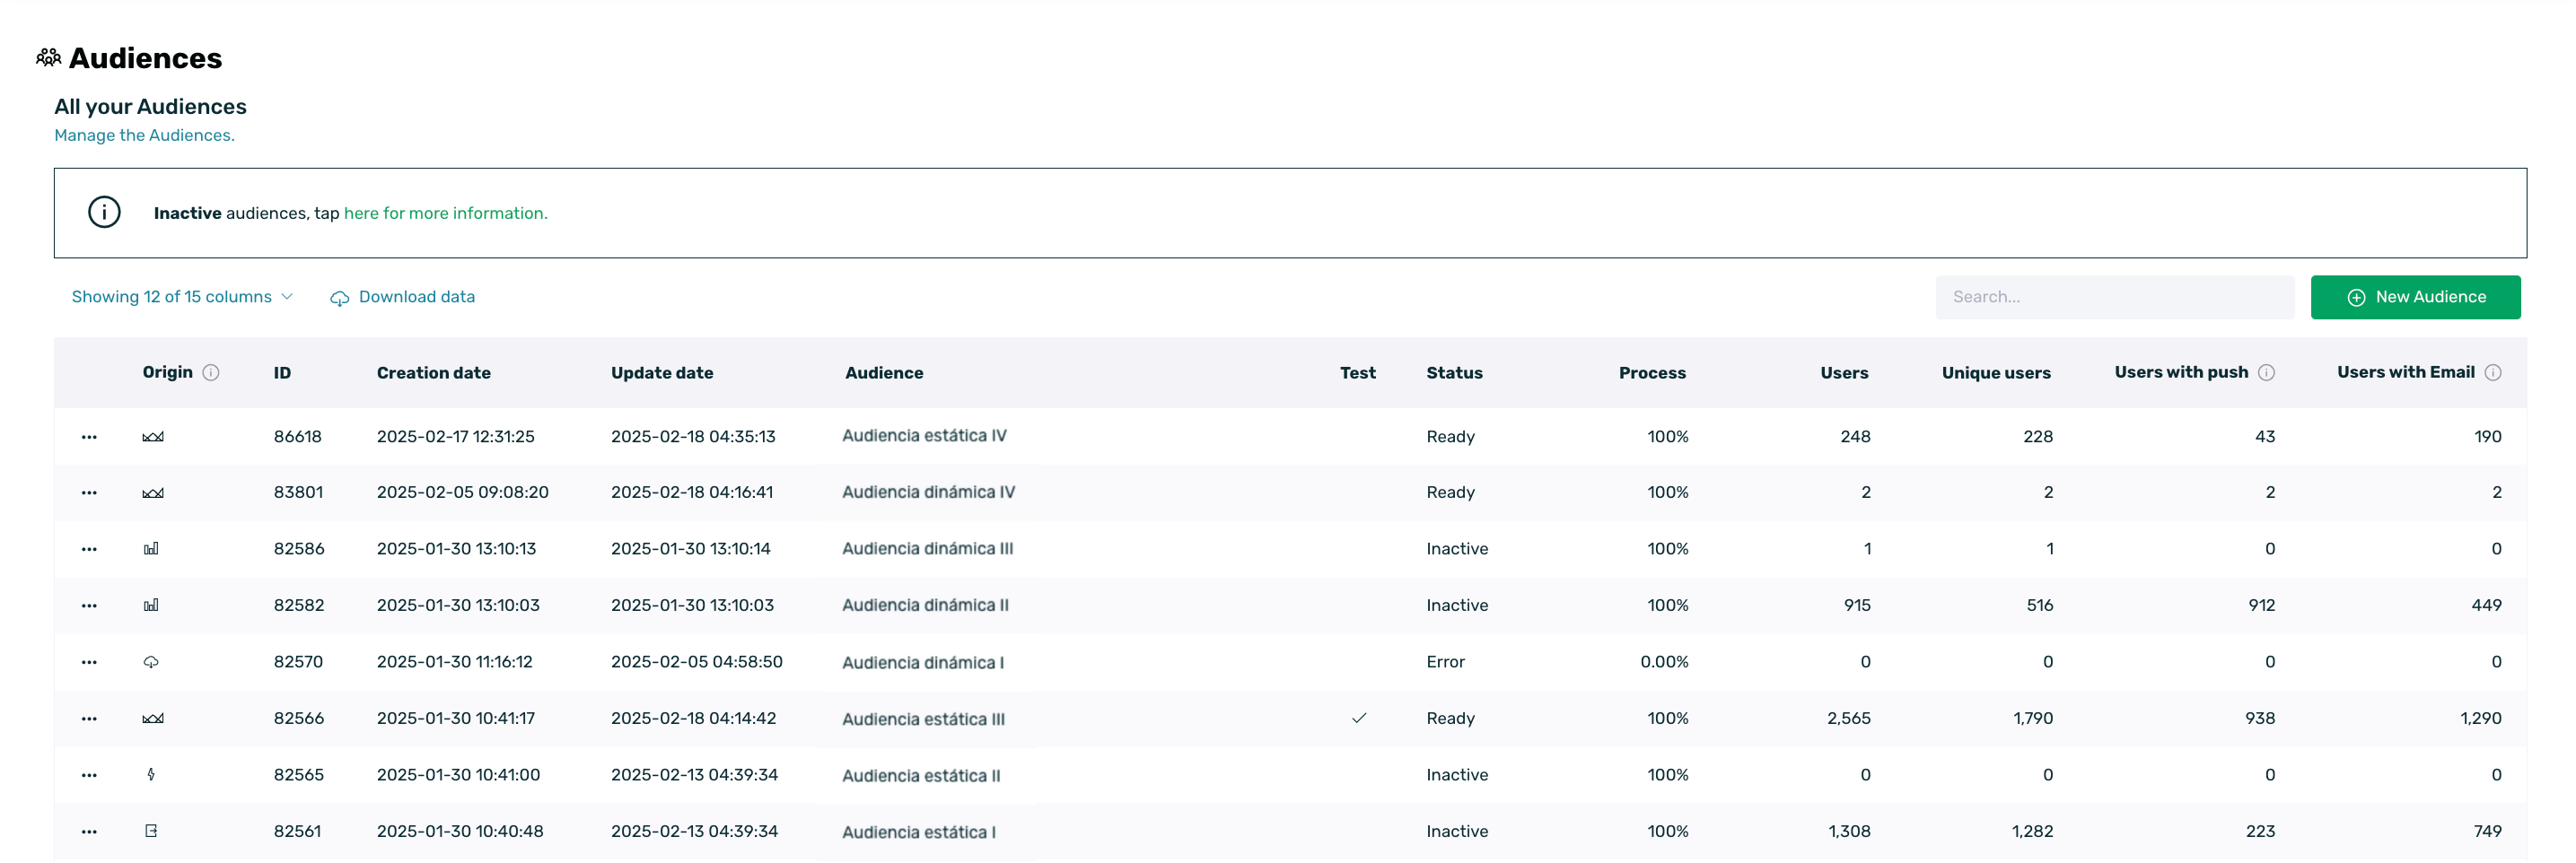
Origin: Displays the origin of the audience with an icon. Static origin audiences (CSV) will be marked with the CSV icon. Dynamic origin audiences of the segment type (filters) will be marked with the EMMA icon. Dynamic origin audiences of the FTP or S3 types will also have specific icons.
Shared: If the audience is being shared with Facebook or Google, the corresponding icon for each network will appear in this column to identify which audiences are being shared and on which platform. You can find more information about sharing audiences with Facebook here and with Google here.
ID: Internal EMMA ID to identify each created audience.
Creation date: The date the audience was created.
Update date: The date the audience was last updated. Audiences are updated once a day.
Audiences: The name given to the audience at the time of creation.
Test: If the audience has been marked as a test audience, this column will show a checkmark.
Status: The status of the audience. It can be New, In Progress, Ready, Inactive, or Error.
Process: Indicates the processing status of the audience. While it's not 100% processed, the audience will not change to the Ready status.
Devices: The number of devices that meet the criteria of the audience.
Users: The number of unique users (unique customer IDs) that meet the criteria of the audience.
With Push: The number of devices that are active for push notifications.
With Email: The number of devices for which we have email information to send emails from EMMA.
Push Exceedance: The number of devices that have exceeded the push limit. This only applies if a push limit has been configured.
If needed, we can download the table content by clicking on the Download data button. Once clicked, the table will automatically download with the columns that are selected at that moment.
Additionally, if we want to view the specific configuration of an audience or delete it, we can do so from this section. To do so, we need to hover over the contextual menu shown on the left of the table and select the desired option.

¶ Inactive audiences
To prevent the audience system from becoming overloaded and to ensure better performance and stability for your communications, EMMA will deactivate audiences that are not being used in any communication or shared with Google and/or Facebook.
Only audiences that are not linked to any active or scheduled communication will be marked as inactive, provided that 14 days have passed since their creation.
Test audiences will always remain active, regardless of whether they are linked to an active or scheduled communication.
Additionally, audiences shared with Google and/or Facebook will also never be marked as inactive.
Audiences will remain active as long as they meet one of the following conditions:
- The audience is linked to an automated communication for rules and has an active or scheduled rule.
- The audience is in an active classic communication or is scheduled for the future.
- The audience is linked to an active or scheduled push notification or email.
- The audience is being shared with Google or Facebook. In this case, the audience will never be marked as inactive while being shared.
- The audience is linked to another dynamic segment audience that is considered active, meaning it meets one of the conditions listed above.
Test audiences will always be active.
Just because an audience is marked as inactive does not mean it cannot be reactivated. Keep in mind that audiences are marked as inactive when they are no longer being used directly, but if you wish to reactivate an inactive audience, you can simply click the Reactivate button from the contextual menu of the audience in question.
The reactivation will take as long as it takes to recalculate the audience. This waiting time can vary depending on the size of the audience.

We will also be able to identify which audiences are marked as inactive since, on the audience screen, they will be labeled as Inactive in the Status column.
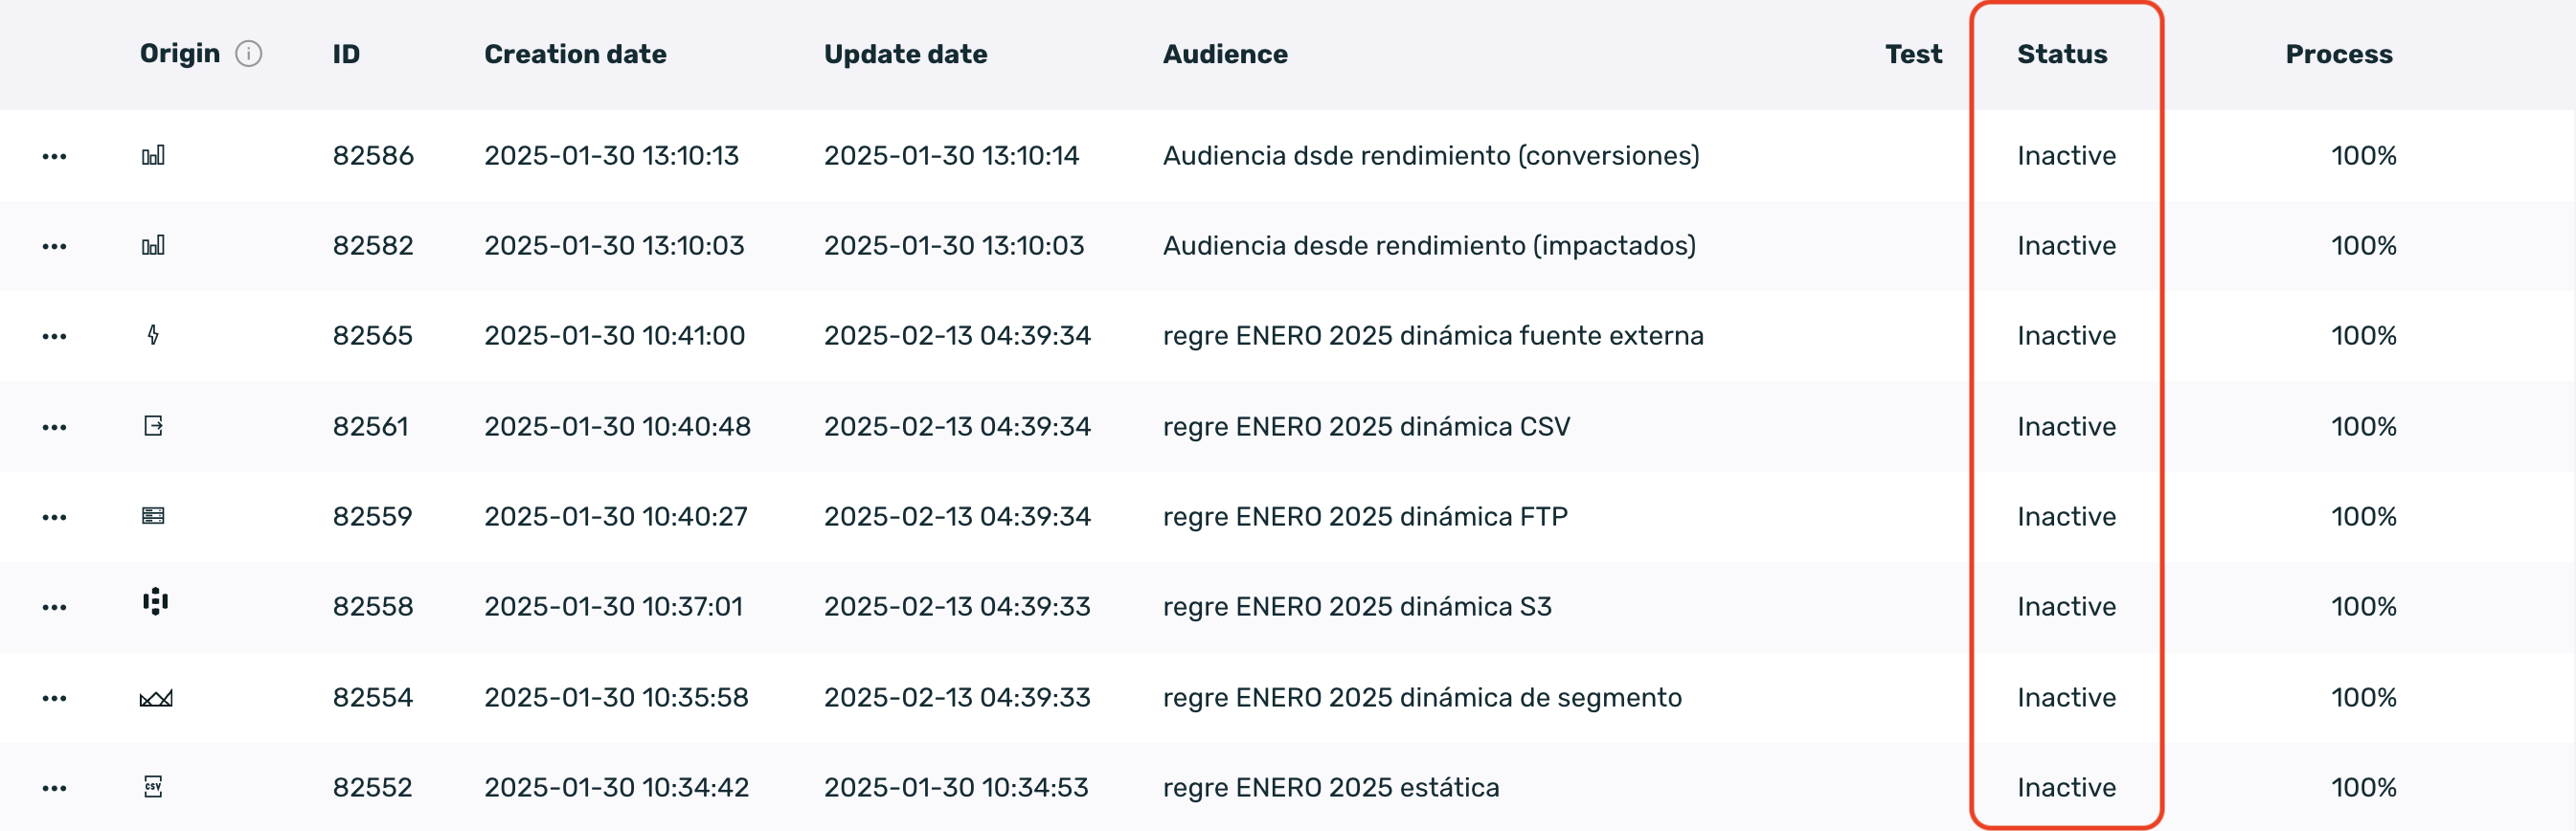
Additionally, we can set a filter so that the dashboard only displays inactive audiences or those in another state.
You can find more information about how filters work here.
¶ S3 integration
To add an S3 connection and use dynamic S3-based audiences, follow these steps:
-
Log in to EMMA.
-
Go to the Management > Integrations section.
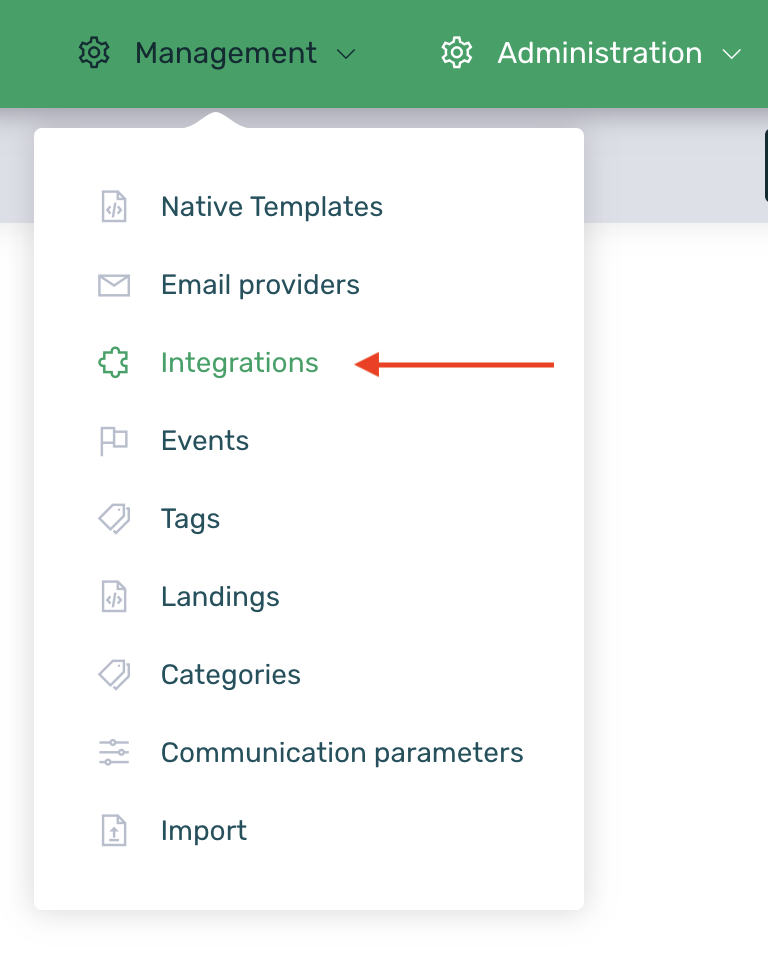
-
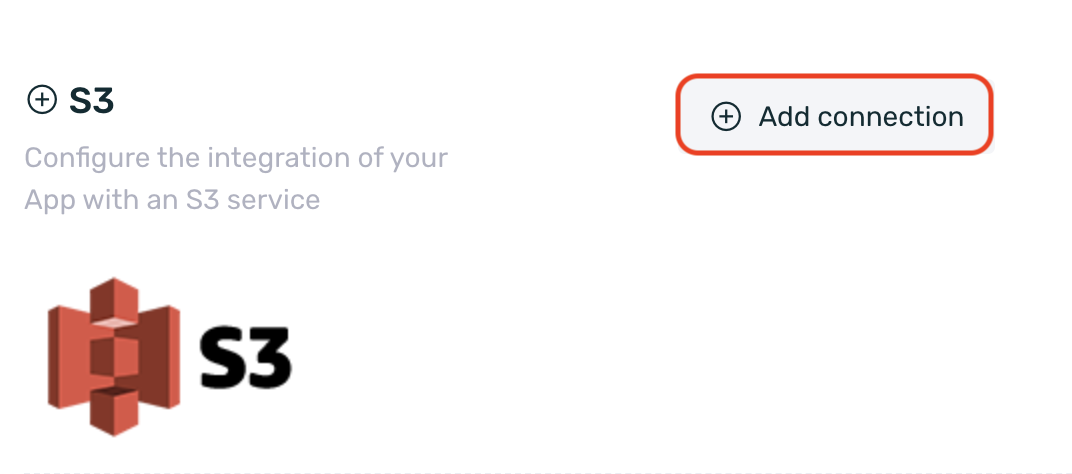
In the S3 section, click on the Add Connection button.
-
Fill out the connection form.
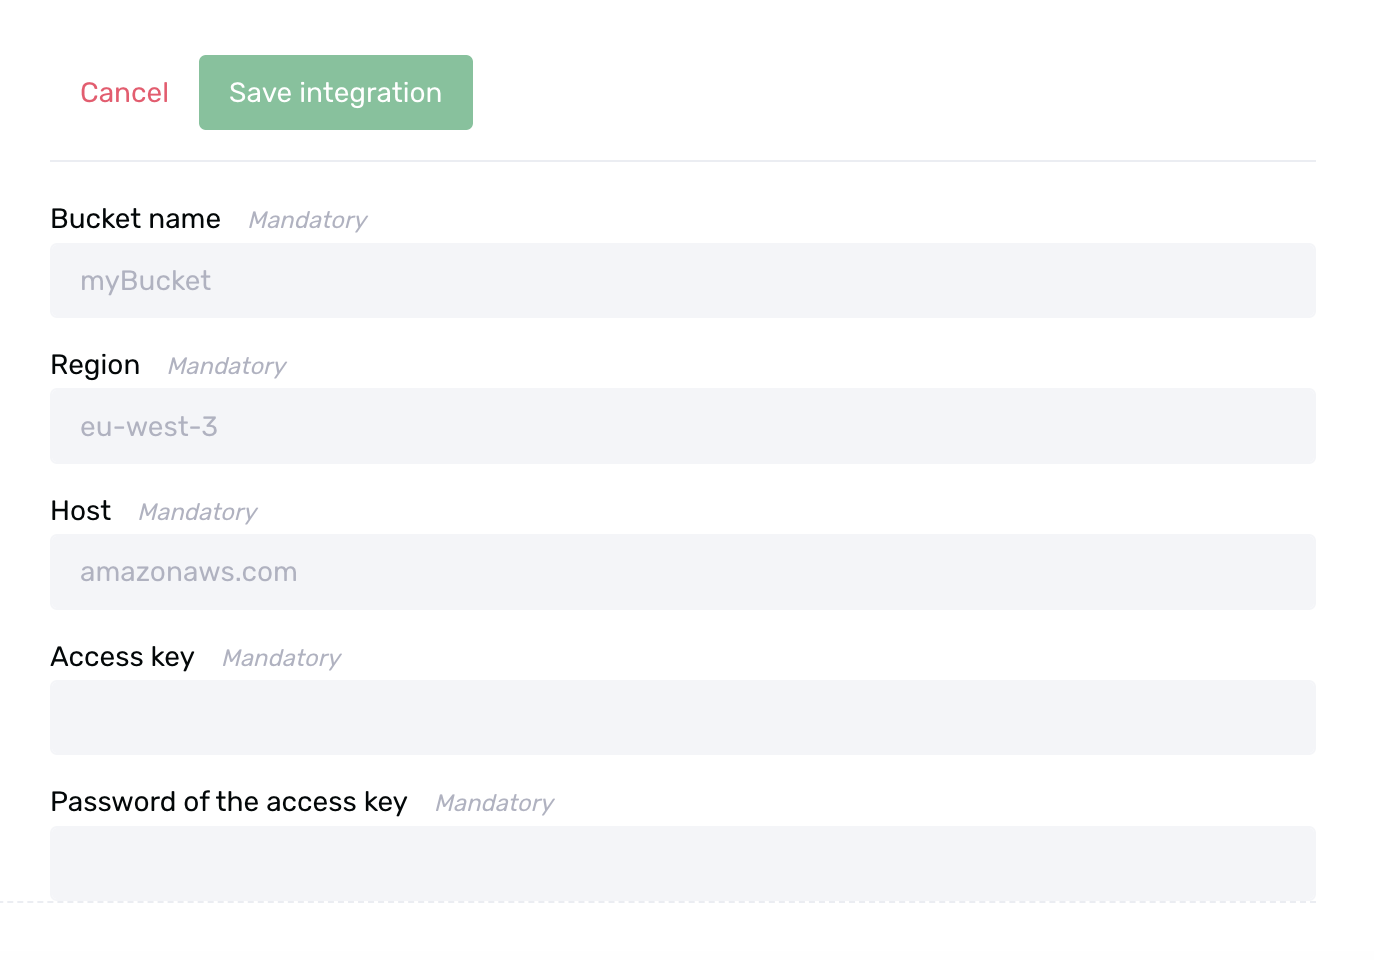
- Bucket Name: Name assigned to the Bucket when it was created.
- Region: Region of the Bucket.
- Host: Domain of the S3 where the Bucket is located.
- Access Key: Access Key or Key ID of the S3.
- Access Key Secret: Access Key Secret linked to the previous Access Key.
-
Click the Save Integration button to save the configuration.

-
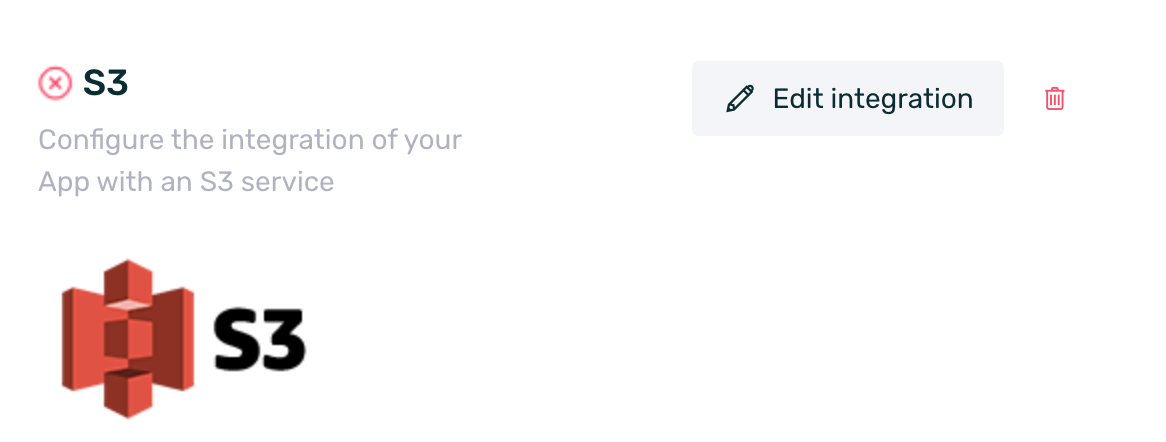
If the configuration is correct, you will see a green checkmark next to the S3 name confirming the successful integration.

-
If the configuration is incorrect, you will see a red "X" next to the S3 name, indicating that the integration has an error. In this case, you should edit the integration and make the necessary adjustments based on the error message displayed by EMMA after clicking the Edit Integration button.
If we delete an S3 integration and have dynamic S3-type audiences that are being used in communications, when the audience is recalculated (which happens every 24 hours), it will produce an error. Once the audience encounters an error, the corresponding communication will no longer be displayed to users.
¶ Sharing audiences with third parties
EMMA allows you to share audiences with various integrated systems. This way, you can leverage EMMA's full potential to create the necessary audience based on user actions within the app and other filters, and then share the device information with third-party platforms.
¶ Sharing audiences with Facebook
Thanks to the integration between EMMA and Facebook, it is possible to send audiences to Facebook. You can find more information on how to share audiences with Facebook here.
¶ Sharing audiences with Google Ads
Thanks to the integration between EMMA and Google Ads, it is possible to send audiences to Google Ads. You can find more information on how to share audiences with Google Ads here.
¶ Sharing audiences with The Trade Desk (TTD)
Thanks to the integration between EMMA and The Trade Desk (TTD), you can send audiences to TTD and leverage all the information within the platform.
To share audiences with The Trade Desk, simply follow these steps:
-
Log in to EMMA using your credentials.
-
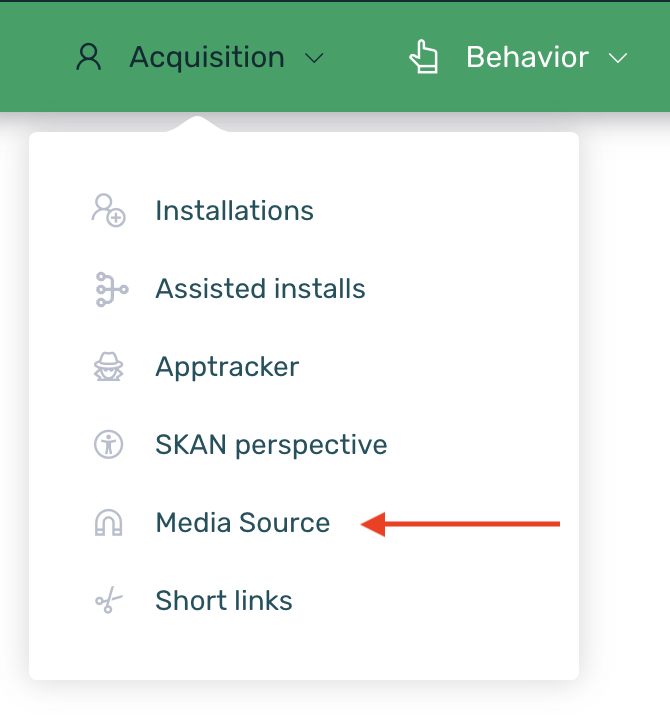
Go to the Acquisition > Apptracker section.
-
Search for and edit The Trade Desk provider.

- Configure the Advertiser ID and Secret Key fields.

- Within the editing section, go to the Audiences tab and select the audiences you want to share with The Trade Desk (TTD).

- Click the Save button located in the top right corner of the screen to apply the changes.
And that's it! Your audience will start being shared with The Trade Desk
By default, EMMA only shares the Device ID in audiences. If you also want to share the user's email, you must enable the Share EMAIL with The Trade Desk checkbox.
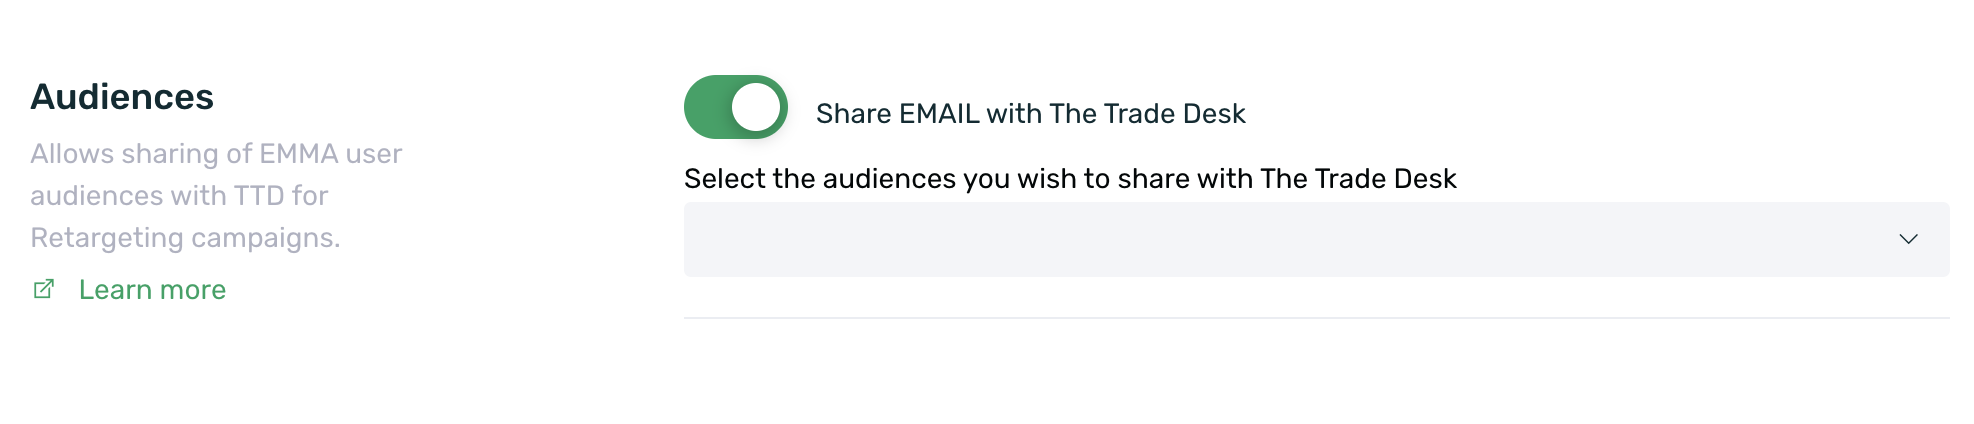
The email information is sent encrypted using SHA-256.