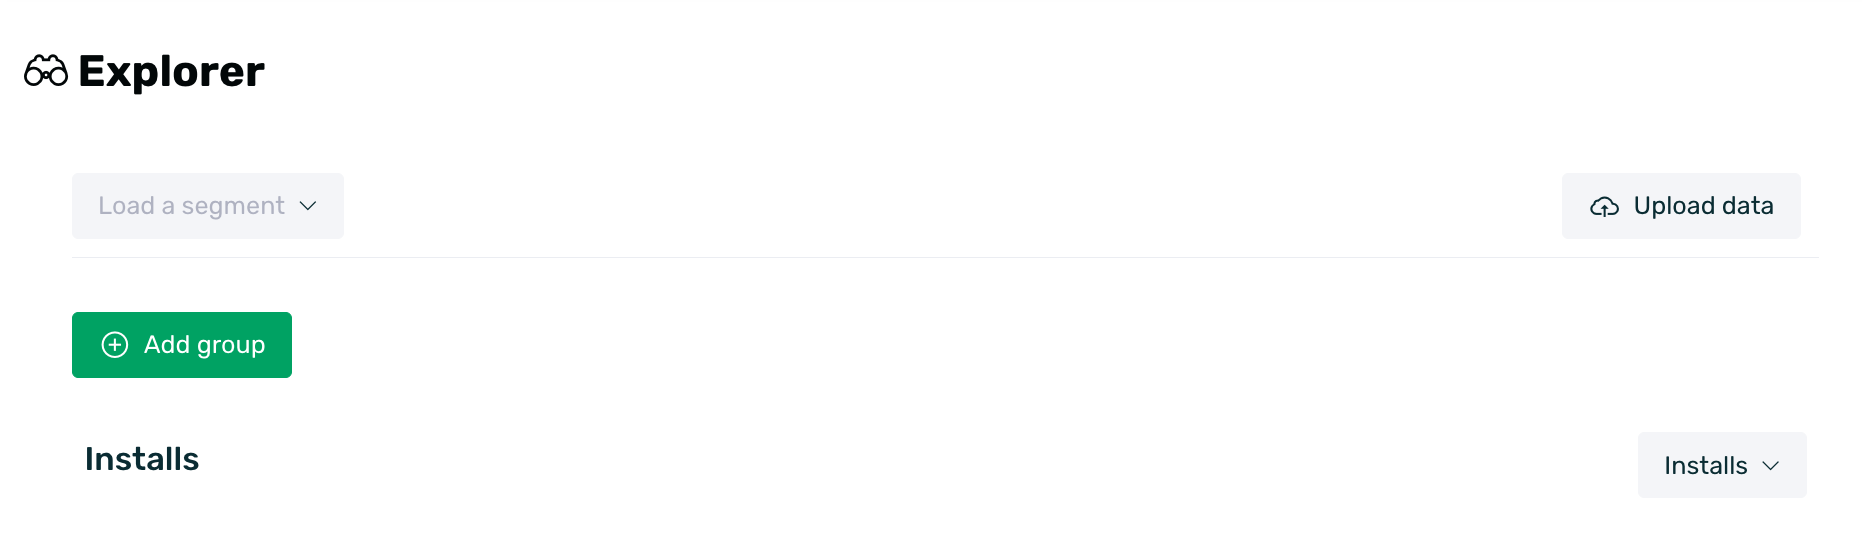
In Behavior > Explorer, you can review all data related to your users' activity with your app: from user types to purchases made, the most frequently used screens, and more.
EMMA provides a filtering/segmentation system that allows you to access all this information, along with any tagging you have set up for your app.
¶ Apply filters
To perform the queries you need, you must apply the filters you want to use. To do this, follow these steps:
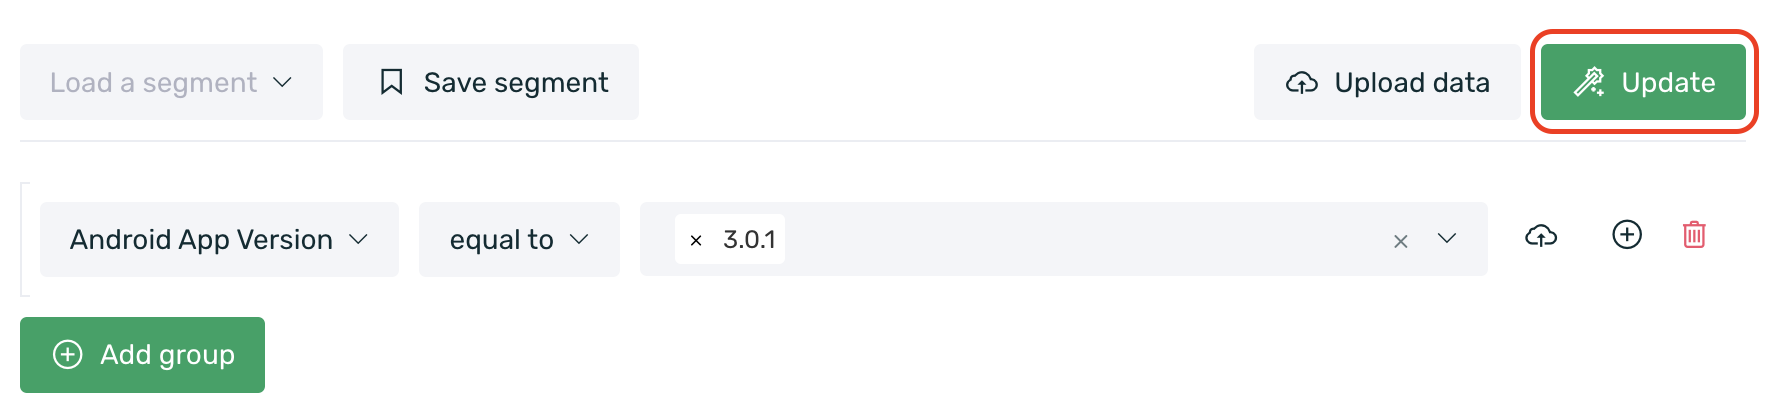
Click on the green + Add group button to add a new filtering criterion. Choose from all available filters and add as many as you need by clicking the + Add group button again.
- All conditional segmentation filters will be added with an "AND" in between, meaning that the filtered users must meet all conditions.
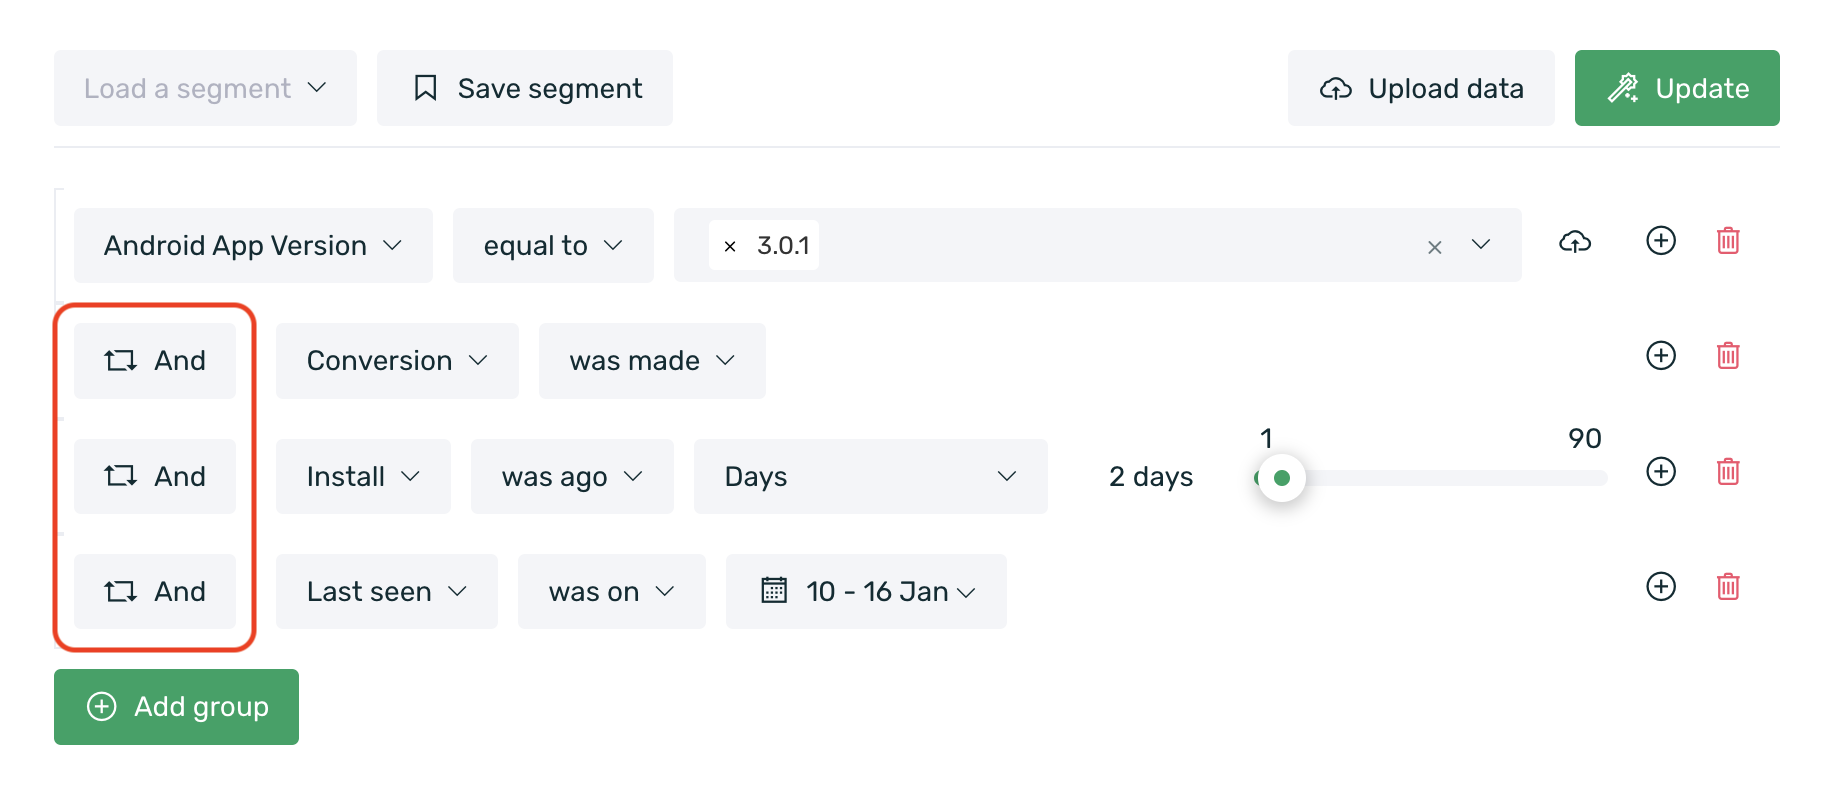
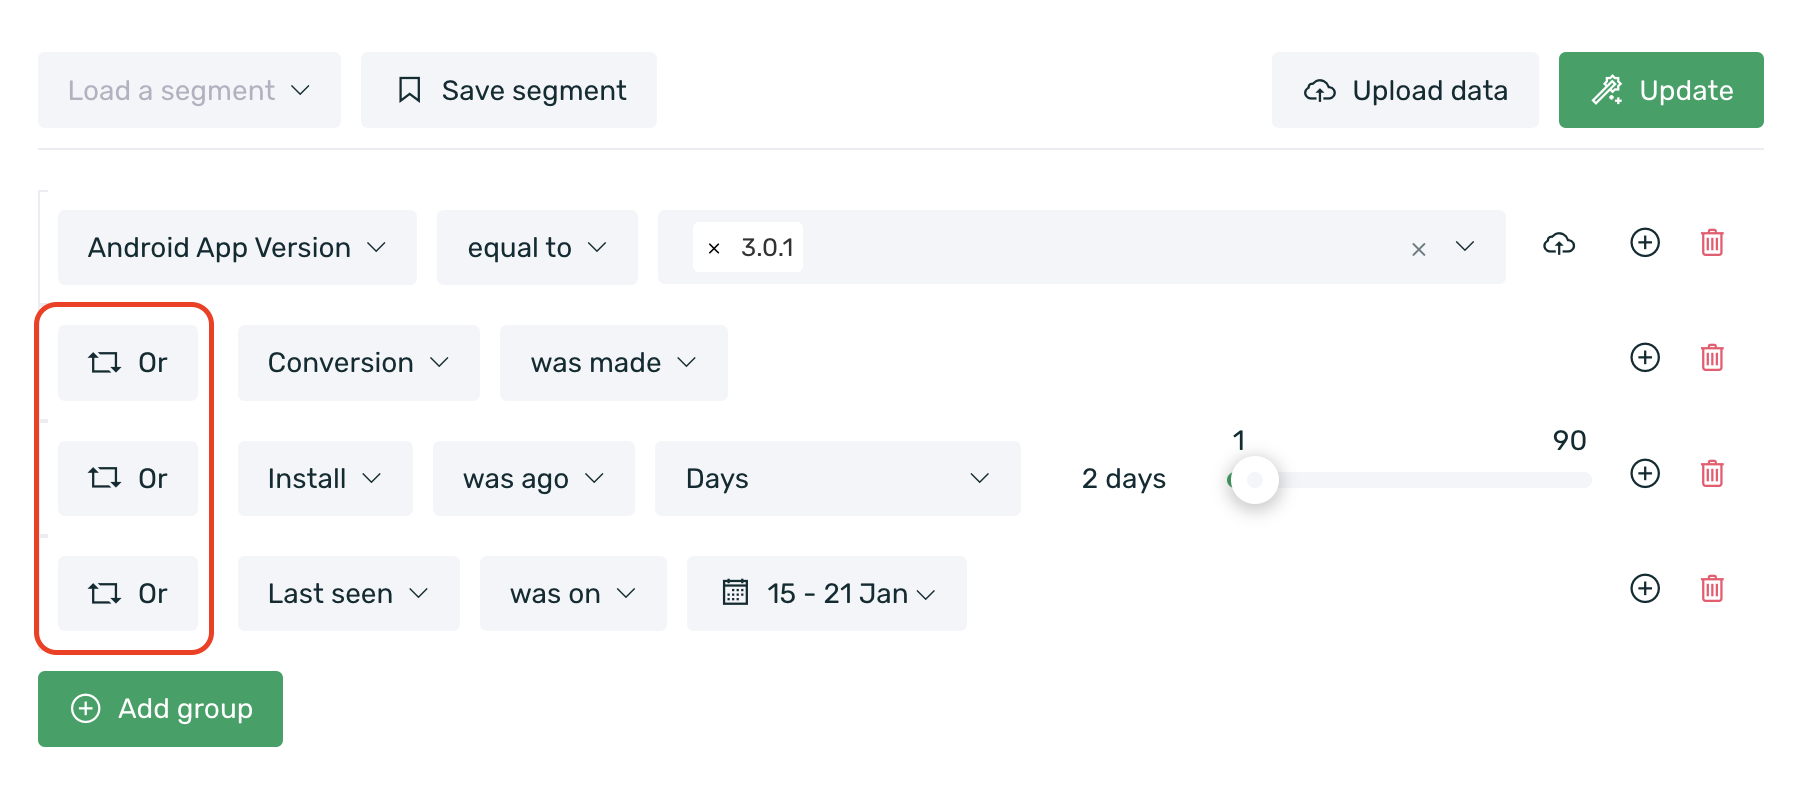
- Click on one of the intermediate "AND" to convert the conditions into "OR." This change means that the filtered users must meet at least one of the conditions.
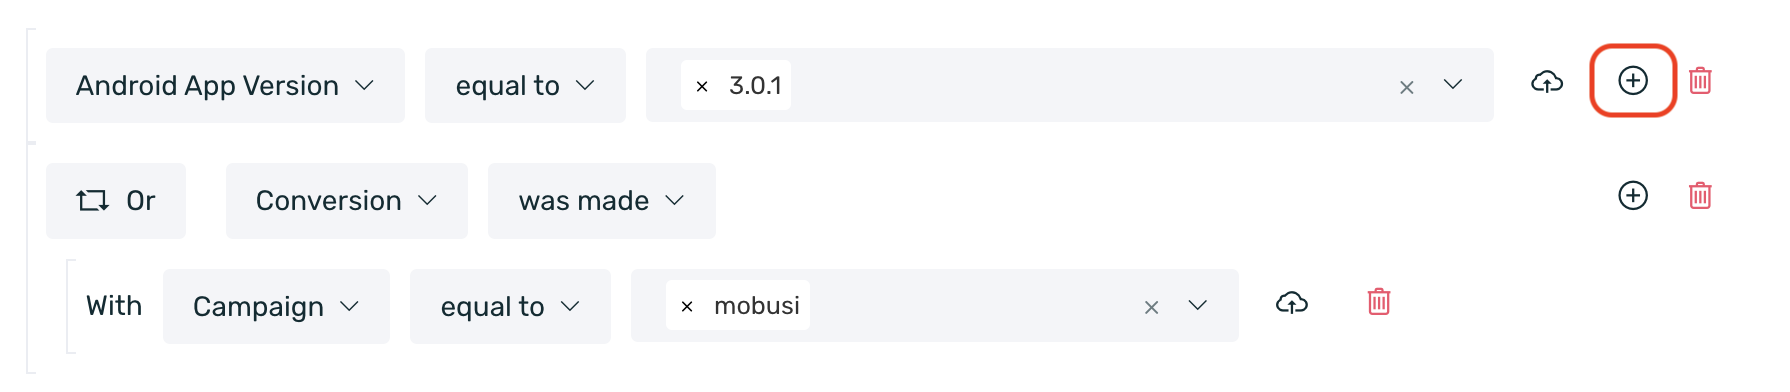
- You can enhance segmentation by adding new conditions to the equation. To do this, use subfilters, which will allow you to include additional "AND" and "OR" conditions.
- Click on "AND" and "OR" to change the conditional application from "all" to "any."
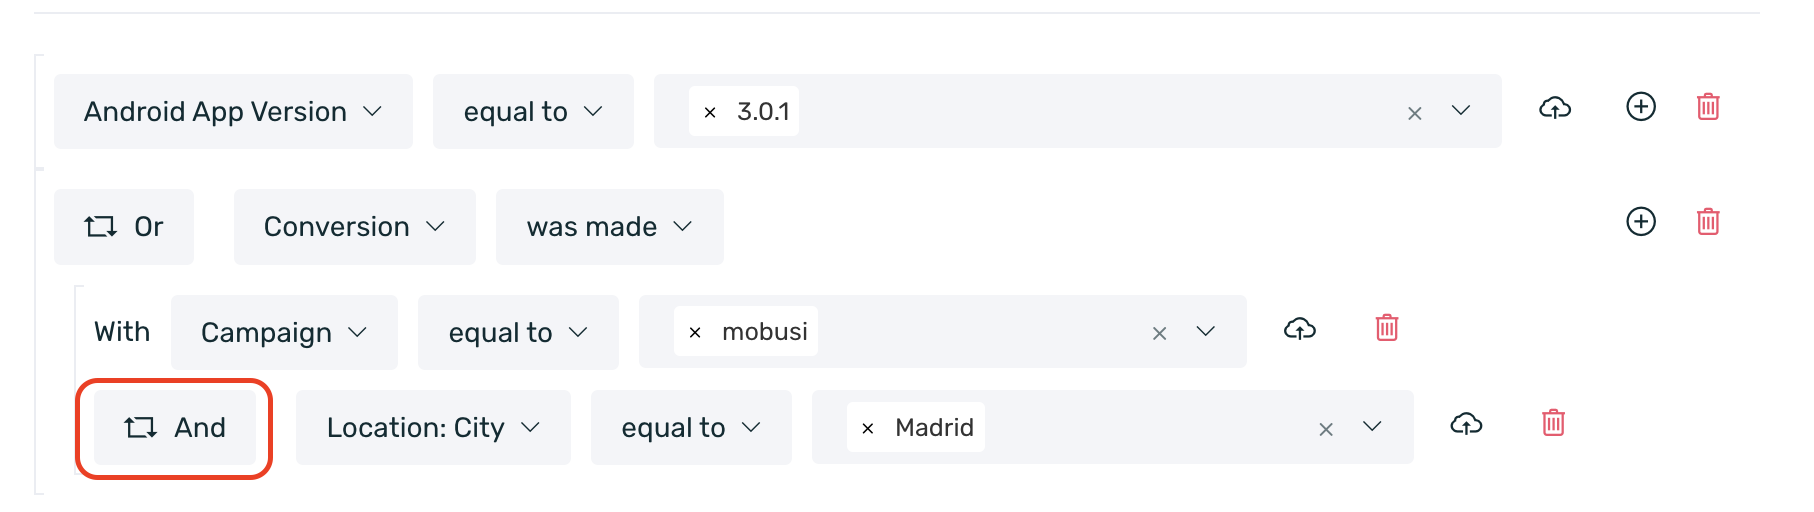
- To delete a filter or subfilters, simply select the red trash icon on the right side of the filter.
- Each time you update any information or add/remove a filter, you must select the Update button to refresh the queried data.
¶ Tags
If you want to query a tag, keep in mind that for tags with more than 100k results, the list will not be displayed, and you will need to manually enter the desired values.
¶ Available filters
Below is a detailed list of filters you can select in the Explorer dashboard to query the data.
You can choose by:
Attributes
| Android App Version | Version of the application on Android (e.g., 1.0). |
| EMMA SDK Android Version | Version of the EMMA SDK on Android. |
| Android Device Model | Model of the user's Android device (e.g., Samsung Galaxy). |
| Android Version | Version of the Android operating system (e.g., Android 4). |
| iOS App Version | Version of the application on iOS (e.g., 1.0). |
| EMMA SDK iOS Version | Version of the EMMA SDK on iOS. |
| iOS Device Model | Model of the user's iOS device (e.g., iPhone 5c). |
| iOS Version | Version of the iOS operating system (e.g., iOS 10). |
| Android Mobile Services | Devices using Google Mobile Services (devices with access to Google Play) or Huawei Mobile Services (devices with access to App Gallery). |
| Device ID | Unique device identification number for iOS (IDFA/IDFV) and Android (AAID). It is automatically collected from the device. For IDFA, it is collected only if the user has given explicit consent. |
| EMMA ID | User identification number for the EMMA platform. This is a random ID generated by EMMA. |
| Client ID | Internal identifier used to recognize client users. This identifier is external to EMMA and may or may not be sent from the app. It is usually an existing identifier in the client’s database to identify users. |
| Location: Country | Country where the user was while using geolocation in the app/website. If geolocation is not used, the location is inferred from the IP address. |
| Location: City | City where the user was while using geolocation in the app/website. If geolocation is not used, the location is inferred from the IP address. |
| Location: State/Province | State/Province where the user was while using geolocation in the app/website. If geolocation is not used, the location is inferred from the IP address. |
| Multiple Devices | True: Identifies users who use one or more devices. False: Identifies users who use only one device. |
| Operating System | iOS, Android, Windows Phone, or another operating system. |
| Order Value | Value of the purchase order. |
| Product Name | Tagged products: you can list all additional fields for the products in your app that have been implemented. |
| Push Notification Opened | Users who have opened push notifications. |
| Push Notification Enabled | Users who have push notifications enabled. |
| Source | Information about the Apptracker source to which a user is attributed if applicable. |
| Campaign | Information about the Apptracker campaign to which a user is attributed if applicable. |
| Communication | Users who have been impacted by an in-app or out-app communication (email and push). |
| TAG | Implemented user tags. |
¶ Birthday tag
If you have implemented the Birthday tag and want to target users based on their birthday, it is important to consider a few key points regarding two available operators:
-
Was on: If you have recently started using the EMMA SDK, you will not be able to use the Was on operator to target users with birthdays on a specific date. This is because if you started using the EMMA SDK on April 15, 2016, the Was on operator will only allow you to go back to that date, as that is when data collection began. Therefore, if a user sets their birthdate as 03/03/1988, they will not be targeted using this operator.
-
Birthday is: With this operator, you can use the value 0 to target users whose birthday is on the current day. If you set a value > 0, you will target users who had their birthday X days ago (based on the value you set).
Events
| Sales | Total number of sales that have been completed. |
| First sale | User's first purchase in the app/mobile site. |
| Last sale | Last time the user made a purchase in the app/mobile site. |
| Last seen | Last time the user accessed the app. |
| Install | New users who have downloaded the app. |
| Registration | Users who have registered in the app. |
| Last Login | Last time the user logged into the app. |
| Openings | Number of times the user has accessed the app. |
| Login | Users who have logged into the app. |
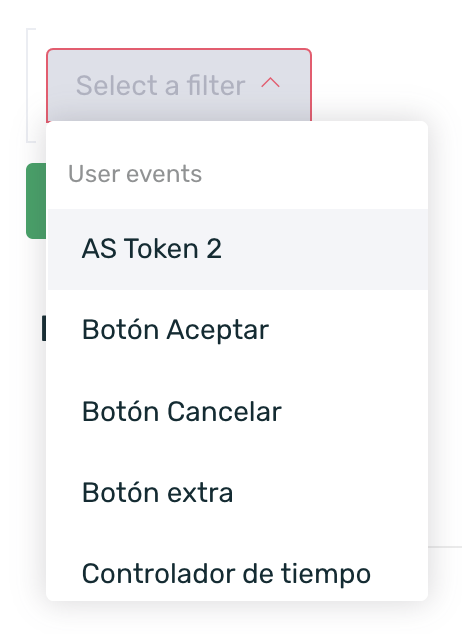
| User Events | Users with Custom or Automatic Events. Custom-integrated events in the app and automatic ones collected by our SDK will appear here. |
-
The default events will be categorized as Automatic Events.
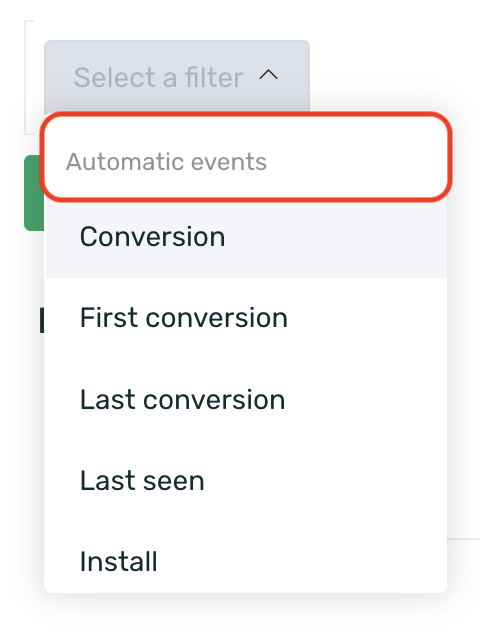
-
Custom events will be categorized as User Events.
You can find more information about default and custom events here.
¶ Available selection variants
Below is a list of the selection variants available today to perform a more specific data filtering.
¶ Info
Keep in mind that these selection variables are not all available for every filter. Each filter accepts different selection variants depending on the type of information being filtered.
| Equal to | The event/tag is equal to X value/information. |
| Different from | The event/tag is not equal to X value/information. |
| Contains | The information contains the word, character, or set of searched characters. This operator is only available for user tags. |
| Does exist | The event/tag is selected, marked, or covered. |
| Does not exist | The event/tag is not selected, marked, or covered. |
| Greater than | The information is greater than X value. |
| Minor than | The information is less than X value. |
| More than | The event has been performed more than X times. |
| Less than | The event has been performed less than X times. |
| Was made | The event has been performed. |
| Was not made | The event has not been performed. |
| Was on | The event has been performed on a specific date. |
| Was not on | The event has not been performed on a specific date. |
| Was ago | The event has been performed exactly X time ago. |
| Was not ago | The event has not been performed exactly X time ago. |
| Was more than | The event has been performed more than X days ago. |
| Was not more than | The event has not been performed more than X days ago, has never been performed, or was performed in another period. |
| Was less than | The event has been performed less than X days ago. |
| Was not less than | The event has not been performed less than X days ago, has never been performed, or was performed in another period. |
| With property | This operator will return all attributes linked to the queried event. This operator is only available for custom events and session/login events. |
| Sent | Outapp: Users who have been sent a push notification or email. Inapp: Users who have been impacted by a communication (at least one impression). |
| Not Sent | Outapp: Users who have not been sent a push notification or email. Inapp: Users who have not been impacted by a communication. |
| Clicked | Outapp: Users who have opened the push notification or email. Inapp: Users who have clicked within the in-app communication. (For strips, this does not apply as it is the only non-interactive in-app format). |
| Not Clicked | Outapp: Users who have not opened the push notification or email. Inapp: Users who have not clicked within the in-app communication. |
¶ Filter from a CSV
EMMA gives you the opportunity to cross-reference your CSV files with our database.
To do this, you must select one of the user tags (Tags) that your app is sending us or attributes.
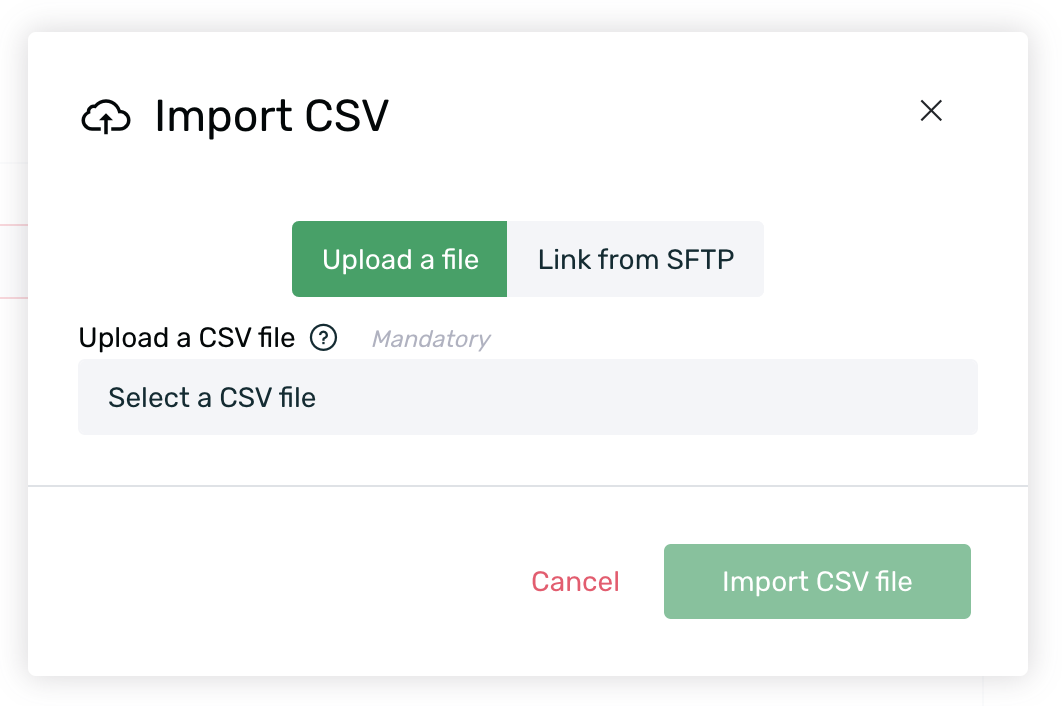
If you want to upload a file, you can do so by clicking on the cloud button that appears to the right of the filter.

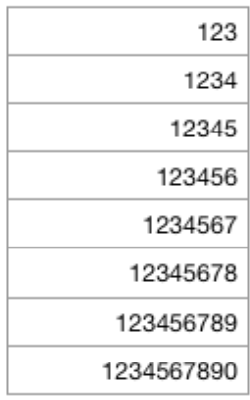
Keep in mind that it must be a CSV file with all values in a single column, without blank spaces, and without the TAG name in the header.
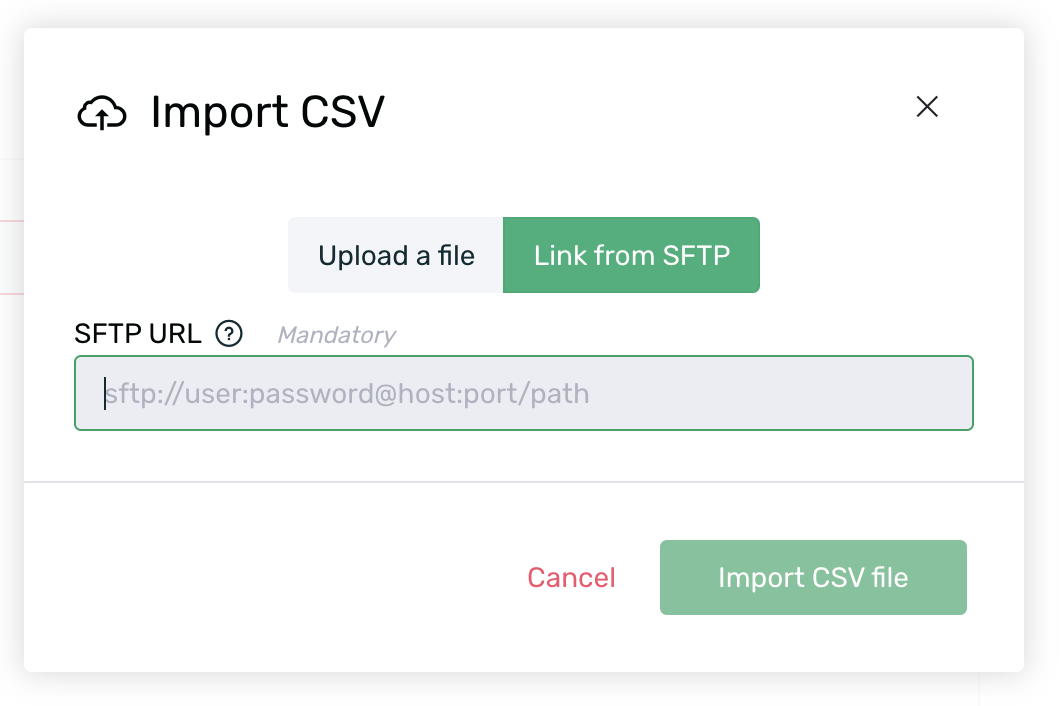
You have two options: manually upload the .CSV to EMMA or, if you prefer, EMMA can check a path from an FTP server whenever needed. Remember to always include the username and password for the path.
¶ Event counter
All the data you will consult in the Explorer will depend on the main KPI you select. The options will be broken down when you select the dropdown in the event counter section (bottom of the screen where the graph is displayed).
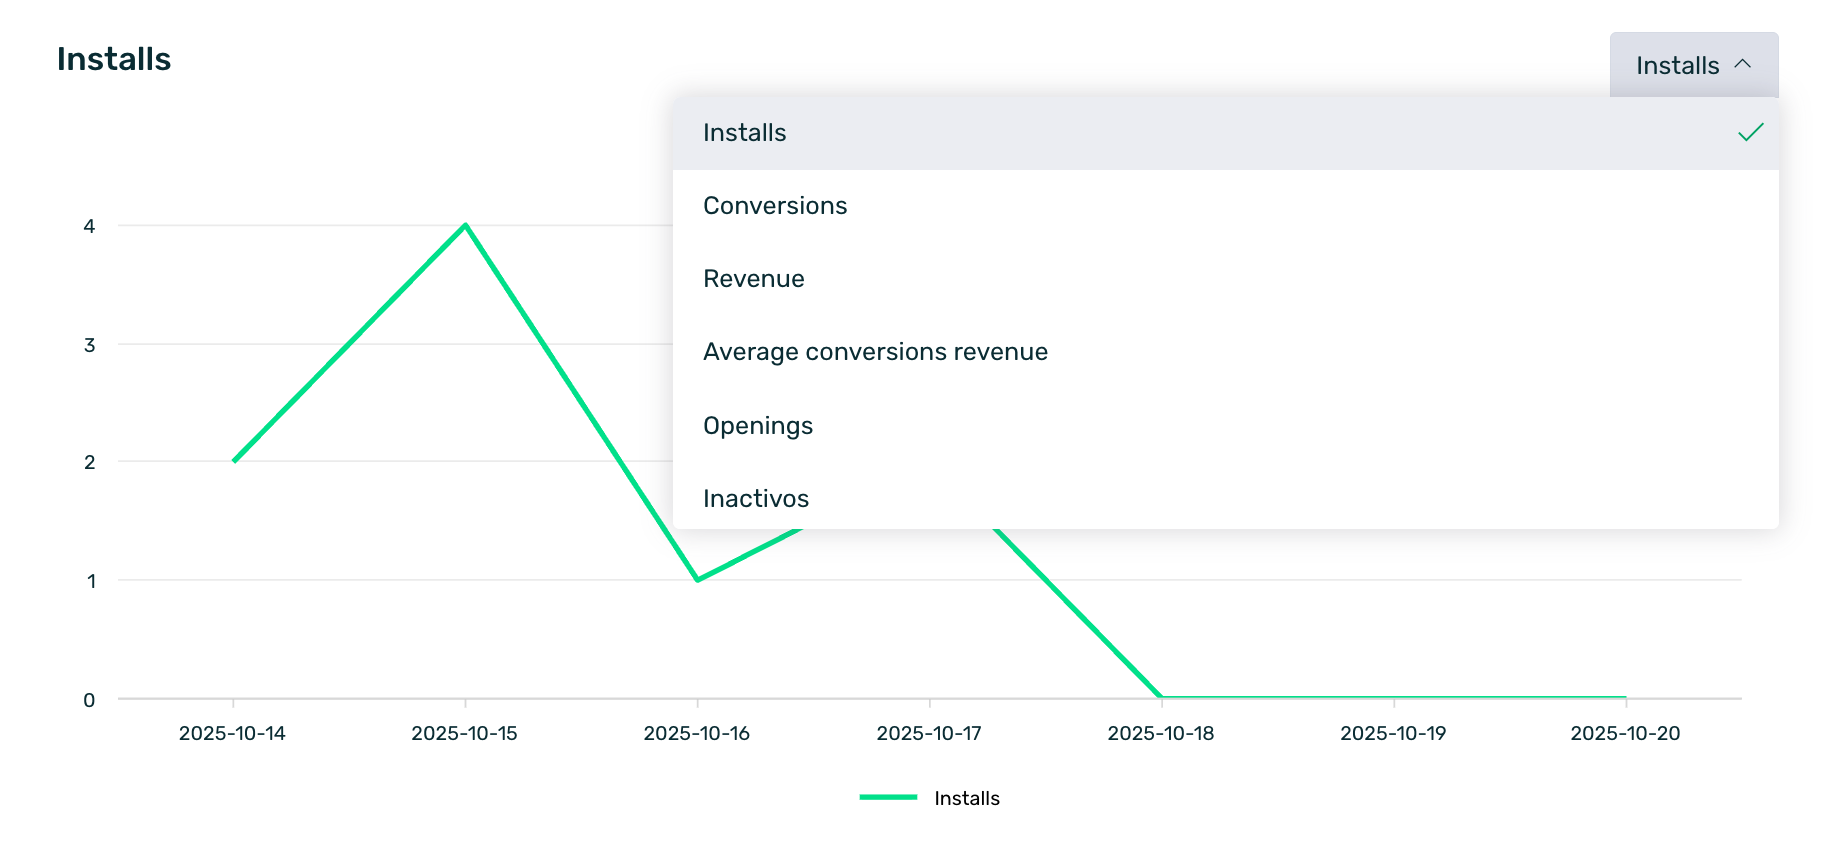
Available KPIs for the event counter:
| Users | Users (new installs). |
| Sales | Query to find the total number of sales completed through the app. |
| Revenue | Query to find the total revenue generated from sales. |
| Average Purchase Revenue | Average value of transaction orders. |
| Openings | Query to find the number of app openings. |
| Registrations | Query to find the number of app registrations. |
| First Login | Query to find the number of ‘first logins’. |
| Logins | Query to find the number of logins in the app. |
| EVENTS | Query for each of the custom events implemented in the app. |
If we have a main filter/segment created, it will affect the event query in this event counter section.
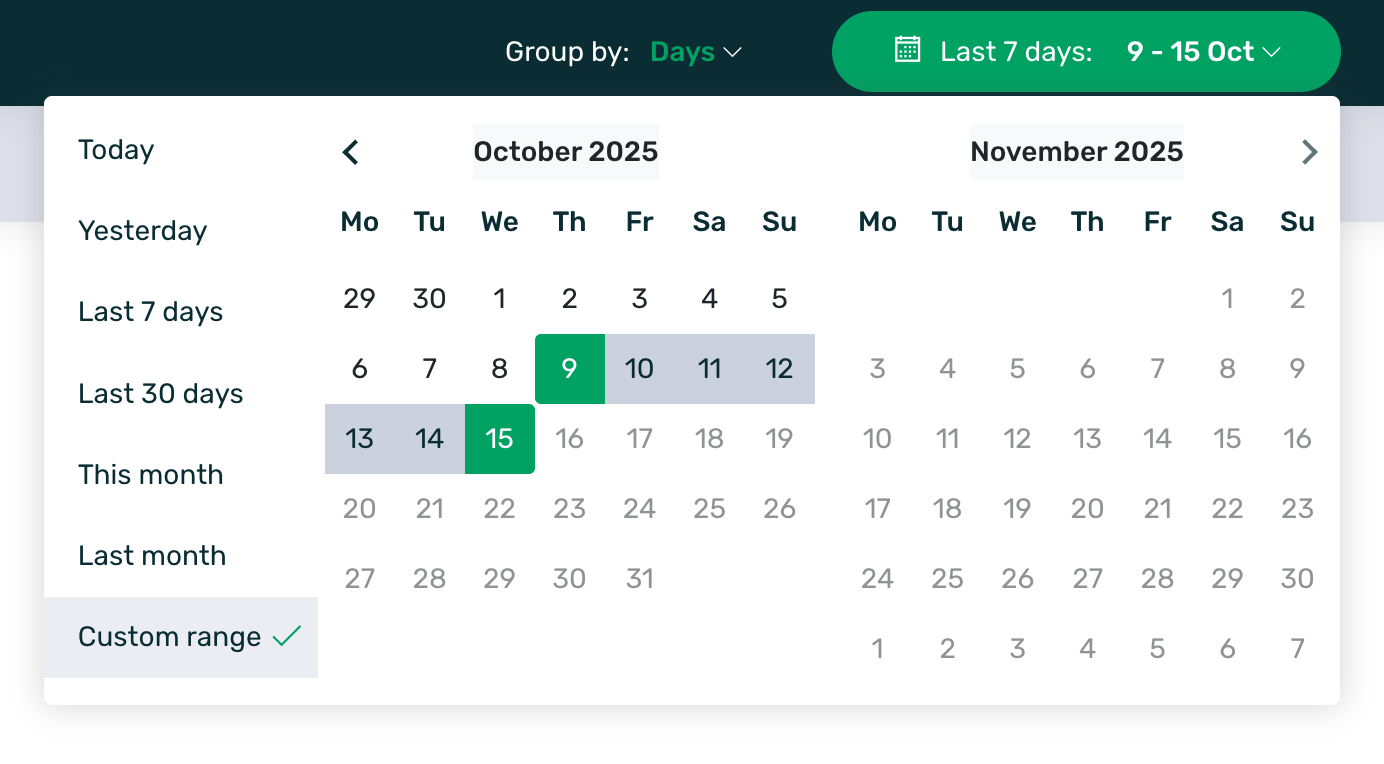
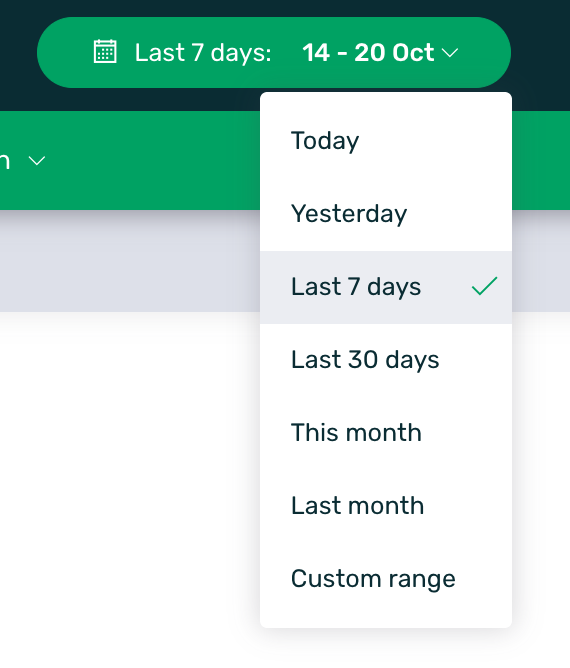
Additionally, the event counter is affected by the date filters selected in the main menu bar.
¶ Save segments
You can save the selected filters if you use them frequently, allowing you to access them quickly and easily whenever you want.
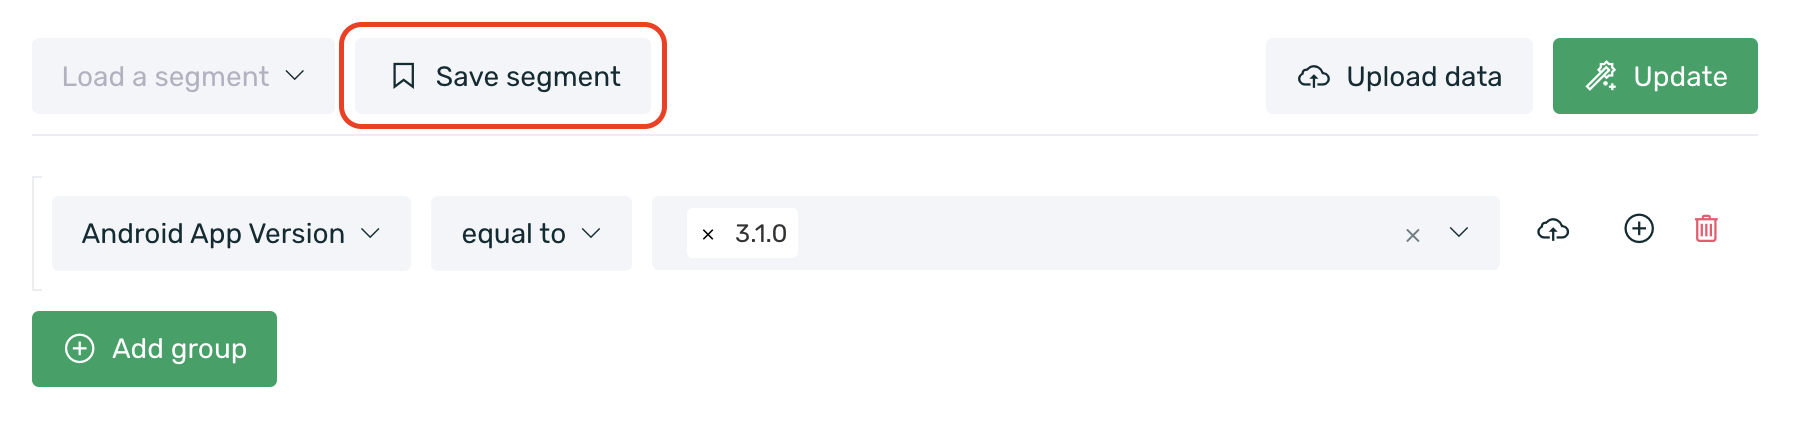
Once you have selected the filters you want to consult, click the Save Segment button in the upper left corner.
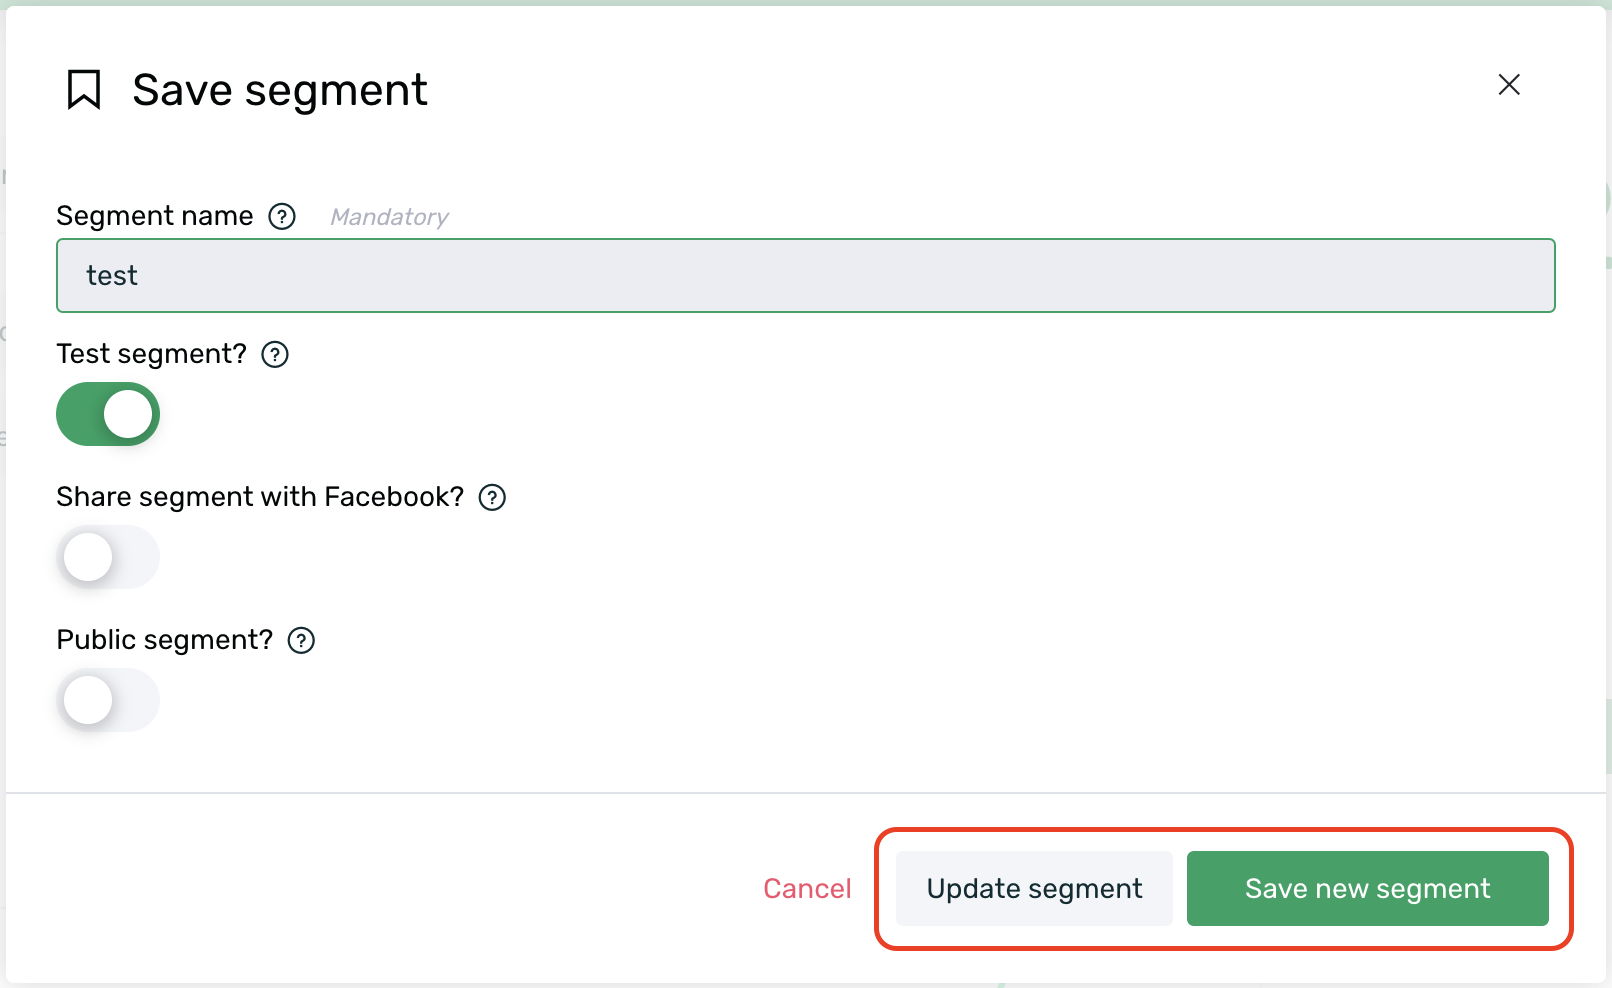
When saving the segment, the first thing you need to do is enter a name to identify it later.
If you want your segment to be visible to all users with access to your app, you must enable the "Public Segment?" checkbox.
Activate the Test Segment option if you want a user with the "Author" role to test their communication campaigns (learn more about different roles here).
If the segment is to be shared with Facebook, enable the "Share segment with Facebook?" checkbox. More info on how to share audiences with Facebook here.
Finally, just save your segment by clicking the Save New Segment button to access it later.

Once you have created the segment, if you want to modify it, simply load it (Load a segment), make the necessary changes, and click Save segment.
Now, you have two options to save your segment:
- Update segment: This option overwrites the previously created segment with the new configuration.
- Save new segment: This option allows you to save the modified segment as a new one, keeping both the original and the updated version.
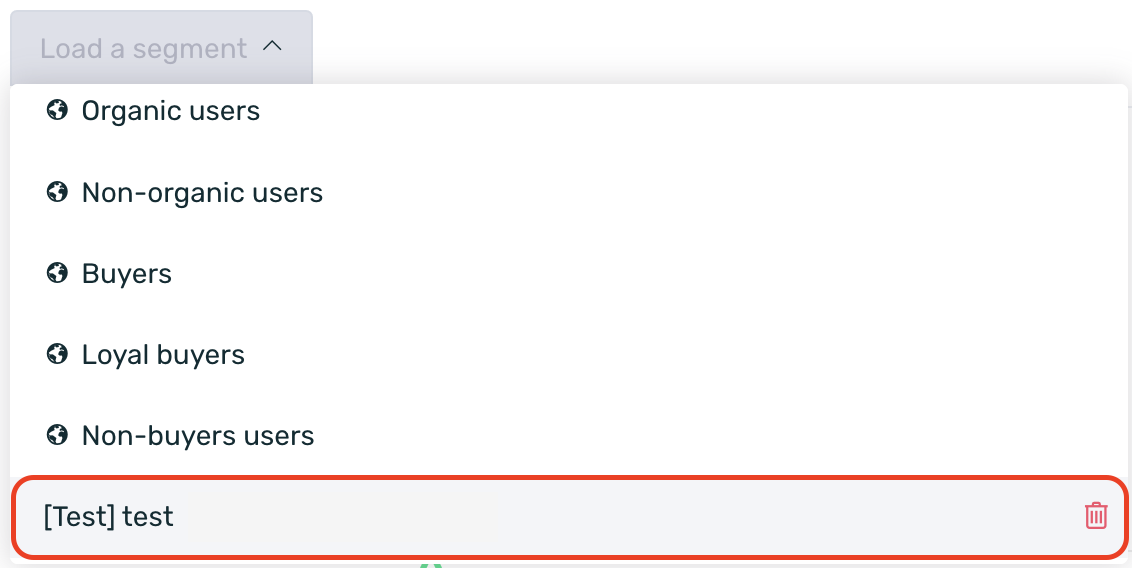
Your segment will be saved within the Load a segment option.
Your segment will be saved within the Load a segment option.
Once the menu with all the saved segments is displayed, you can quickly and easily access the desired segment using the search bar.
¶ Pre-saved segments
In addition to the filters you have saved yourself, as we mentioned in the previous point, EMMA provides you with predefined segments that you can find in the Load a segment option.
The pre-saved segments include:
| A Users | Users who have logged in within the last month and made more than one purchase. |
| A+ Users | Users who have logged in within the last month, signed in more than four times, and made more than one purchase. |
| Active for push | Users who have enabled push notifications. |
| Active Users | Users who have logged into the app within the last month. |
| Inactive Users | Users who have not logged into the app for more than a month. |
| Installs (new users) | New users who have downloaded the app. |
| Leads | Users who have registered in the app. |
| Register Offline | Users who registered through an external form but have logged into the app. |
| Non-Register Users | Users who have not registered or logged into the app. |
| Loyal Users* | Users who have logged into the app more than four times. |
| *Organic Users | Organic users who did not come from any campaign. |
| Non-organic users* | Users who came from a campaign. |
| Buyers | Users who have made one or more purchases. |
| Loyal Buyers | Users who have made two or more purchases. |
| Non-buyers users | Users who have not made any purchases. |
¶ Retargeting Actions
From the Behavior > People section, you can review actions from retargeting sources, such as identifying the devices that have performed a specific event attributed to a retargeting source within a selected date range. You can also track devices that have clicked or engaged with different retargeting sources.
¶ Identifying devices that have clicked or engaged
To obtain information about users who have clicked or engaged with a retargeting source, follow these steps:
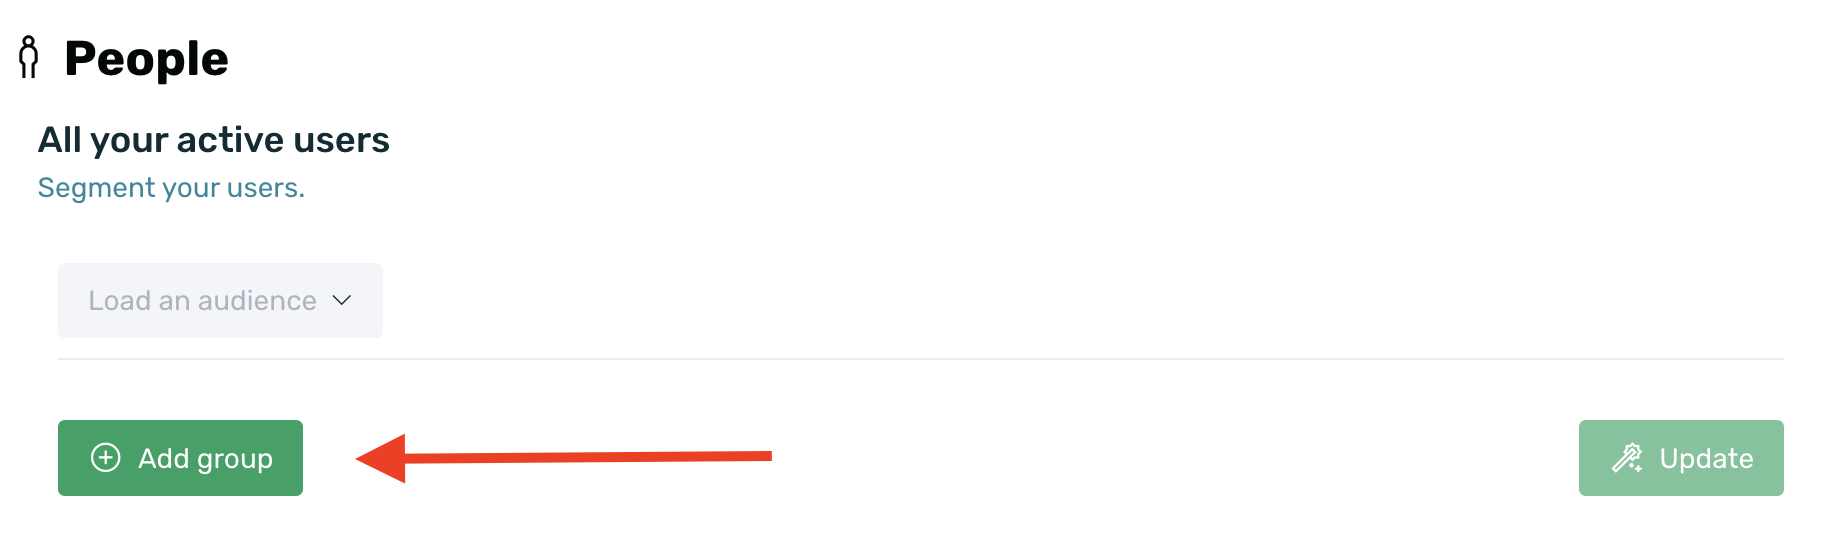
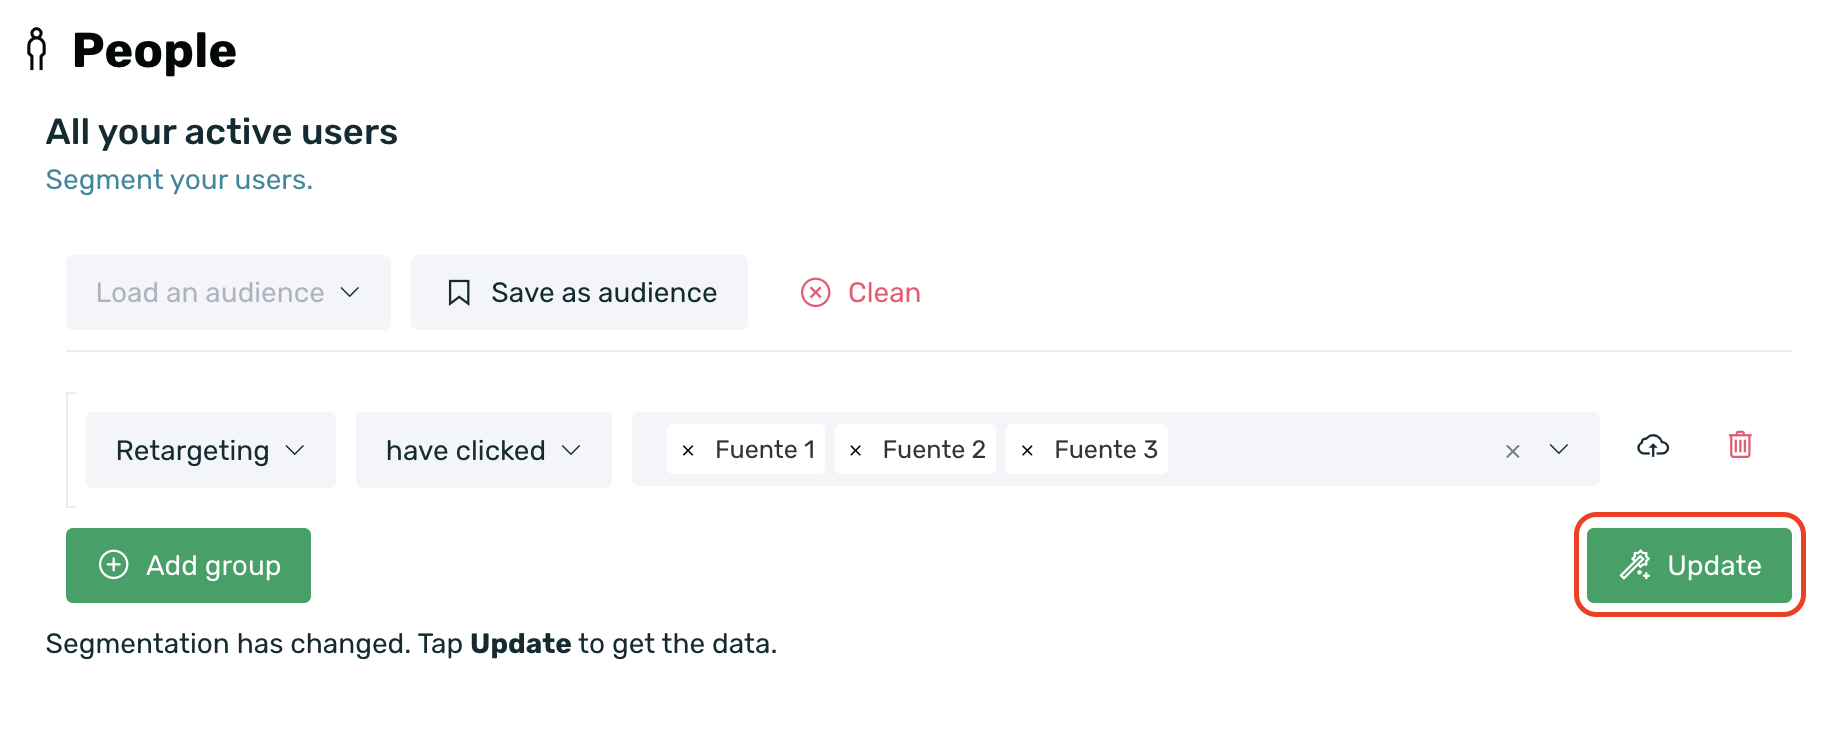
- Click the green "+ Add Group" button to add a new filtering criterion.
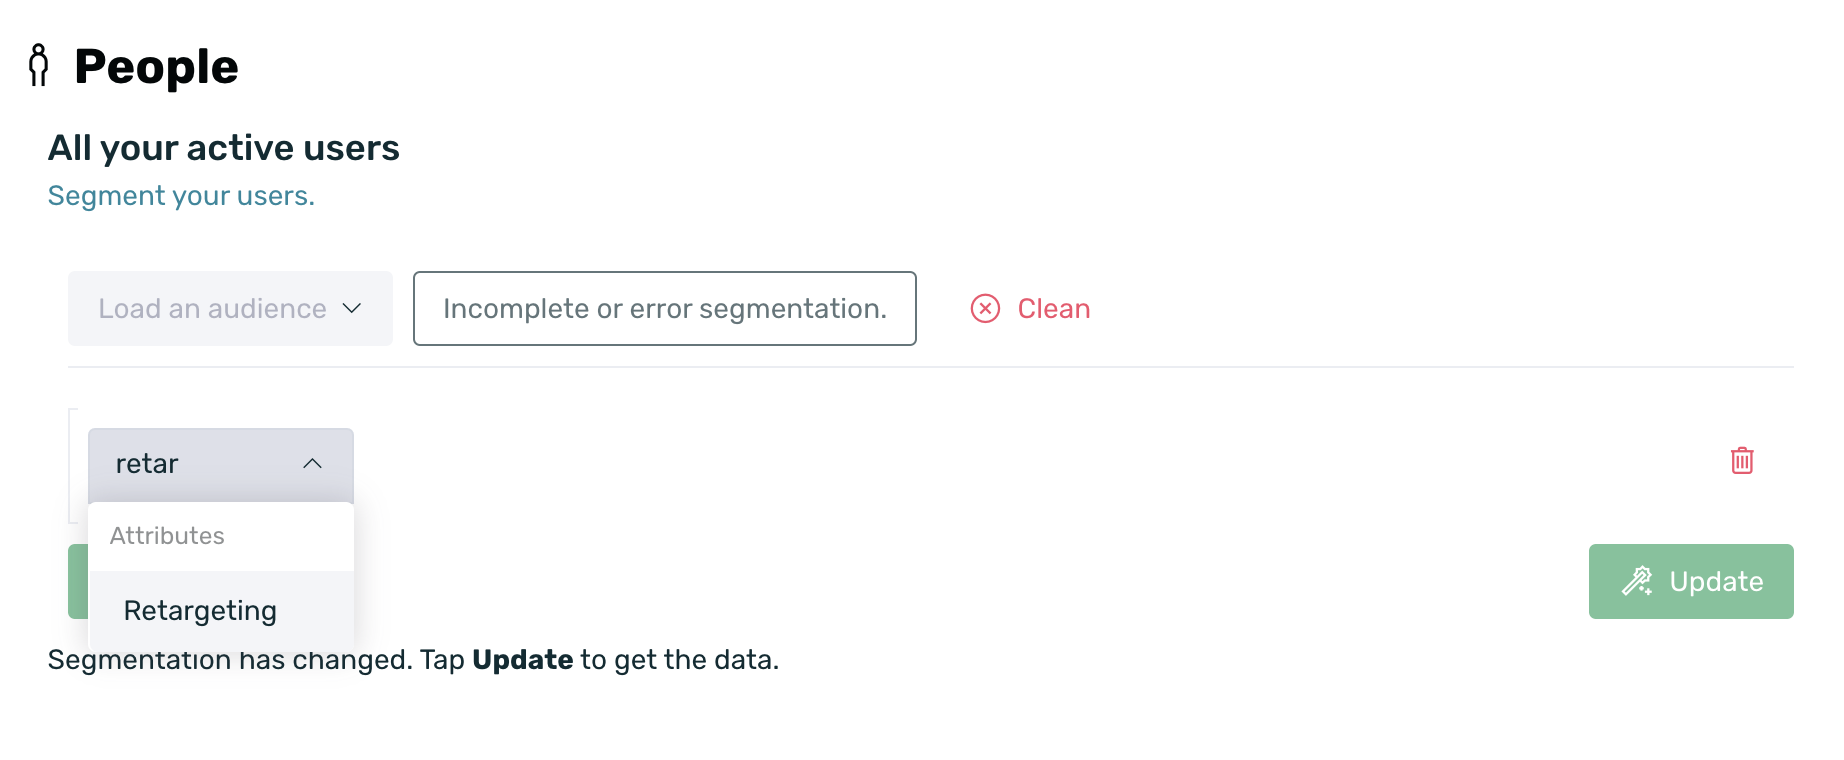
- In the selector, search for the Retargeting option.
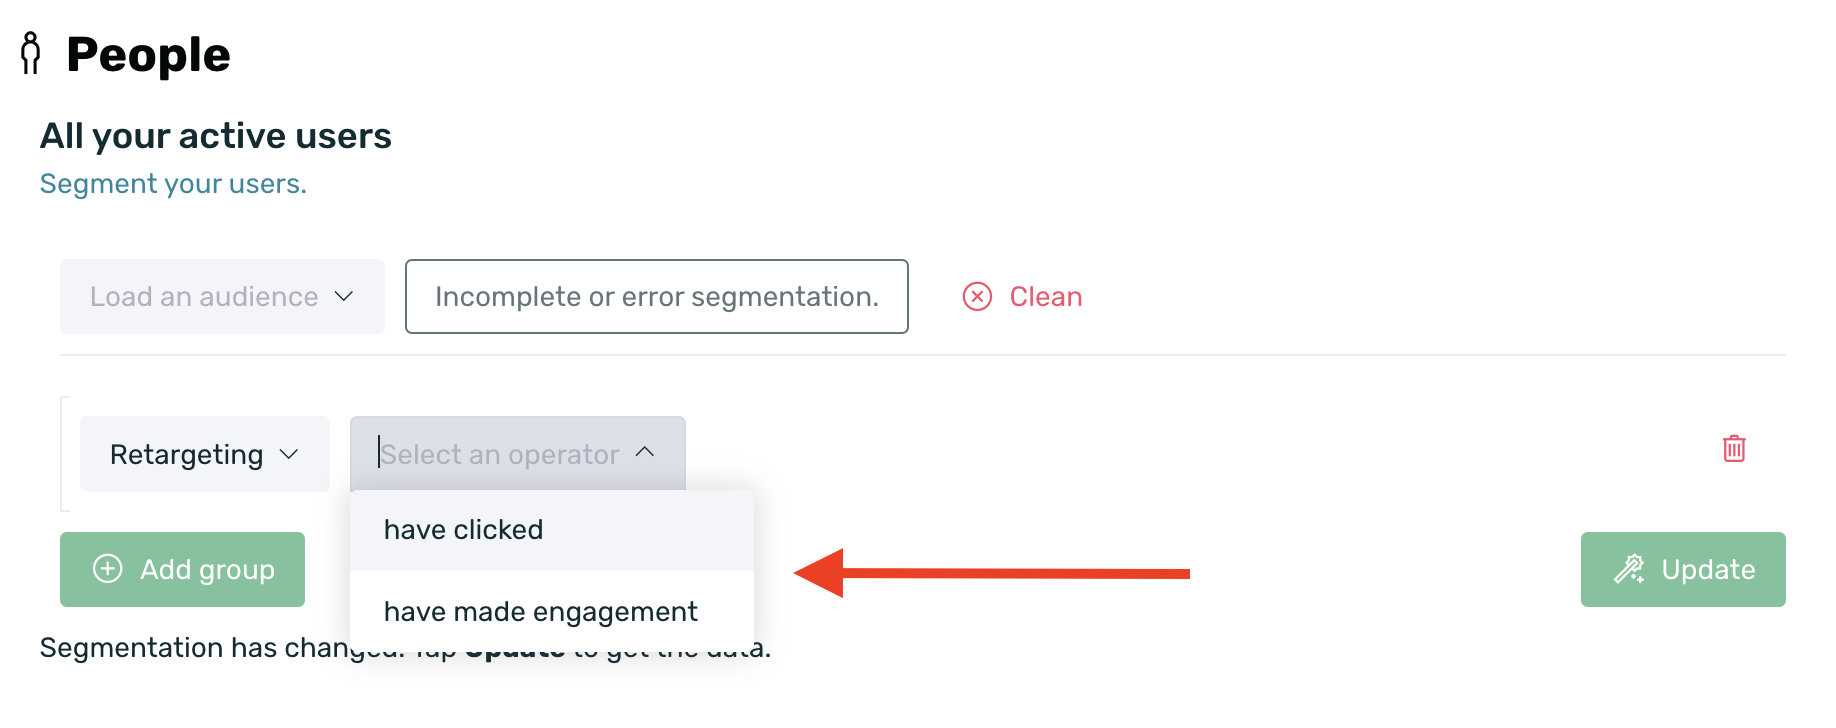
- Once selected, choose between the operators have clicked or have engaged, depending on the information you want to obtain.
- Select the retargeting campaign(s) from which you want to obtain the data.
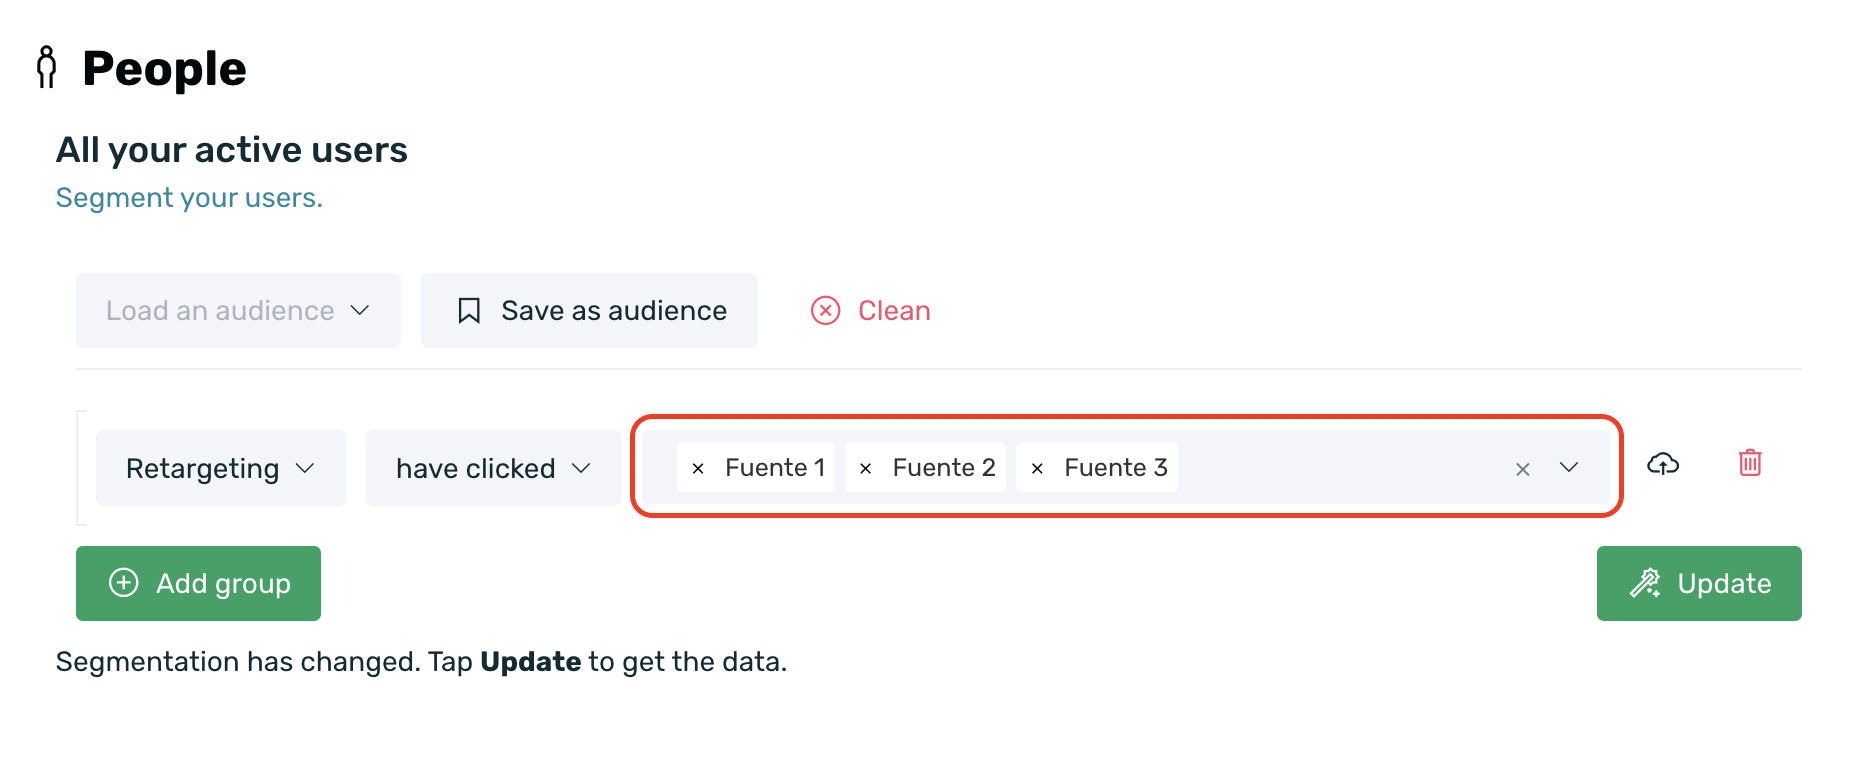
- Finally, click the Update button to get the results of your query.
It is not possible to know the devices that have clicked on a self-attributed retargeting source such as Google or Facebook, as the click information is not linked to users. These platforms only allow us to retrieve information about the total volume of clicks made.
¶ Identify devices that have performed a retargeting-attributed event
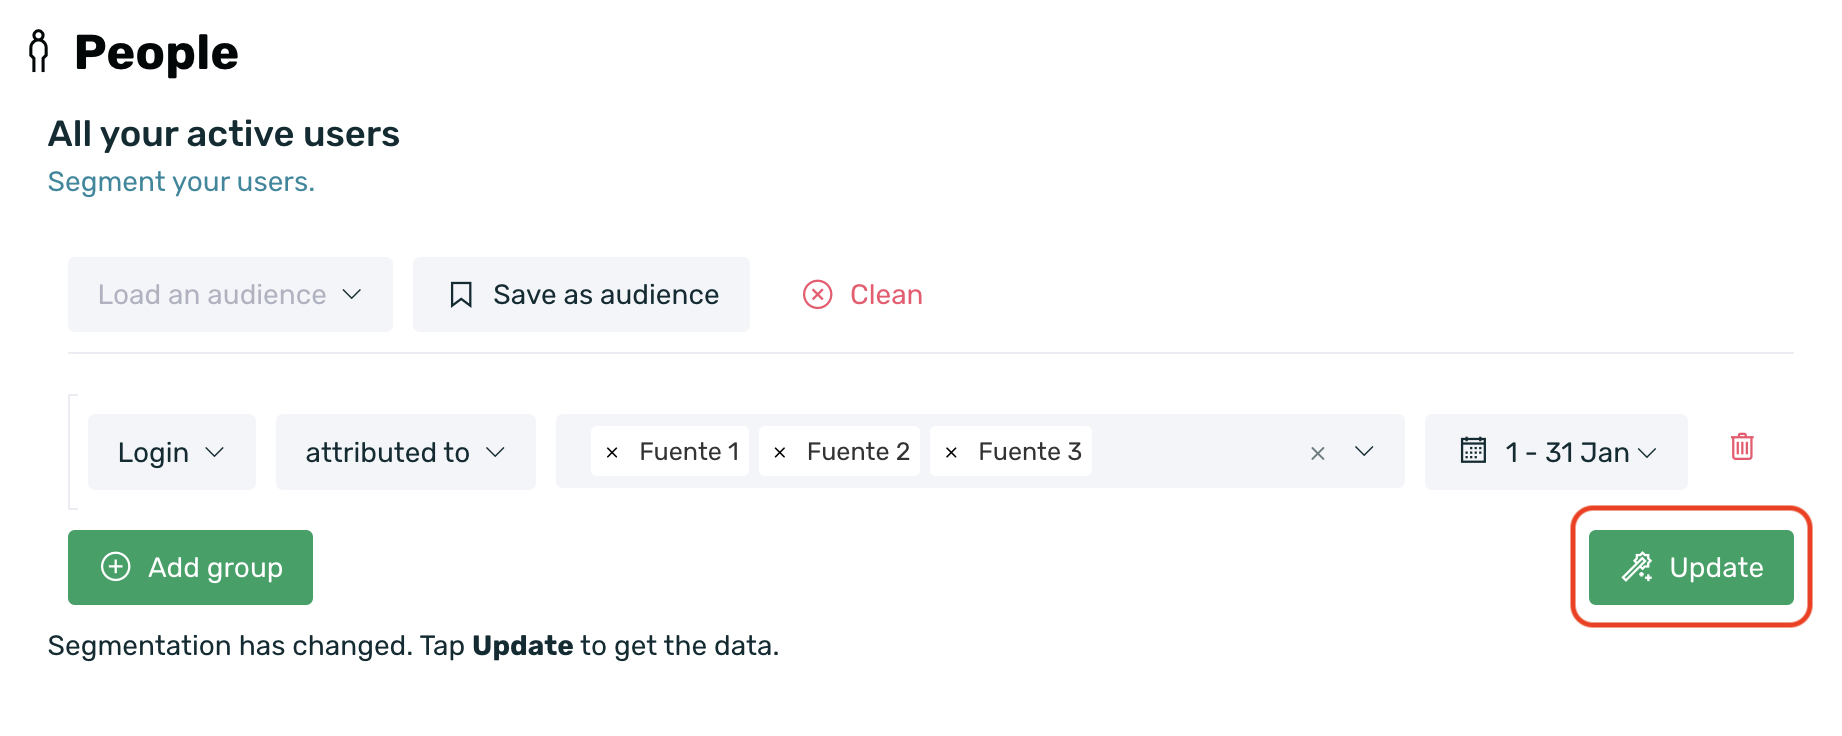
To locate devices that have carried out one or more events attributed to a retargeting campaign, follow these steps:
- Click on the green "+ Add Group" button to add a new filtering criterion.
- Select the desired event.
- Select the new operator attributed to.
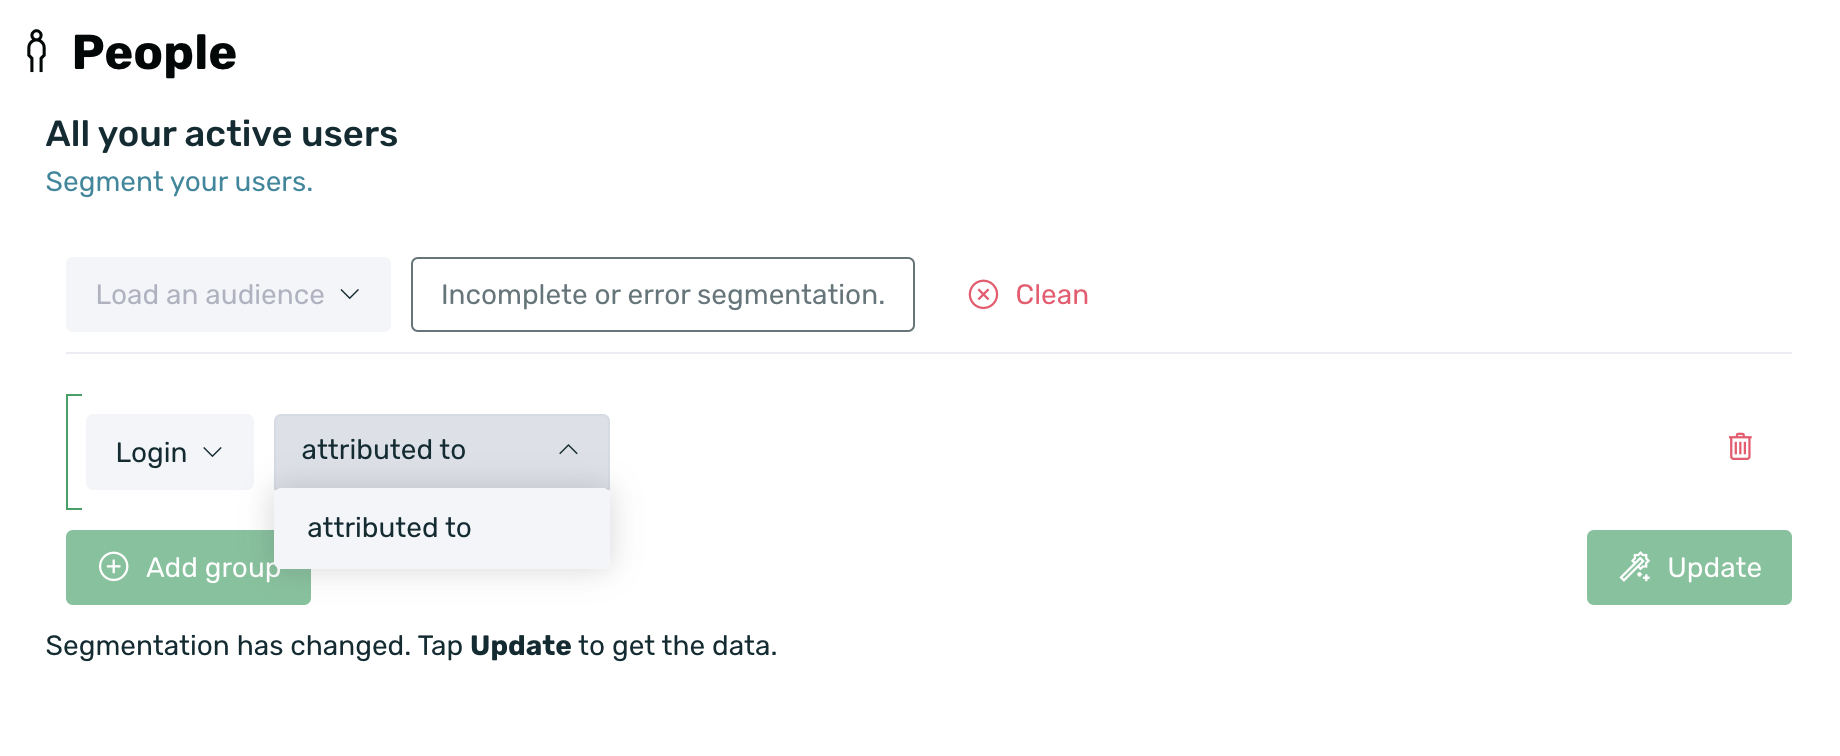
- Select the retargeting source(s) from which you want to retrieve the information.
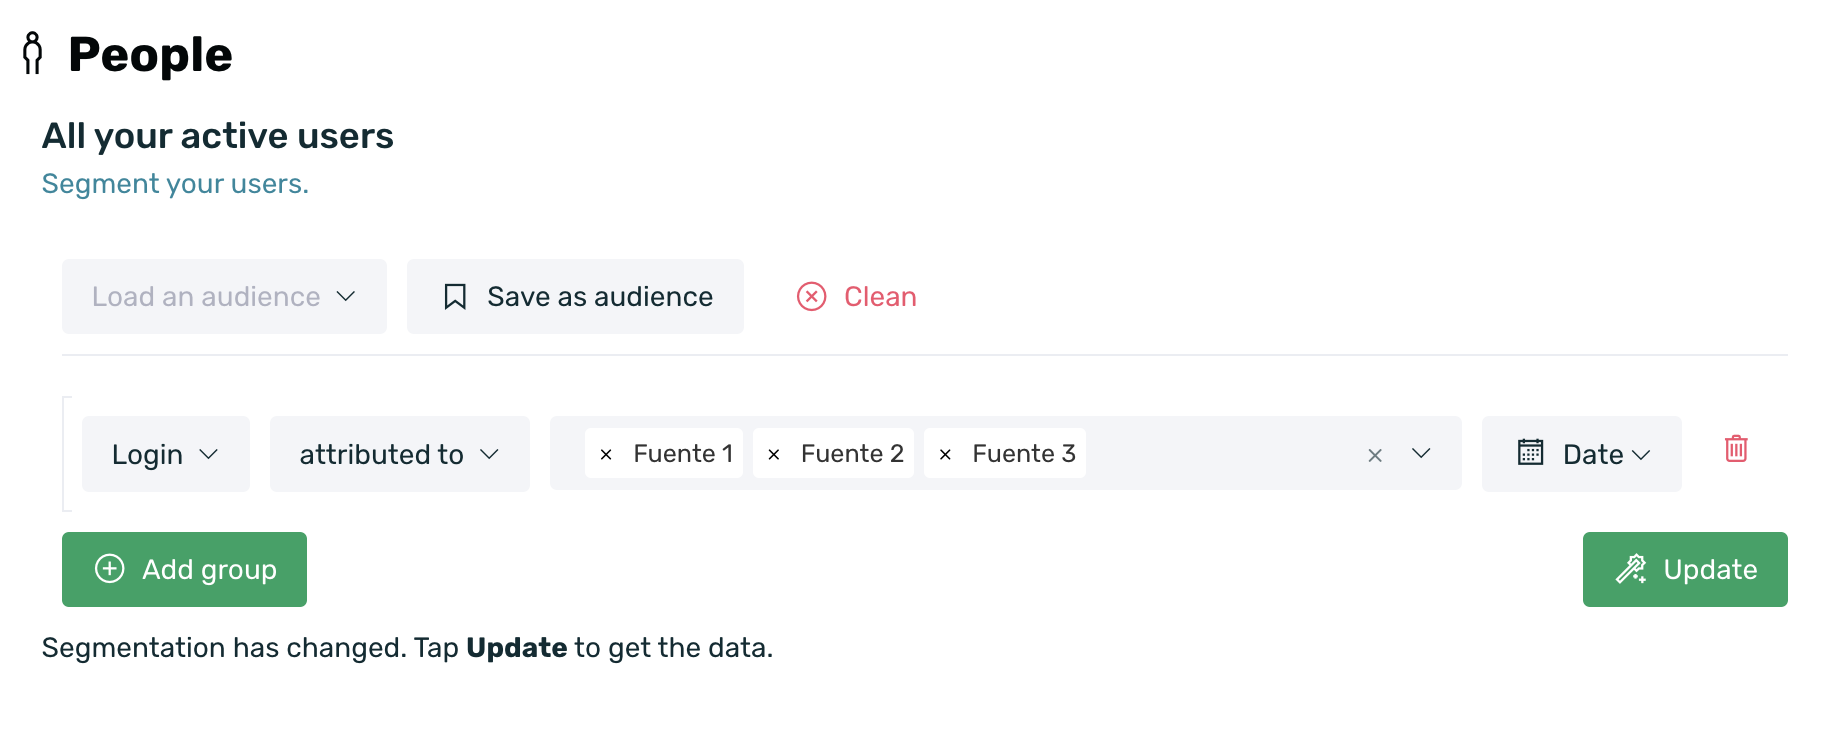
- Select the date range from which you want to retrieve the information.
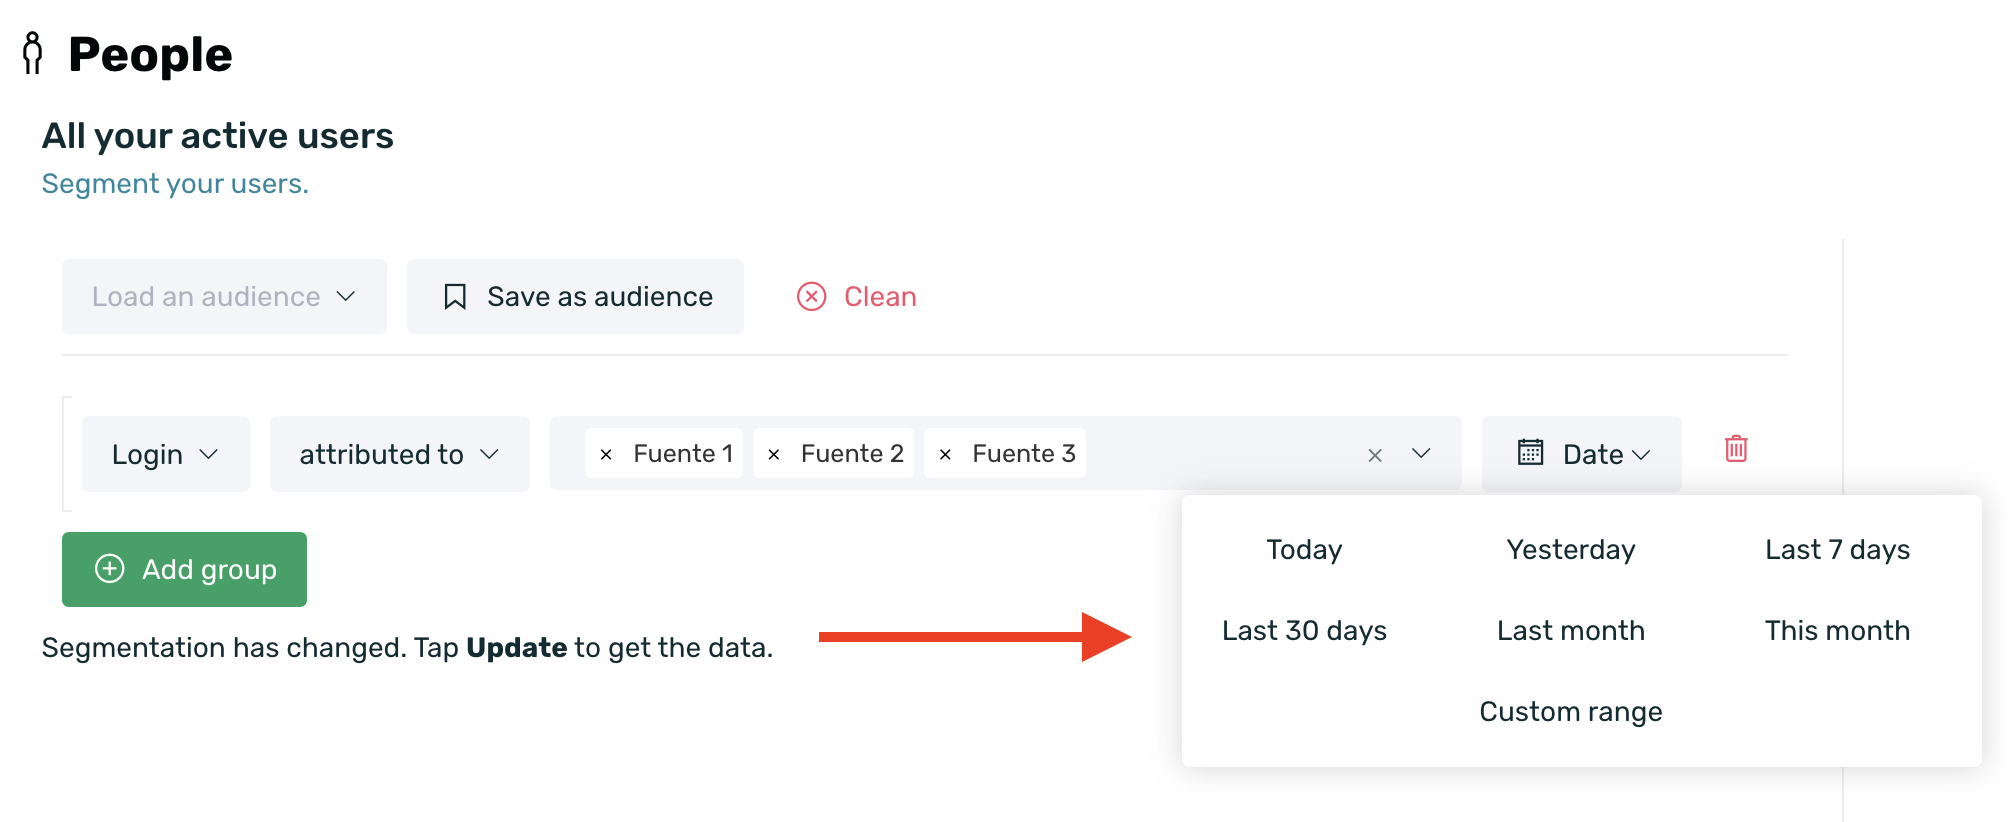
- Click the Update button.
Keep in mind that the data reported by AppTracker and the data reported by People do not have to match, as AppTracker displays the total events performed within a date range, while People returns the unique devices that have performed a specific event within a date range.
¶ Reporting: Learn to read the results
The Explorer dashboard presents data results in three sections:
¶ Devices that meet the filtering criteria
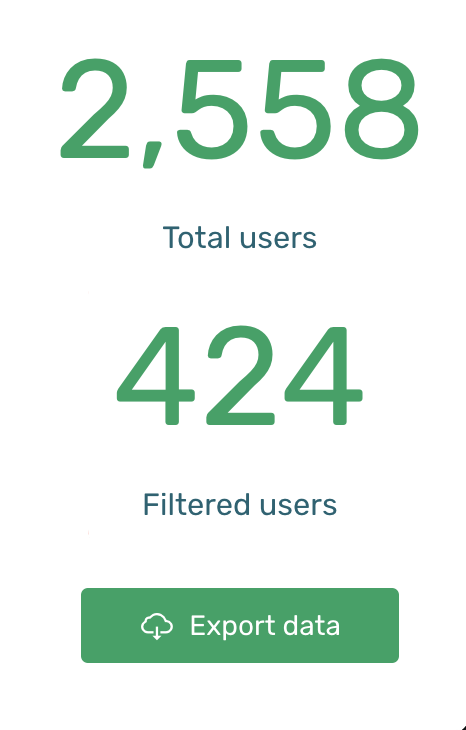
The first section includes the initial box, where the total number of devices in the database that meet the selected filter is displayed.
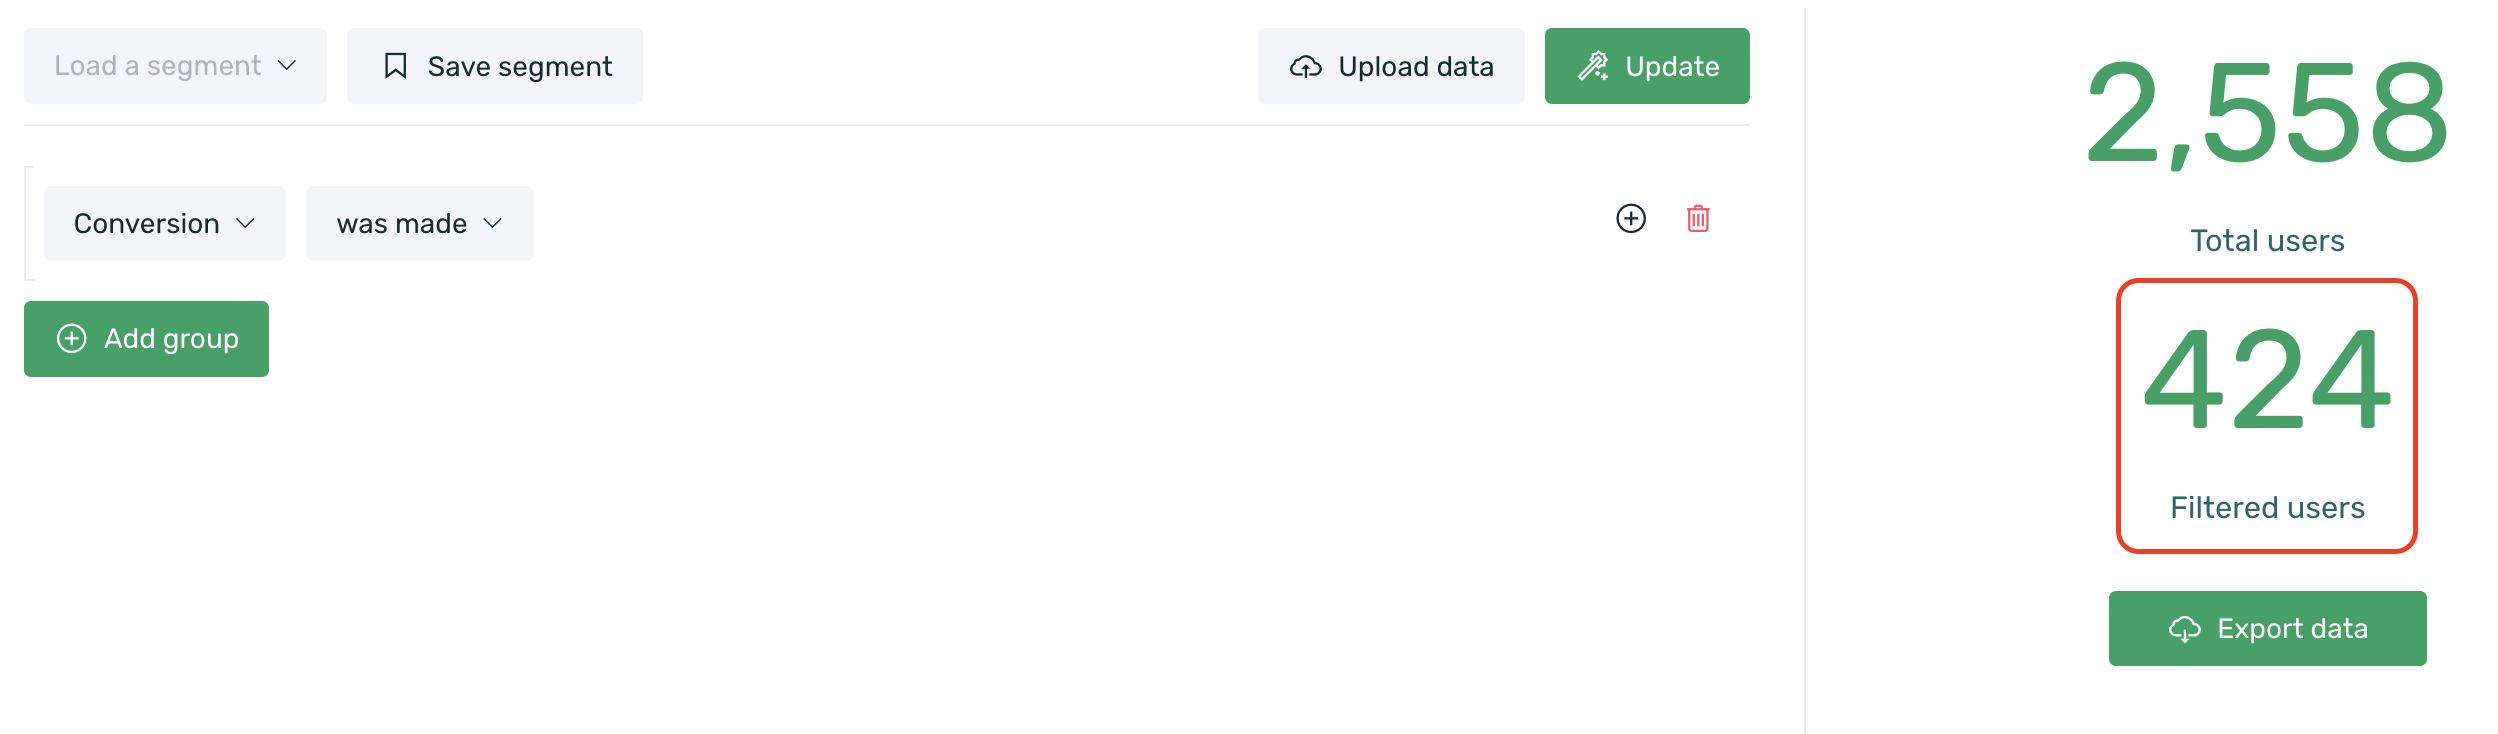
- 2,558 Total Users: Displays the total number of devices in the database, regardless of the applied filter.
- 424 Filtered Users: Shows the total number of users in the database who meet the selected filter conditions. In this example, we are querying users who have performed the sale event.
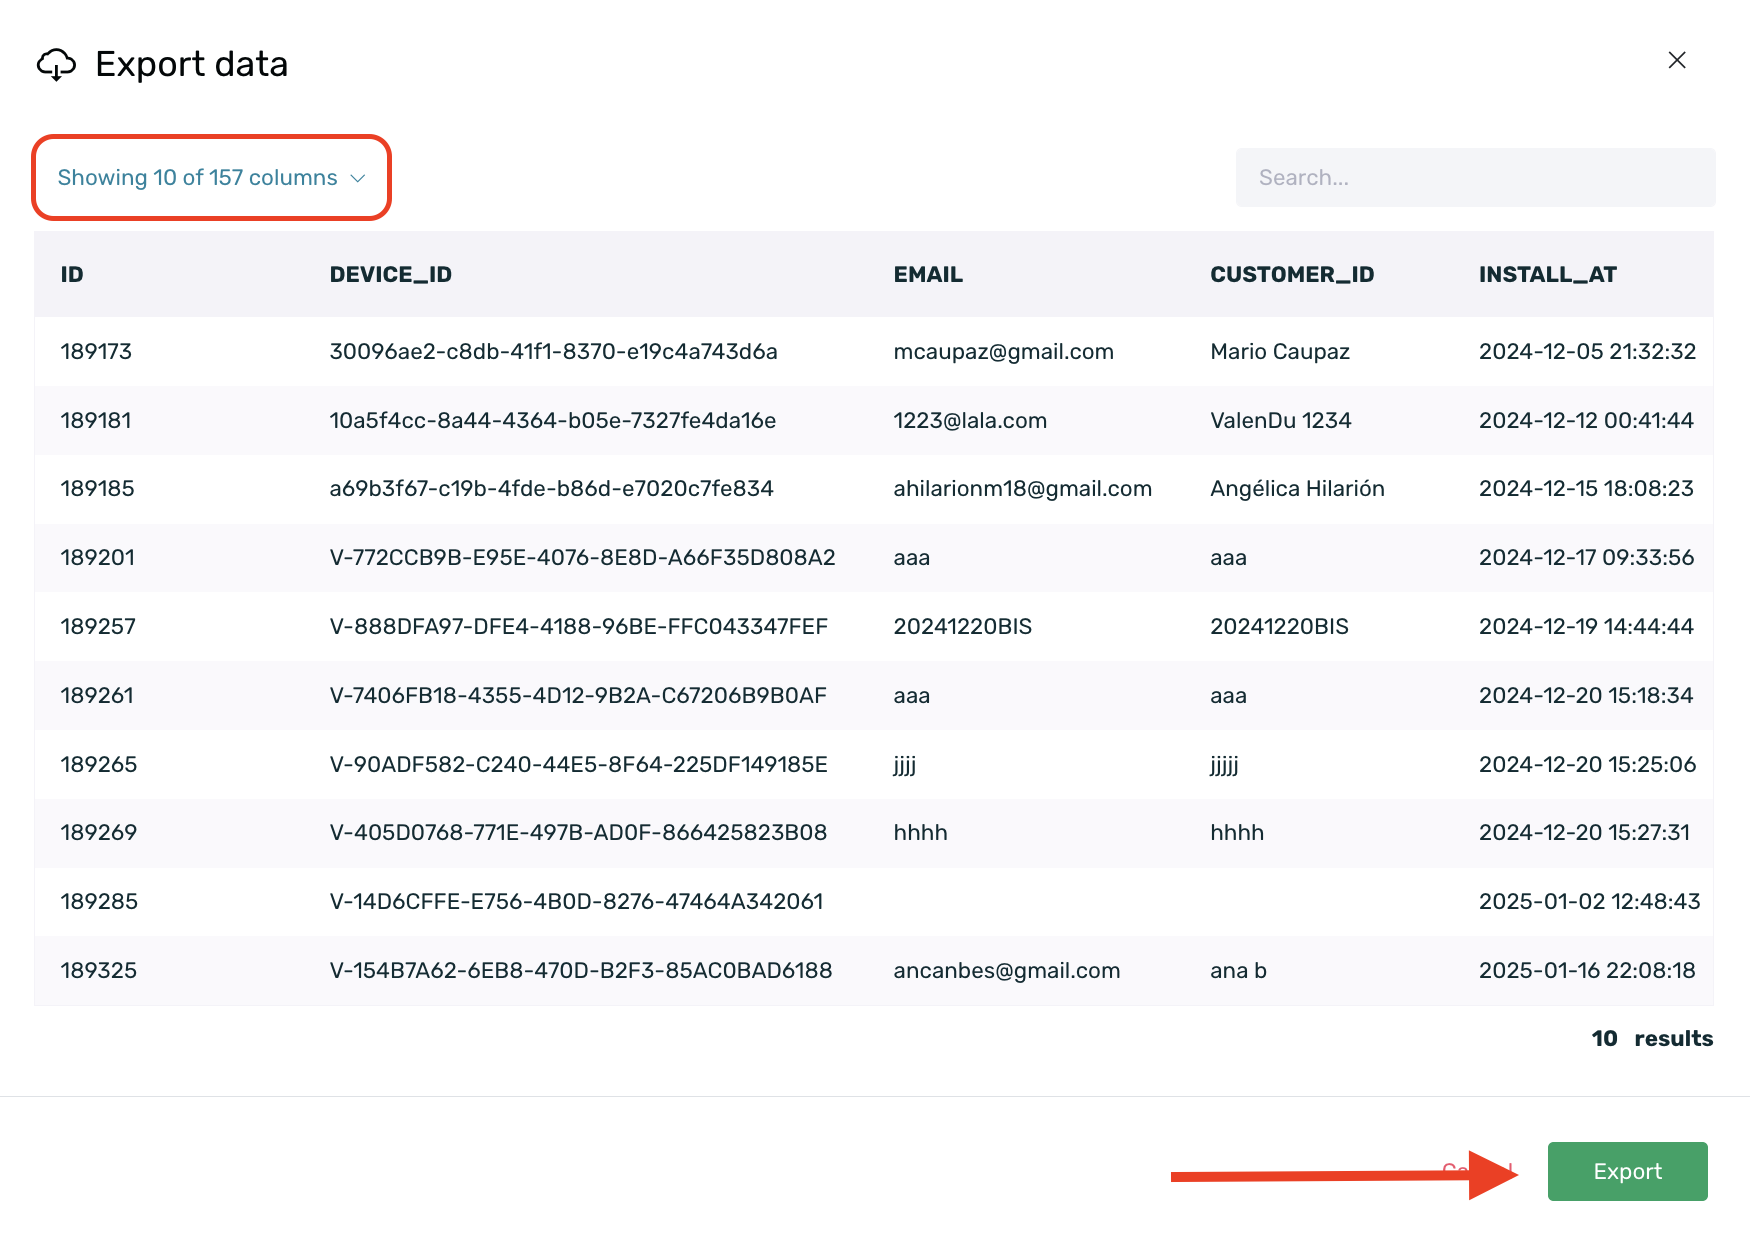
You can export the unique filtered devices by selecting the box labeled "Raw Export" just below the number of filtered users.
A preview of the available information will be displayed on your screen, allowing you to customize the columns you want to include in the report. There is also an Export button that generates a CSV file. Click here to learn more about the details this reporting can provide.
¶ Event counter
The event counter reporting displays the results in a timeline that can be broken down daily, weekly, or monthly. The KPI displayed will be the one selected in the event counter selector.
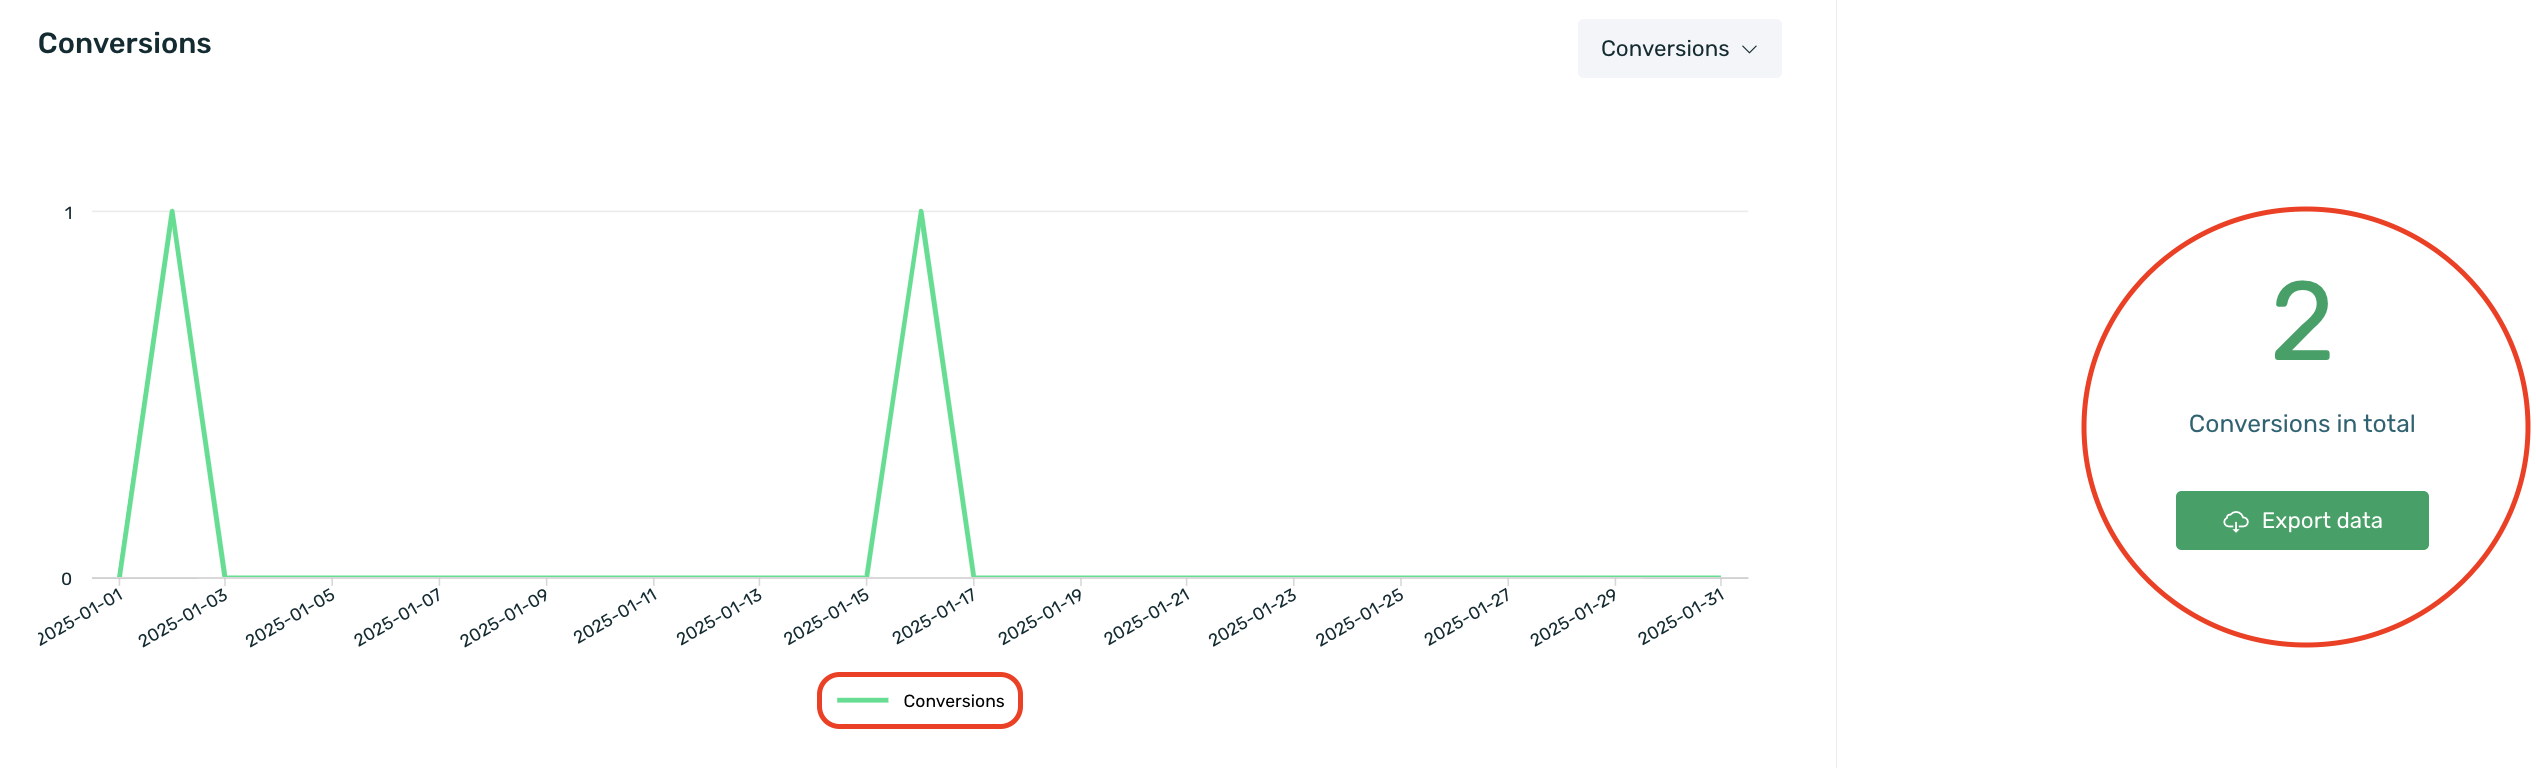
- 2 Total Events: Total KPI events that meet the selected filter during the specified time period.
To export the data based on the selected time period, click Export Data. This will download a CSV file containing data from the date range selected at the top of the menu, grouped by days, weeks, or months, as chosen in the main menu.
¶ Accumulated data
The third and final option is a table located below the graph. This table allows you to review the accumulated data for the selected KPI and compare it by days, weeks, or months.
By day: Compares the accumulated value of the current day with the three equivalent days from the previous three weeks:

By week: Compares the accumulated value of the current week with the previous three weeks:

By month: Compares the accumulated value of the current month with the previous three months:

¶ Export your data
Raw Export is a type of raw reporting with all available information at your disposal. EMMA allows you to perform a Raw Export from two different sections:
In both sections, a preview of your export will be generated, allowing you to customize the columns you want to include. Click Export and open the .csv file, separating it by commas.
In the exported document, the breakdown by device will appear, and for each of them, you will obtain the following information based on the columns you have selected in the preview:
| ID | User identification number on the EMMA platform. |
| Device ID | Unique device identification number (DFA for iOS, AAID for Android). |
| Email address of the user registered in the app/website. | |
| Customer ID | Internal identification number to identify customers. |
| Install at | Date when the user opened the app for the first time after downloading it. |
| Register at | Date when the user registered for the first time. |
| First Login | The first time the user logged into the app/website. |
| Last Login | The last time the user logged into the app/website. |
| Device | Device model used to access the app/website. |
| App Version | Latest installed version of the app on the user's device. |
| OS Version | Latest version of the operating system configured on the user's device. |
| Emma Build | Version of the SDK configured in the latest app/website build. |
| Rated | Indicates whether users have rated the app/website (1 for rated, 0 for not rated). |
| Inactive | Indicates whether users are active for receiving Push communication (0 for active, 1 for inactive). |
| Latitude | Latitude coordinates of the user while using geolocation in the app/website. |
| Longitude | Longitude coordinates of the user while using geolocation in the app/website. |
| City | City where the user is located while using geolocation in the app/website. If geolocation is not used, IP-based location is applied. |
| Country | Country where the user is located while using geolocation in the app/website. If geolocation is not used, IP-based location is applied. |
| Referrer ID | Identifier of the campaign source that informs about the user’s origin. |
| From campaign | Campaign from which the user originated. |
| From source | Source of the campaign from which the user originated. |
| IP | IP address where the user connected to the app/website. |
| Loyal User at | The moment when the user becomes a loyal user (fifth login). |
| Loyal Buyer at | The moment when the user becomes a loyal buyer (after their second purchase). |
| Last Session at | Last time the user opened the app/website. |
| Sales | Number of purchases made by the user. |
| Last sale | Last time the user made a purchase in the app/website. |
| First sale | First time the user made a purchase in the app/website. |
| Seconds to first sale | Moment when the user made their first purchase after first installing the app/website. |
| Accept language | Language configured by the user. |
| Carrier | Company providing the user's mobile network service. |
| Connection type | Indicates whether the user's connection is through WiFi or 3G. |
| Install Postback | Install notification sent to the "Provider." |
| TAGs | Values assigned to the tags sent from the app if they exist. |
| Events | Counter of the number of times each device has performed any of the events sent from the app. |
¶ Import your data into EMMA
EMMA collects a wealth of information from user interactions with your app. However, there may be times when you have additional user data not gathered by the app but valuable for analysis and segmentation within the platform. For this reason, EMMA offers a data upload system that allows you to import extra information (tags) into the system via a CSV file.
¶ Important
The import of additional information can only be done for user tags (TAGs) and only users with admin or manager roles can perform the import.
To upload this extra information, simply follow these steps:
- Go to the Behavior > Explorer section. Once in the Explorer section, click on the Upload Data button.
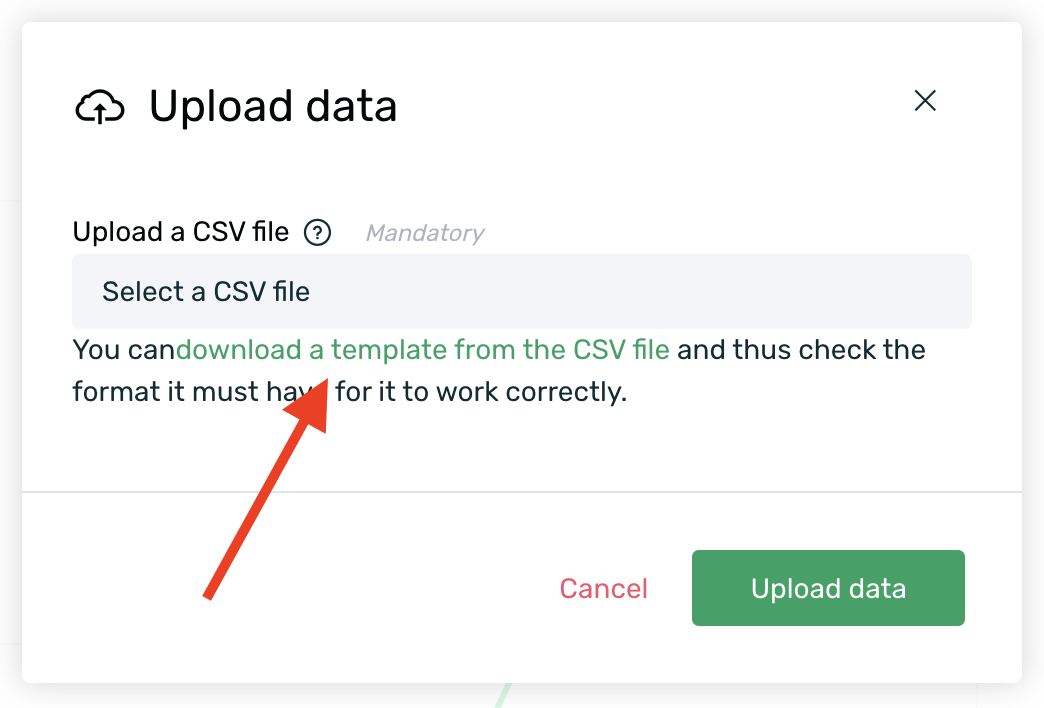
- Download the template available in the link "Download a CSV file template" and complete the table with the information you want to import.
The template is structured as follows:
| Customer ID | This is the first column and serves as the reference to match data during import. In this field, you must fill in the "CUSTOMER_ID" values for the users whose information you are importing. To successfully import this data, these customer identifiers must have been previously collected by EMMA's SDK. |
| Remaining columns | You can complete the rest of the columns with the information you want to import. Enter the TAG name in the first row of each column where you will load data. Then, fill in the corresponding values for each TAG row by row for each user. The information in these columns will be imported into EMMA, overwriting any existing values. |
¶ New TAGs
If the column name does not exist in EMMA, a new attribute or TAG will be created with the name provided in the CSV file from which the import is being made.
- Save the file in CSV format, separated by commas. It is important that the values do not have spaces between them so that the upload can be done correctly.
- Click on the input that says Select a CSV file to choose the file you want to upload, then click the Upload data button.

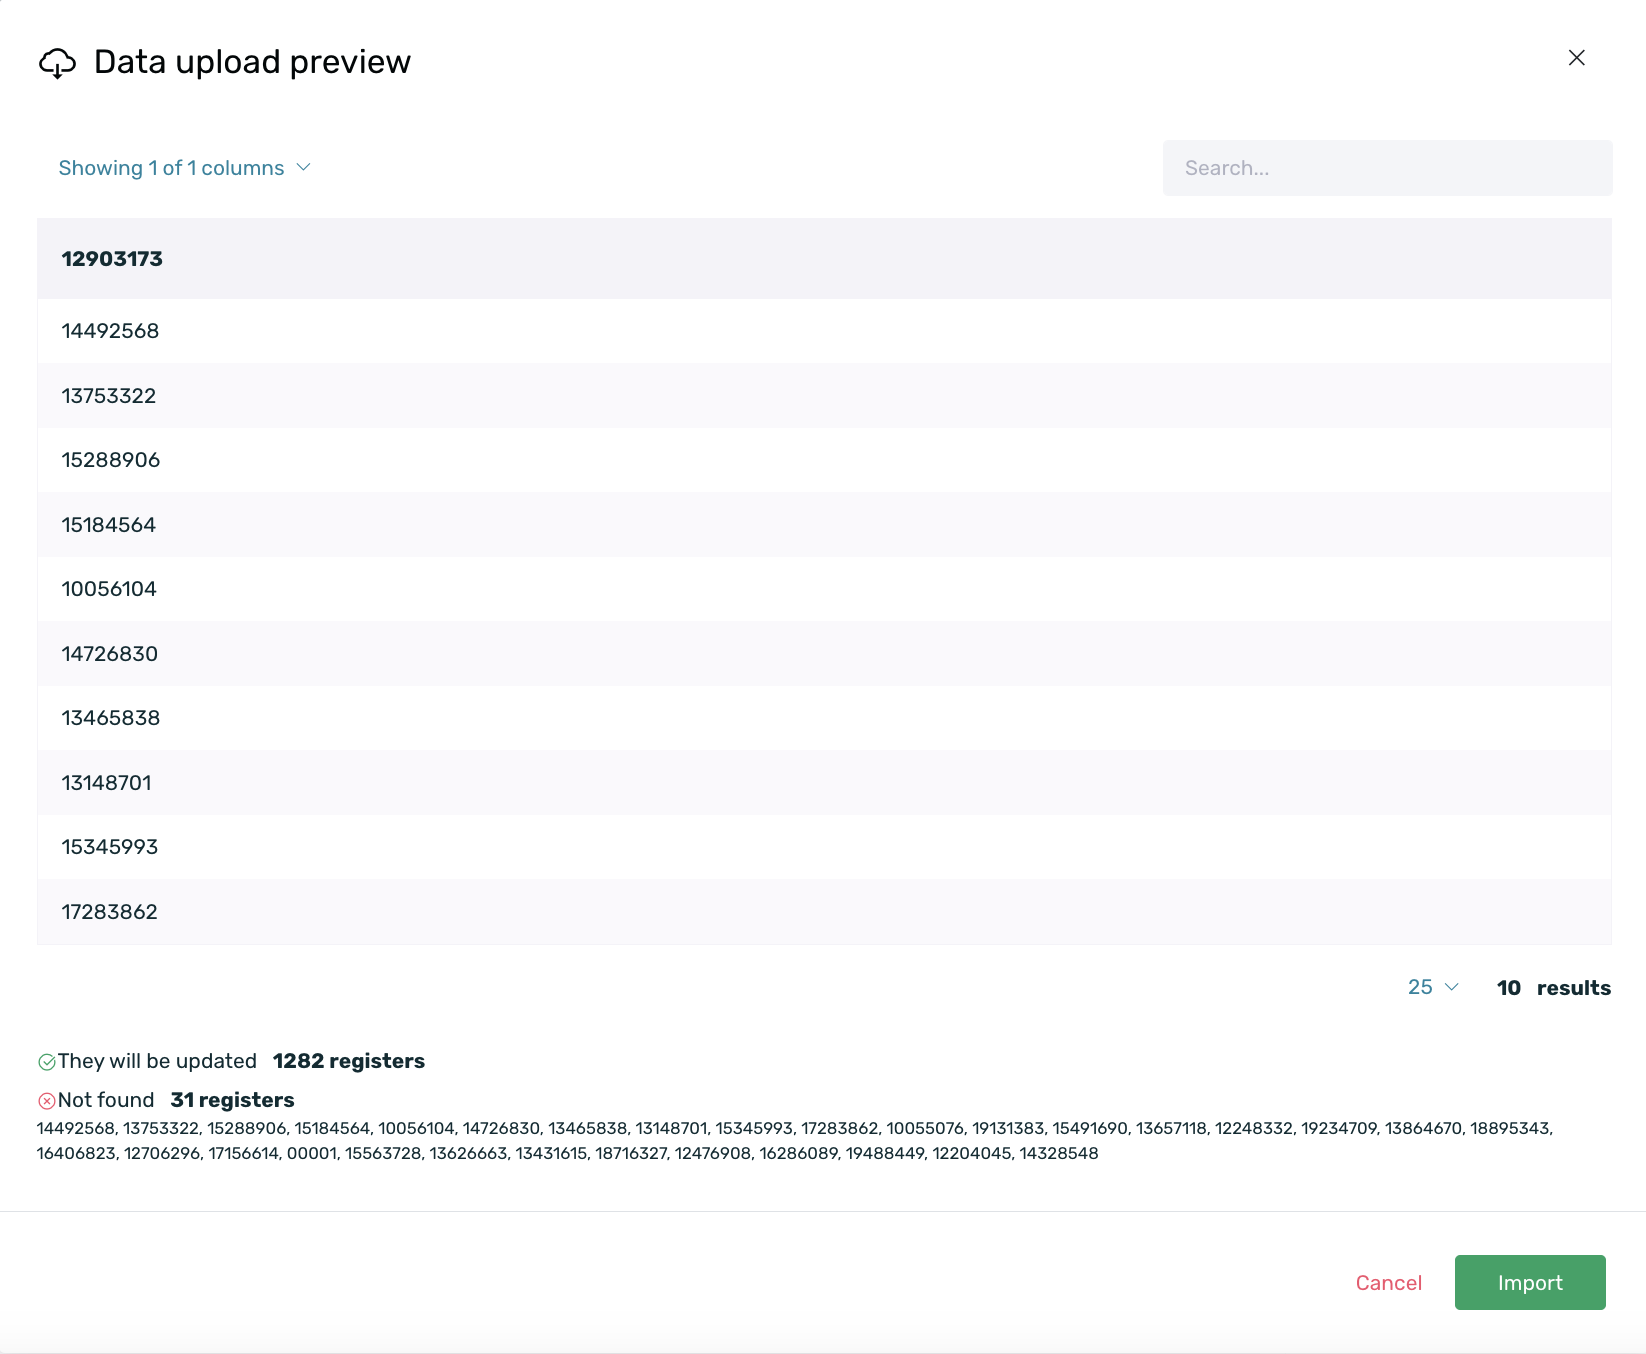
EMMA will show you a preview and a summary of the upload that will be performed. If everything is correct, click on the "Import" button.
- Records to be updated
- Records not found, either because the CUSTOMER_ID is not in the database or because the file format or structure is incorrect.
- New TAGs or user tags that will be created in the database since they didn't exist previously.
- Validate that the information has been successfully imported by performing a Raw Export. If you don't know how to do a Raw Export, you can refer to this guide to see the step-by-step process.