In EMMA, events are used to identify the behavior and actions of users within an application. The same user can have an infinite number of repetitions for each event created.
You decide how you want to measure this behavior by delimiting the number and type of
events you want to measure.
In EMMA there are two different types of events. Default events and custom events.
¶ Default events
EMMA defines as default events those basic events that are common to all applications, and that are automatically created when EMMA integration is performed. Here you can see how to implement EMMA's default events in your app.
The following is the list of default events that will automatically appear in EMMA when the corresponding integration methods are used.
- EMMA Install: generates data when an install occurs.
- EMMA Session: generates data when a session takes place.
- EMMA Register: generates data when a registration occurs.
- EMMA First Login: generates data when the first login occurs.
- EMMA Login: generates data when a login occurs.
- EMMA Sale: generates data when a sale occurs.
¶ Customized events
These are all those actions or sections within the application that are unique to your application. There are two main types of actions and they will result in the majority of all your custom events:
- View a screen or section of the app.
- Click on a button in the app.
Note that it is also possible that you send a custom event with attributes or properties.
For example, let's suppose that in our application we have a section that is a blog in which we show different posts. If we want to know which posts users access we will have to:
- Send to EMMA an event that is a blog. This will measure if users access that specific section sending the information to EMMA when it happens.
- To know which post within the blog they read, we must send as an attribute or property of the blog event the specific name of the post, and/or the internal id of the post.
To integrate custom events in your application and measure them with EMMA, the first thing to do is to create those events in EMMA. By creating an event in EMMA we will obtain a token that is necessary and essential for its implementation in the application code. You can create up to 512 custom events per application.
See our integration guides for more information on how to integrate custom events. Next, we will see in detail how to create, edit and delete events.
¶ Create events
In order to integrate a custom event in the application and measure it with EMMA, the first thing you need to do is to register it in EMMA. To do this, you need to:
-
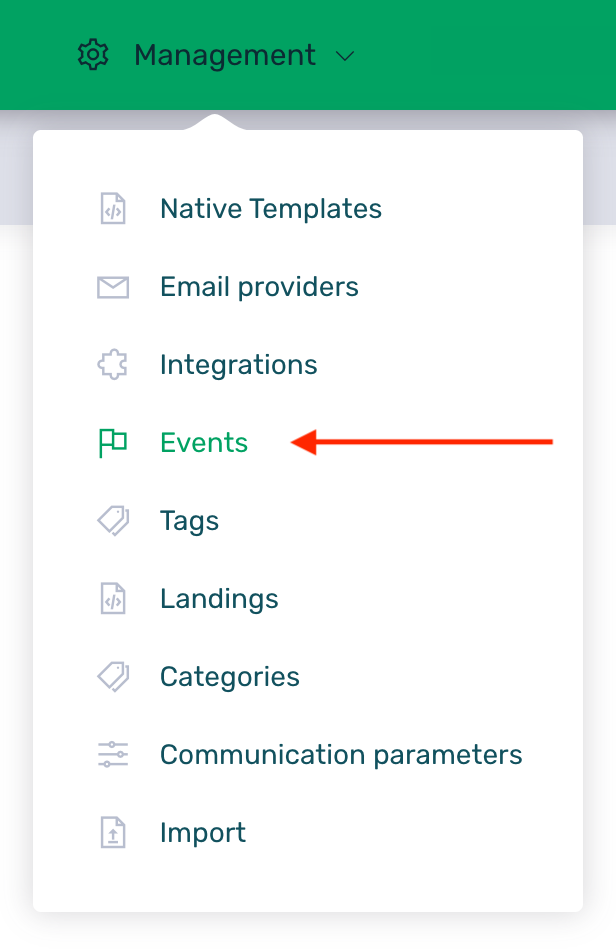
Log in to EMMA and go to Management > Events.
-
Click on the + New event button to create a new event.

-
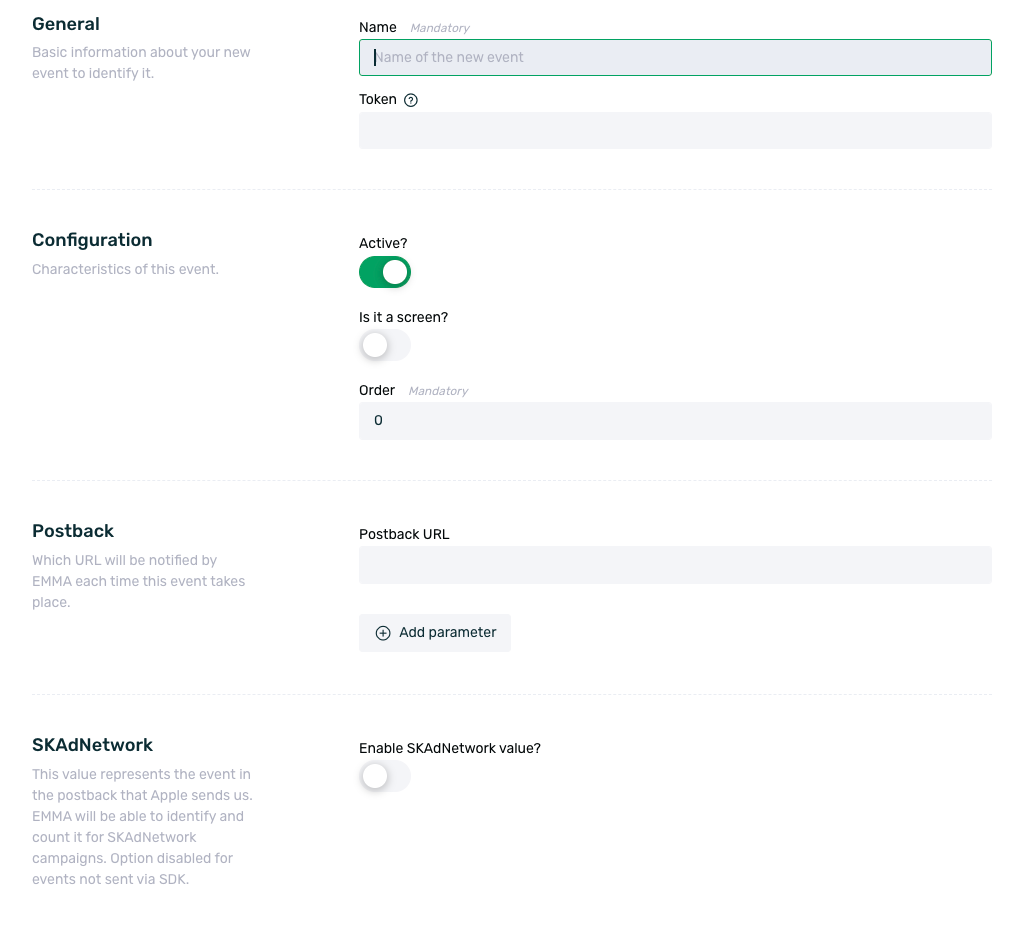
Fill in the data for the event configuration:
-
Name (required): select the name of the event. This name will define the event in the reports as well as in the rest of EMMA.
-
Token (optional): the event token is the identifier that you must integrate in the application code. If this space is left empty, EMMA will automatically assign a token to identify each event.
-
Active? (optional): indicates whether we want to "turn on" the event or not, by default the switch is active. In the case of marking it as inactive, EMMA will stop recording data for that event.
-
Is it a screen? (optional): mark this option if the event corresponds to the display of an application screen. It is important that you identify which events correspond to the display of a screen as there are rules directly dependent on this choice.
-
Order (optional): set an order for the event, the first being number one. This will help you to see the events in a coherent order in Explorer and when generating the reportings.
-
Postback (optional): set a valid URL for EMMA to notify every time such an event occurs. You can see how to perform this configuration here.
-
SKAdNetwork (optional): enable this option if you want the event to be used for attribution via SKAdNetwork. You can check this box for key events such as completed registrations, sales, or other relevant actions.
¶ Manage events
Once we have created all the events we want to measure with EMMA, we can access Management > Events as many times as we need to create new events, edit, manage or delete existing events.
From this screen, we can see in a table all the events that we have registered. In this table we can see the following information:

-
Event Name: The name assigned to the event at the time of its creation. It can be modified by editing the event. This change only affects how the event is displayed in EMMA and does not impact its functionality. More info here.
-
Token: The event token. If changes are made to this token in EMMA without making the corresponding updates in the app’s code, the event will stop being tracked. More info here.
-
Active: If checked, it indicates that the event is active and EMMA is collecting data for it. If not active, even if the event is integrated, no data will be shown for it in EMMA’s dashboard. See how to activate an event here.
-
Display event: If checked, it means the event has been marked as a Screen event so it can be used in rule based communications. Typically, only events intended for use in such communications should have this enabled.
-
Conversion Value: A value assigned to the event for use with SKAdNetwork. Ranges from 1 to 63, where 0 is reserved for the install. Only applies to events configured for SKAdNetwork.
-
Order: The order assigned to the event. This determines how events are displayed in EMMA’s reporting screens. More info here.
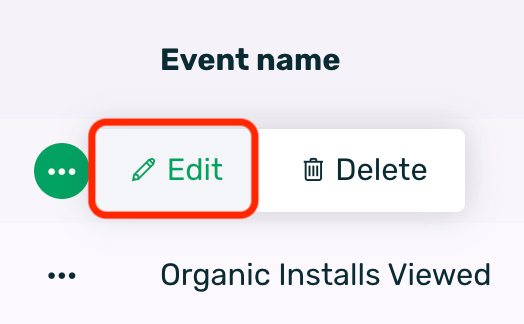
¶ Edit events
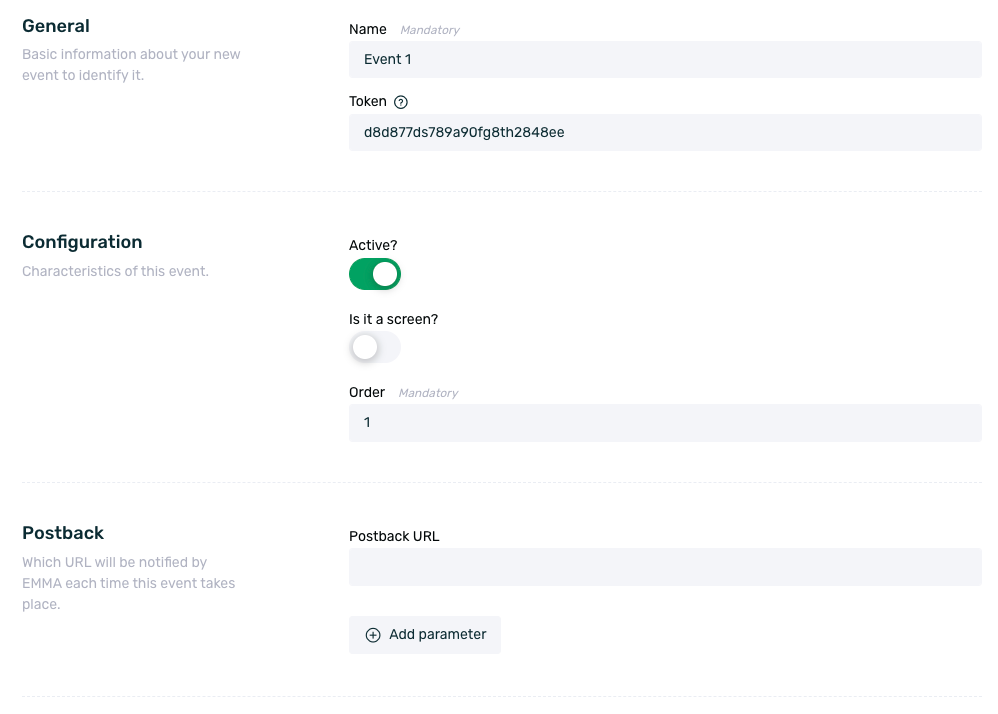
You can edit an event at any time by going back to Management > Events and selecting the Edit option in the context menu to the left of the name:
Changes in the fields of your event do not affect the event token that has already been generated. You can modify any field in the event configuration, but it is important to note that if the token is modified it is necessary to change it in the application code as well. Ourrecommendation is not to modify the token field once the event is implemented in the application.
Once you click on the Edit Event button the changes will be applied to the event in question.
When the events have been implemented in the application code, EMMA will record the information and show it to you in the Explorer screen.
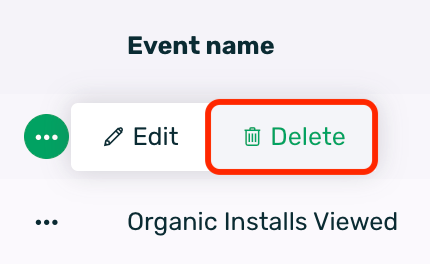
¶ Delete events
To delete an event, select the Delete option from the context menu:
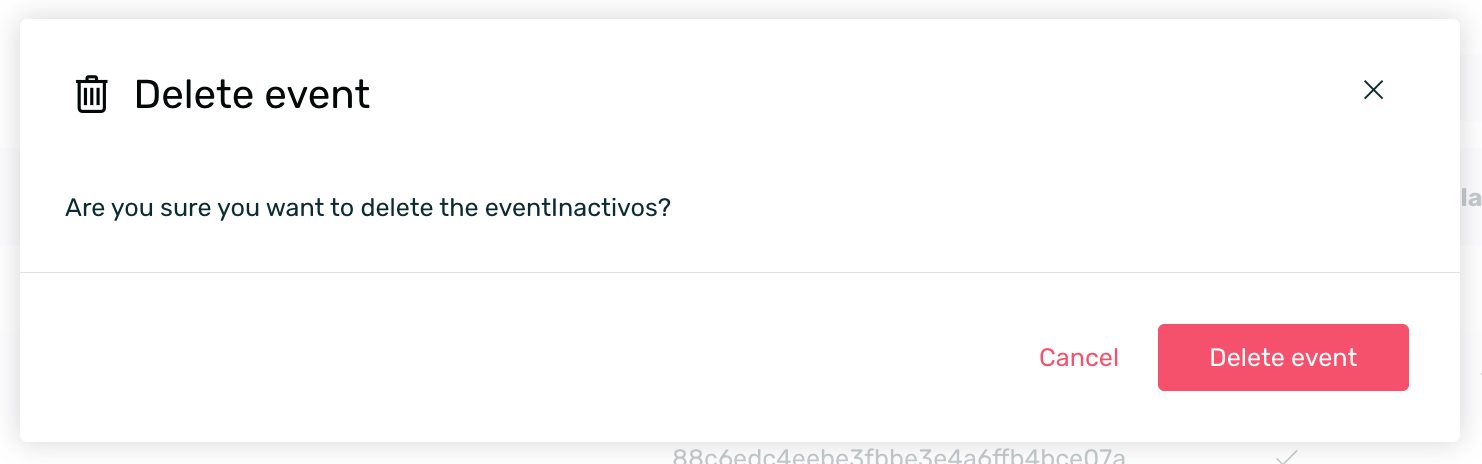
EMMA will ask you if you are sure to delete the event and once confirmed, it will be automatically deleted from your account:
¶ Search for events
f you need to locate an event to make changes or simply review its configuration, you can search by either the event name or its token.
To do so, just follow these steps:
- Go to the Management > Events section.
- Locate the search bar at the top right of the events table.
- Enter the name or token of the event you want to locate.


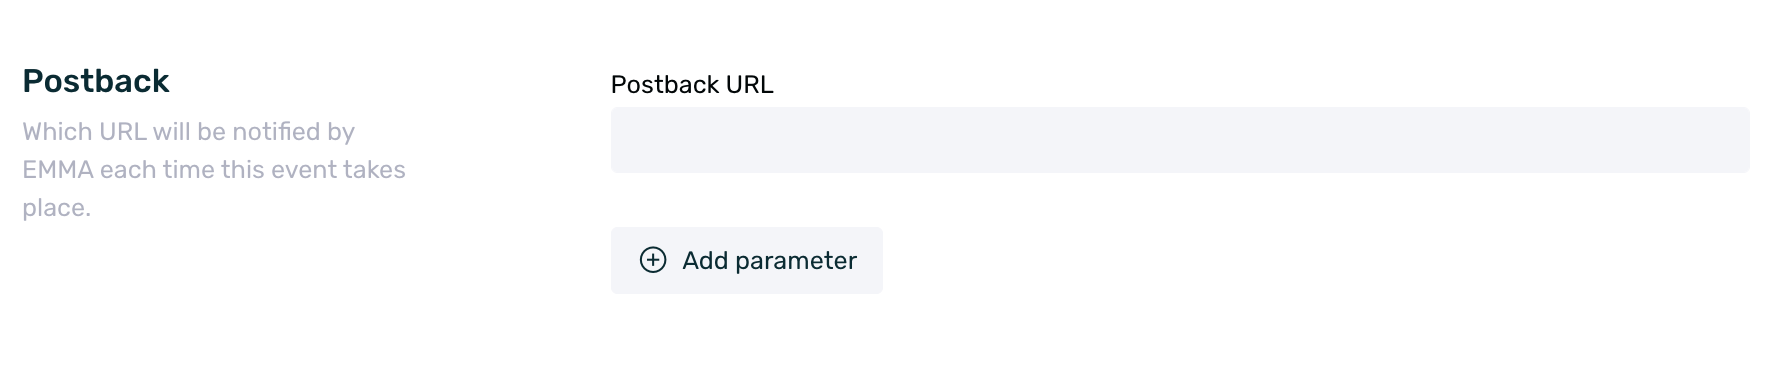
¶ Configure postback to notify a third party of all performed events
If you need to send a notification to a third party whenever a specific event occurs within the app (regardless of whether it is attributed to a campaign or is organic), you must configure the postback field that appears when creating or editing an event.
It’s important to note that with this configuration, all events occurring within the app will be notified—regardless of whether they originate from an organic user or one attributed to a specific campaign. You can find more information about EMMA campaigns here.
The setup is very simple: you just need to enter a valid notification URL in the postback field and add dynamic and/or static parameters if necessary.
The URL to be configured and notified must be provided by the third party who will receive the event information. It is not EMMA’s responsibility to determine which postback URL should be configured in each case.
With this in mind, to configure a postback to notify an event, follow these steps:
-
Go to the Management > Events section.
-
Search for the event in question and click Edit.
-
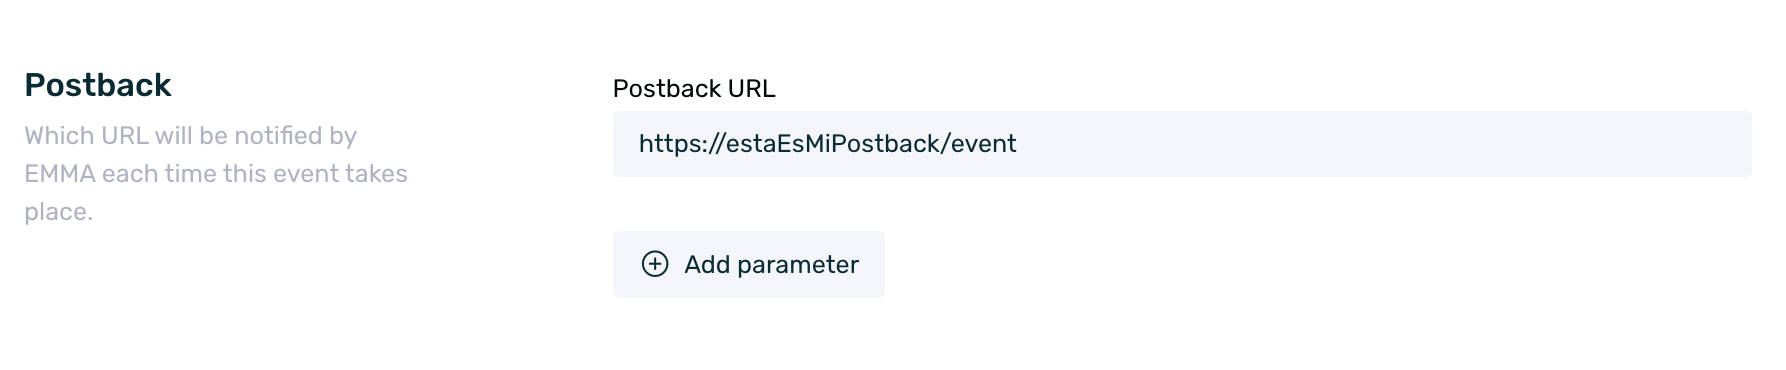
Scroll down to the bottom of the screen where the Postback section is located.
-
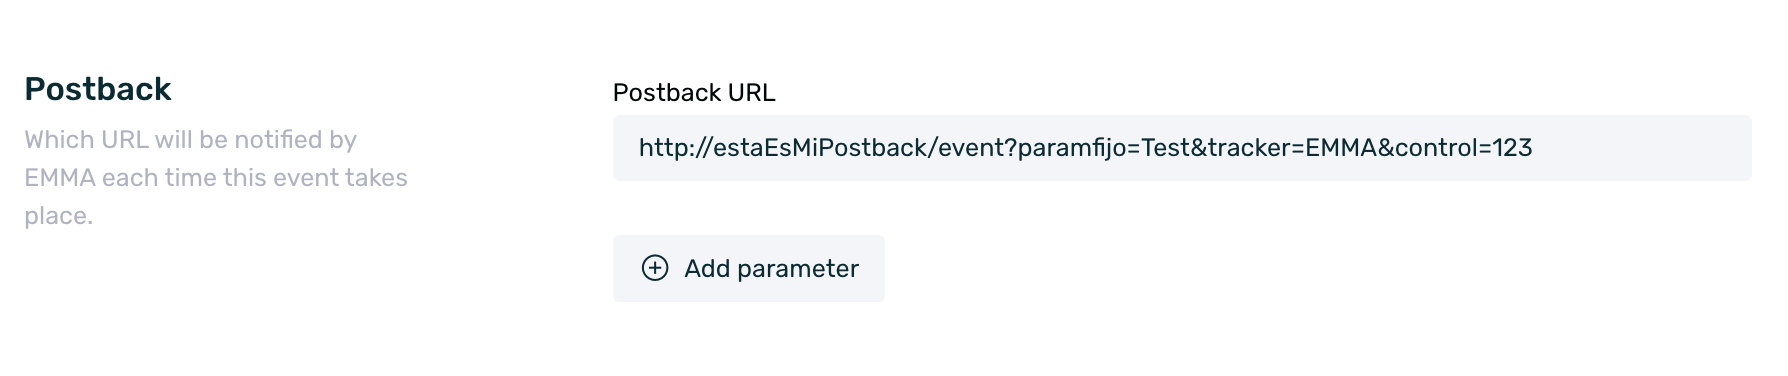
Enter the postback URL in the Postback URL input field. For example: https://estaEsMiPostback/event
-
If the postback includes fixed parameters, they must be added in the Postback URL input field. These are appended to the configured base URL and can be added as many as needed, separated by an &. For example: http://estaEsMiPostback/event?paramfijo=Test&tracker=EMMA&control=123
-
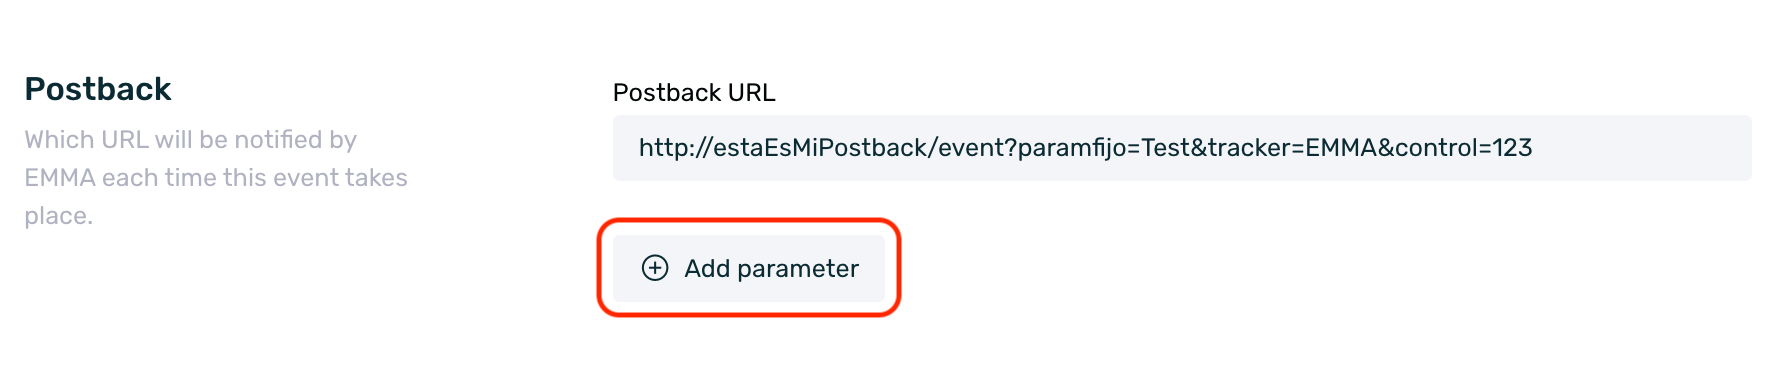
If the postback includes dynamic parameters, follow these steps:
6.1. Click the + Add parameter button located just below the Postback URL input field.
6.2. Next, in the EMMA Value column, select one of the available macros (the available macros are listed below these steps). It’s important to note that the only macros you can select are those specifically listed in this article.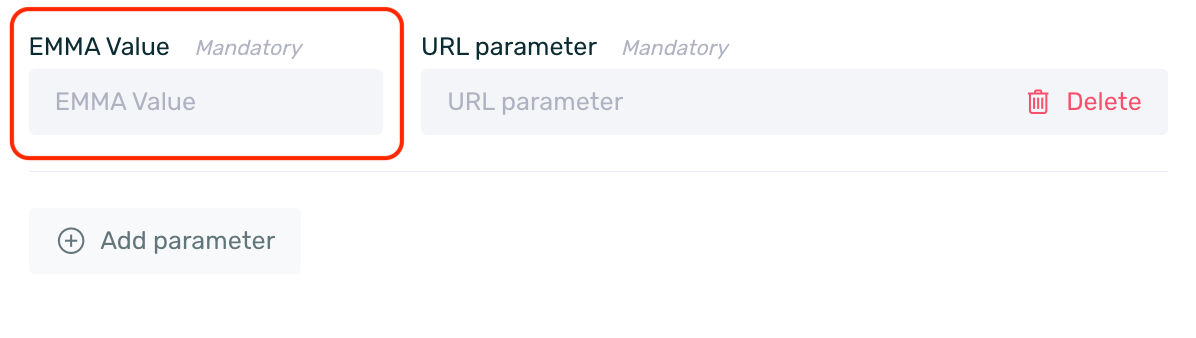
6.3. Finally, in the URL Parameter column, enter the third-party parameter exactly as provided by them, which will be linked to the selected EMMA macro.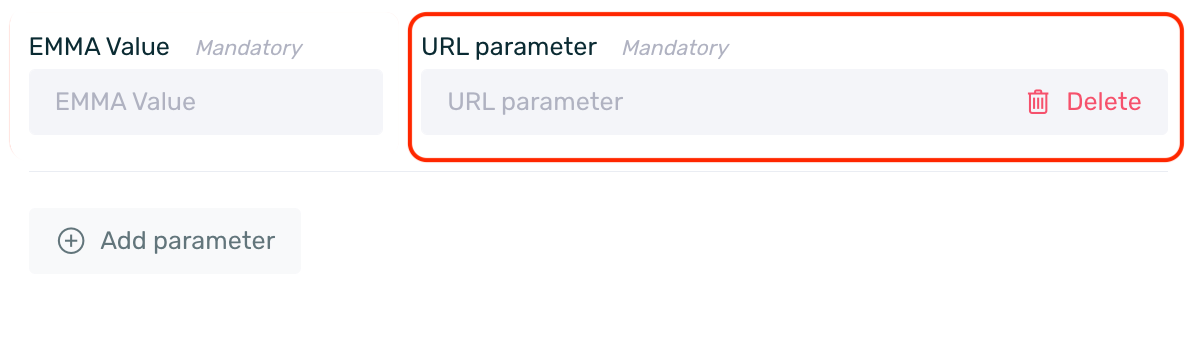
6.4. Repeat this process for each dynamic parameter you need to add.
EXAMPLE
We configure the following URL with fixed parameters in the Postback URL field: http://estaEsMiPostback/event?paramfijo=Test&tracker=EMMA&control=123Next, we add two dynamic parameters with the following configuration:
- We add the first parameter by selecting the udid macro in the EMMA Value field and setting id_dispositivo as the URL Parameter.
- We add the second parameter by selecting the event_id macro in the EMMA Value field and setting evento as the URL Parameter.
With this configuration, a notification like the following will be sent: http://estaEsMiPostback/event paramfijo=Test&tracker=EMMA&control=123&id_dispositivo=ad6af18a-b9c4-4f27-bfa1-b5d651c268e6&evento=ajustes`
Allowed dynamic parameters:
- customer_id: The client ID sent from the app to EMMA.
- idfa: iOS advertising identifier. On iOS 14 and later, if the user does not grant permission to use the IDFA, the IDFV is used instead.
- idfv: A random identifier provided by iOS when permission to use the IDFA is not granted.
- aaid: Android advertising identifier.
- udid: Device advertising identifier, regardless of the operating system. It will automatically send the appropriate one in each case: IDFA, IDFV, or AAID.
- event_id: The event identifier in EMMA.
- random: A random value.
- order_id: The sale ID. Only applies if in-app sales are being tracked using EMMA’s default events for that purpose.
- amount: The amount spent on the sale. Only applies if EMMA’s default sale tracking events are used within the app.
A fixed parameter is one whose value does not change and remains the same every time the specified action is performed. A dynamic parameter is one whose value varies with each execution of the action.
For example, a fixed parameter might be the tool from which the information is received. This value will always be the same (e.g., EMMA), since the tool doesn’t change. A dynamic parameter could be the internal customer ID or the device ID performing the action, as these values will change over time.