¶ Introduction
With EMMA, you will not only be able to launch in-app communications to specific users according to the established segmentation, but you will also have the possibility of establishing impact control at different levels, allowing you to manage and control saturation and the impacts on end users with communications.
In this way, it is possible to avoid over-impacting users massively with different communications, ensuring that these do not have a negative effect on users but instead serve as reinforcement and support for general communication.
The three different levels of impact control that can be established are:
-
Impacts per user: The number of times the user (device) can be impacted by in-app communications in one day, in the last 7 days, and/or in the last 30 days is established.
-
Impacts per category: The number of times the user can be impacted by communications belonging to the same category in one day, in the last 7 days, and/or in the last 30 days is established.
-
Impacts per communication campaign: In the same way as before, at this level, the number of times the user can be impacted by a specific communication in one day, in the last 7 days, and/or in the last 30 days is established.
¶ Important
Keep in mind that the hierarchy when controlling impacts will be:
- Impacts per user
- Impacts per category
- Impacts per communication campaign
In this way, the system will take into account all the established limits when deciding whether or not to display a specific communication to a particular user while maintaining the hierarchical order of the limits. First, it will check whether the user impact limit is met. If this capping has not yet been reached, the category impact limit will be checked, and finally, the communication impact limit will be reviewed.
Let’s look at an example with all saturation control limits active with the following configuration.
-
User impact limit
- Daily limit: 1
- Last 7 days limit: 2
- Last 30 days limit: Unlimited
-
Category 1 impact limit
- Daily limit: 2
- Last 7 days limit: Unlimited
- Last 30 days limit: 3
-
Impact limit for Communication A linked to Category 1
- Daily limit: 1
- Last 7 days limit: 1
- Last 30 days limit: 1
-
Impact limit for Communication B linked to Category 1
- Daily limit: 2
- Last 7 days limit: 2
- Last 30 days limit: 8
With this configuration, on day 1, user A will view Communication A only once, since this communication has a daily impact limit of 1. However, user A will never view Communication B, even if the communication's impacts have not yet been consumed and even though Category 1 has a daily impact limit of 2, because the user impact limit, which is the most restrictive, has a daily impact limit of 1
On day 2, user A will not view Communication A, since the 7-day impact limit of 1 has been reached. However, this time, user A will view Communication B, but only once, because although the daily limit is 2 for Communication B and for Category 1, the user's daily limit of 1 is taken as a reference, as it is the most restrictive.
On day 3, user A will not view any communication, even if communication and category limits are available, because the user's 7-day limit is 2 impacts, and these have already been reached by viewing Communication A on day 1 and Communication B on day 2.
+7 days, user A will not view Communication A, because the 30-day limit of the communication has already been reached by viewing Communication A on day 1. On the other hand, user A will view Communication B but only once, due to the user’s daily restriction of 1 impact.
+8 days, user A will not view either Communication A or Communication B. Communication A has already reached its 30-day limit and will therefore not be displayed. However, although Communication B still has available daily, last 7 days, and last 30 days impacts, and the user's daily, 7-day, and 30-day limits have not been reached, the 30-day limit of 3 impacts for Category 1 has been reached, since 3 impacts from communications linked to this category were consumed on days 1, 2, and +7 days**.
¶ Impacts per user
The user (device) impact limit is the most restrictive of the three control levels and the first in the hierarchy. The function of this limit is to establish the maximum number of communications that a user (device) can be impacted by daily, weekly, and/or monthly.
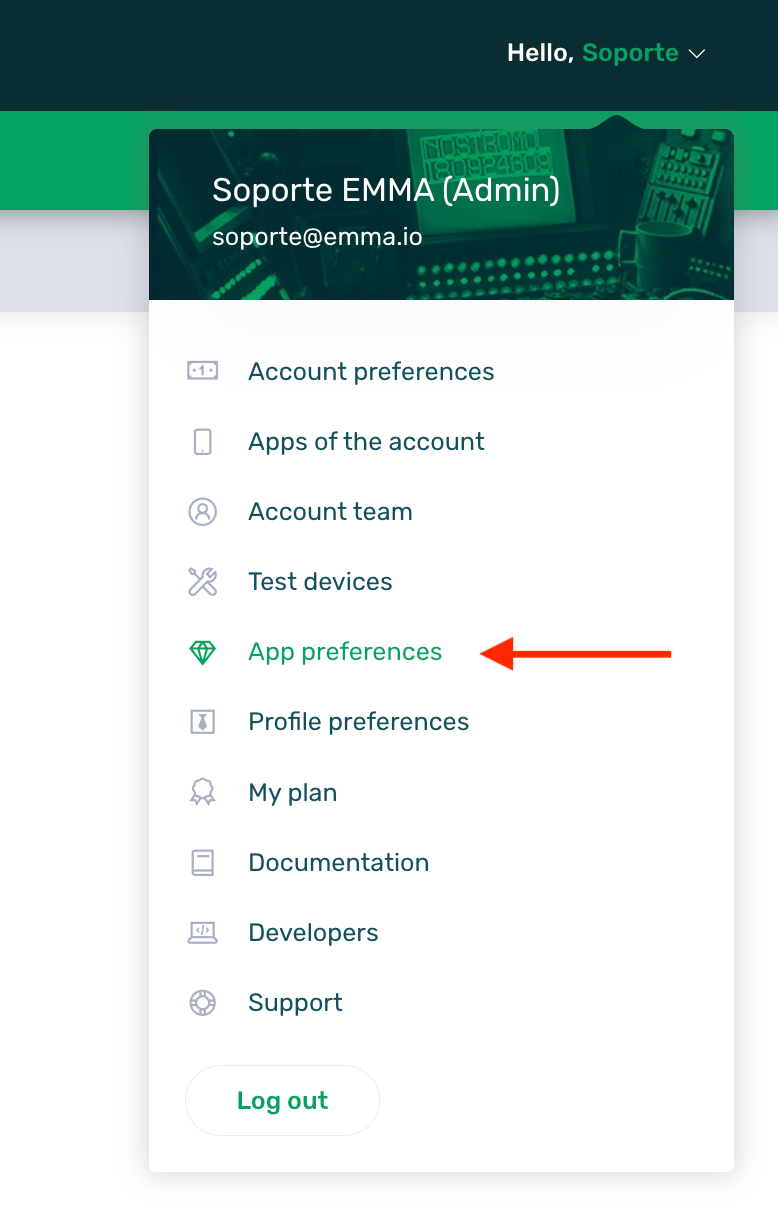
This limit is pre-configured by default with an unlimited daily, weekly, and monthly impact limit. To configure it, simply go to the App Preferences section from the user menu at the top.
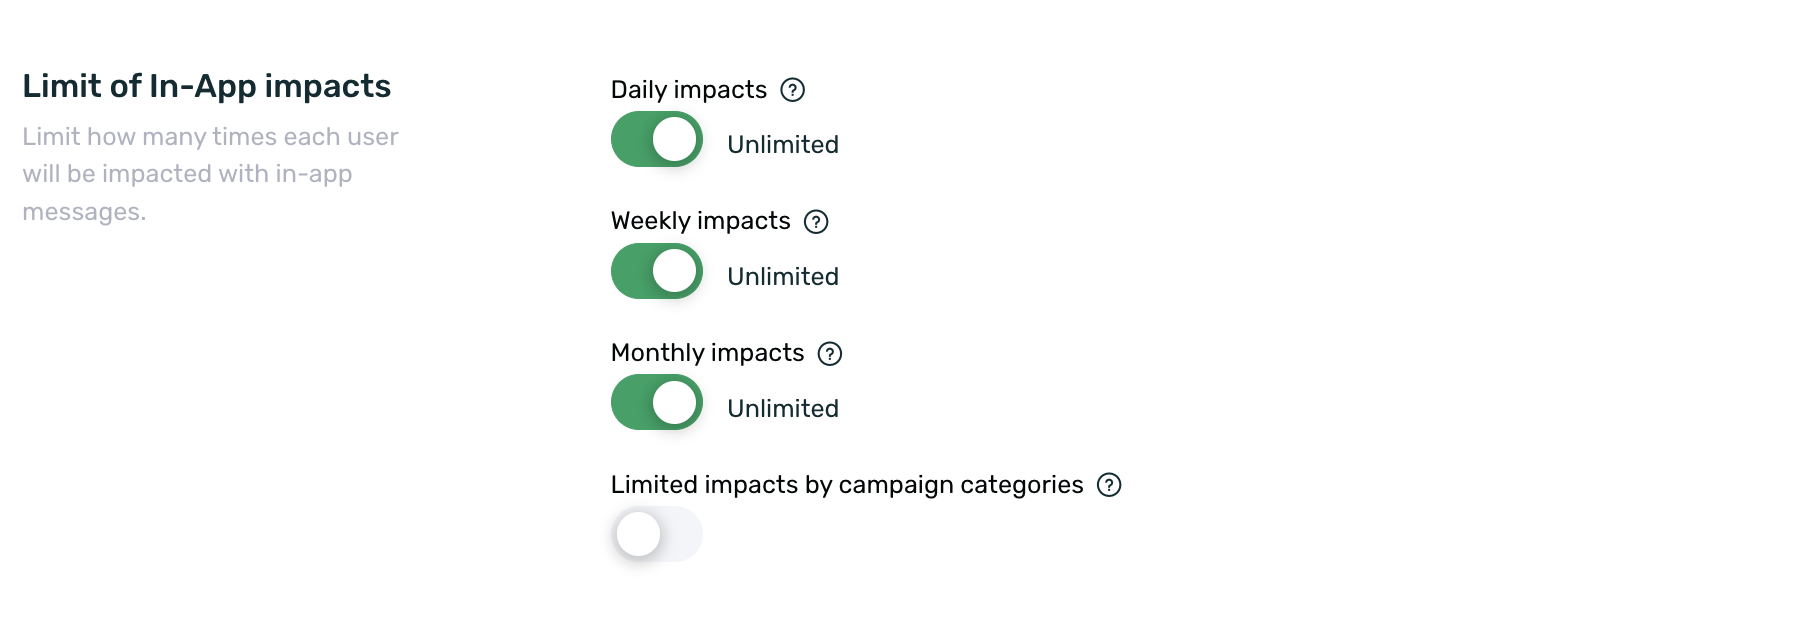
Once inside App Preferences, simply look for the In-App Impact Limit section and set the desired configuration for daily impacts, last 7 days impacts, and last 30 days impacts.

Let's look at an example with the configuration from this screenshot. Imagine we have 5 active communication campaigns and the **user impact limit configuration from the screenshot:
- Daily user limit: 1
- Last 7 days user limit: 3
- Last 30 days user limit: 15
The user (device) A views one of the five active campaigns today. They won’t be able to see any more communications today because there is a daily user impact limit of 1.
The next day, the same user (device) A views another communication without any issues. However, they won’t be able to see any more communications that day due to the same daily user impact limit of 1.
Two days later, that same user (device) A views another communication again, but only one, due to the same daily limitation as in previous days.
For the rest of the week, they won’t be able to see any of the 5 communications because there is a maximum user impact limit of 3 for the last 7 days, and that limit has already been reached.
¶ Extra
The daily, last 7 days, and last 30 days limits are independent of each other. This means we can configure a daily limit of 1 impact, an unlimited last 7 days limit, and a last 30 days limit of 10
It’s possible to set a limit for one of the options while leaving the other two as unlimited, for example. The configuration can be adjusted to best suit real needs.
¶ Impacts per category
The category impact limit is the second in the hierarchy of saturation control limits. It is the second most restrictive after the user impact limit. This limit controls the number of impacts for a specific category, which can later be used in one or multiple in-app communications.
The first step to using the category limit is to enable it. To do this, you need to **go to the App Preferences section.
Once the category limit is enabled, you need to create one or more categories for later use. You can find a detailed guide on how to create new categories in this document.
Once the categories are created, they are ready for use. But how do you link a category to one or multiple in-app communications? It’s simple: when creating a new message, a selector will appear with all the existing categories available for use. You just need to select the desired category, and it will be linked to the communication.
Let's see an example of use.
If, for example, we have a category called Category A with the following configuration:
- Daily impact limit: 2
- Last 7 days impact limit: 3
- Last 30 days impact limit: Unlimited
If we create 3 in-app communications linked to this category with the following configuration:
-
Communication A
- Daily impact limit: 1
- Last 7 days impact limit: 1
- Last 30 days impact limit: 3
-
Communication B
- Daily impact limit: 1
- Last 7 days impact limit: 2
- Last 30 days impact limit: Unlimited
-
Communication C
- Daily impact limit: Unlimited
- Last 7 days impact limit: Unlimited
- Last 30 days impact limit: 5
With this configuration, on day 1, User A would see Communication A and Communication B. However, they would not see Communication C, since the daily impact limit for Category A (which applies to all three communications) is 2.
On day 2, User A would not see Communication A, because although it has a daily limit of 1, it also has a last 7 days impact limit of 1, which has already been reached. However, they would see Communication B, as it has a daily limit of 1 and a last 7 days limit of 2. Once again, they would not see Communication C, since the last 7 days impact limit for Category A is 3, and that limit has already been reached.
If the communications linked to the category have unlimited daily, last 7 days, and last 30 days impact limits, only the limit set in the category will be considered.
¶ Impacts per campaign
The impact limit per communication is the last of the saturation control limits and the least restrictive in the hierarchy (it is the last one to be checked). This limit determines how many times per day, in the last 7 days, and in the last 30 days a specific communication will be displayed.
To configure this saturation limit, it must be set in Step 3: Scheduling, at the moment when a new communication is being created.
This is where you can define the maximum number of times per day, last 7 days, and last 30 days that you want that communication to be shown.
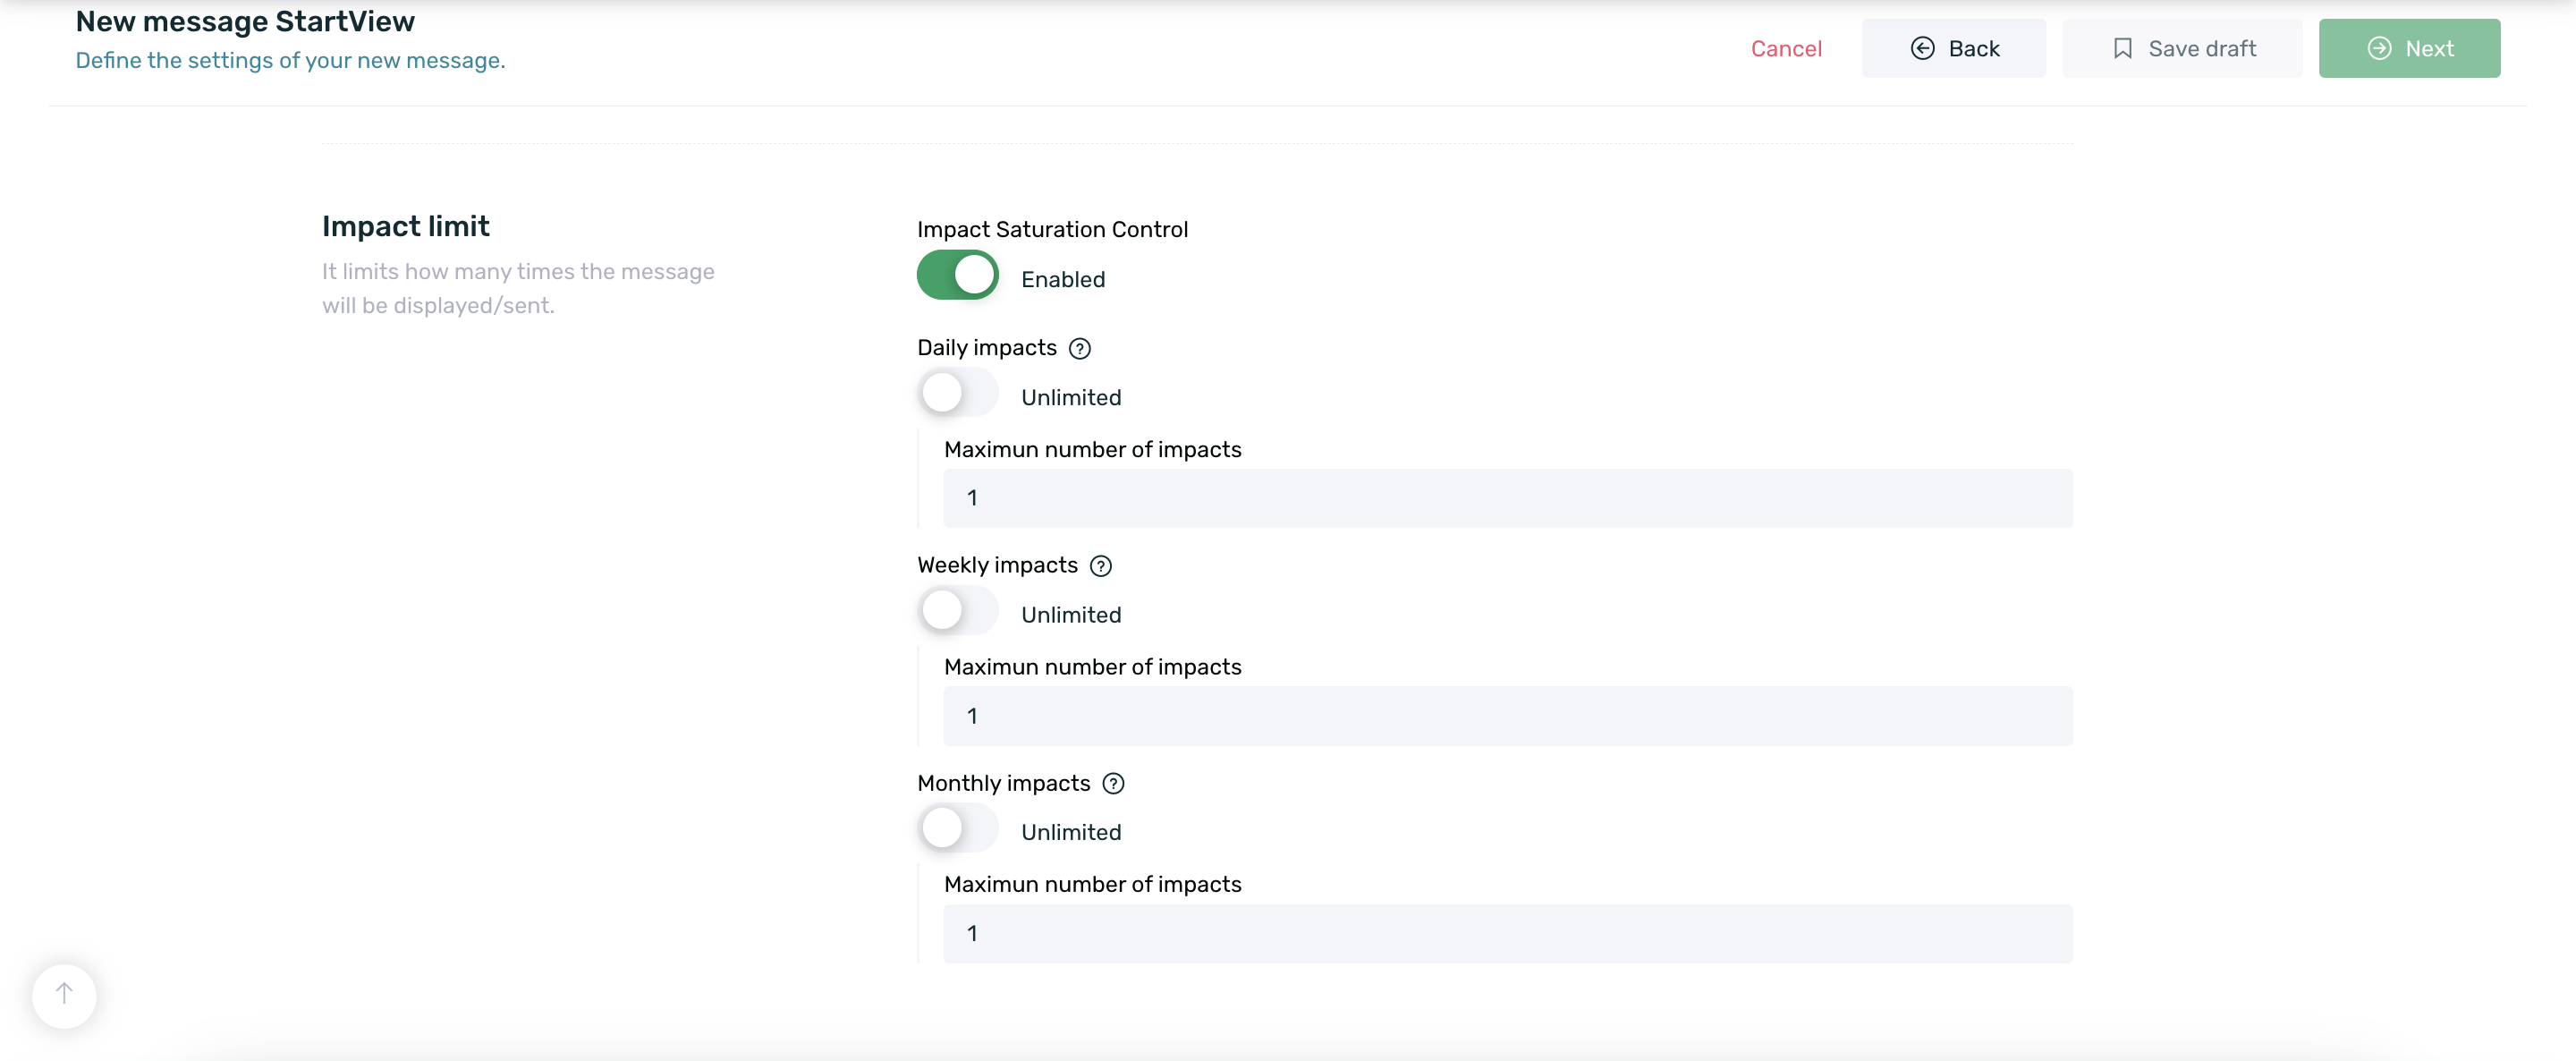
In this way, with the configuration shown in the capture, we would have the following behavior:
Today, user A will view the communication, but only once, as a daily limit of 1 is set.
The next day, user A will not view the communication, as, even though the daily limit of 1 has not been reached yet, the 7-day limit of 1 has already been reached the previous day. However, user B will still be able to view this communication.
The following week, user A will still not view the communication because, although the daily limit and the 7-day limit have not been reached that week, the 30-day limit has already been met. Moreover, user B will also not view the communication due to the same reason.
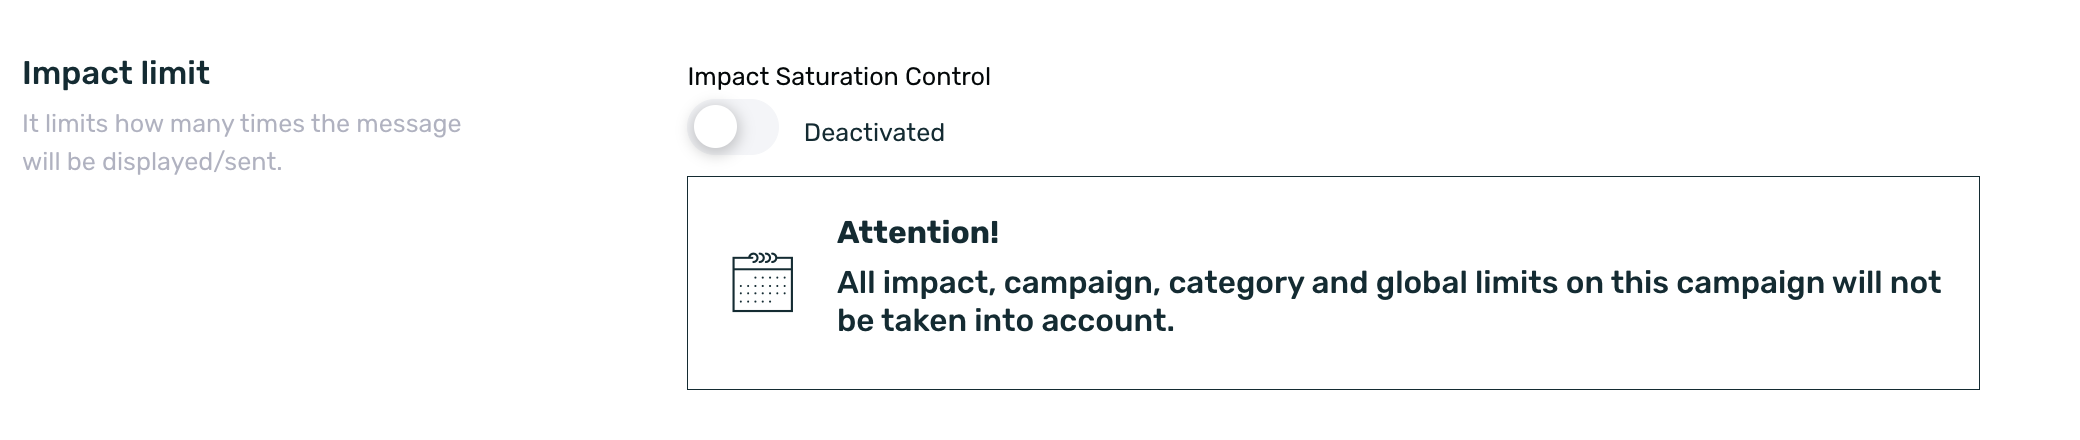
¶ Saturable and non-saturable impressions
In addition to setting up a campaign saturation control at the user, category, and communication level, it is also possible to configure whether the impressions made in a given campaign are saturable or non-saturable.
Saturable impressions are those where the impressions configured at the user, category, and communication levels are taken into account, and they affect one another. To ensure your campaign takes these impressions into account (whether at the user, category, or communication level), simply check the Saturation Control box that appears in the campaign scheduling step.

Non-saturable impressions, on the other hand, are those that, even if a category is linked to the communication and an impression limit is set at the campaign and user level, will not be considered. The campaign will be displayed an unlimited number of times, and the impressions will not affect the broader cappings for the category and user. To enable this type of configuration, simply uncheck the Saturation Control box that appears in the campaign scheduling step.