¶ Communication report
With the EMMA communication report, you can view in detail the results achieved by each of the communications sent, obtaining all the analytics related to the reach and performance of those communications.
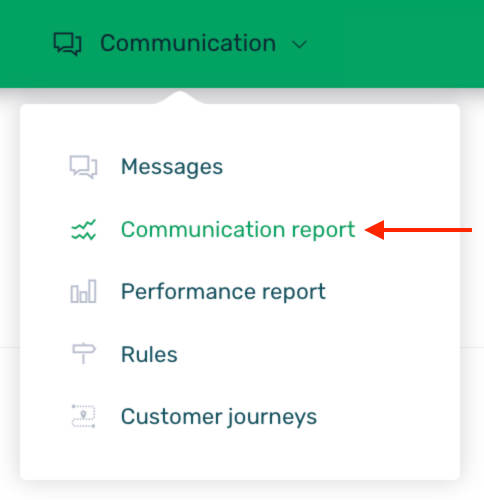
To access these communication statistics, you just need to go to the Communication > Communication Report section.
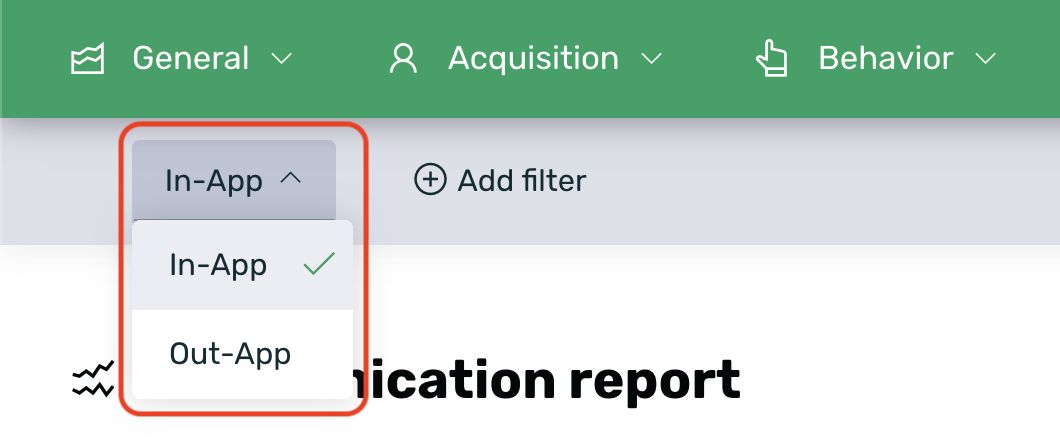
According to the type of reporting you want to view, you will need to select one option or another from the dropdown menu at the top left.
-
In-App: This is the default option and will show all the information about In-App campaigns (Adball, Startview, Native Ad…) that have data within the selected date range.
-
Out-App: If the Out-App option is selected, you will be able to view all the information related to communications that take place outside the app. In this case, Push Notifications and Emails, as long as they have data within the selected date range.
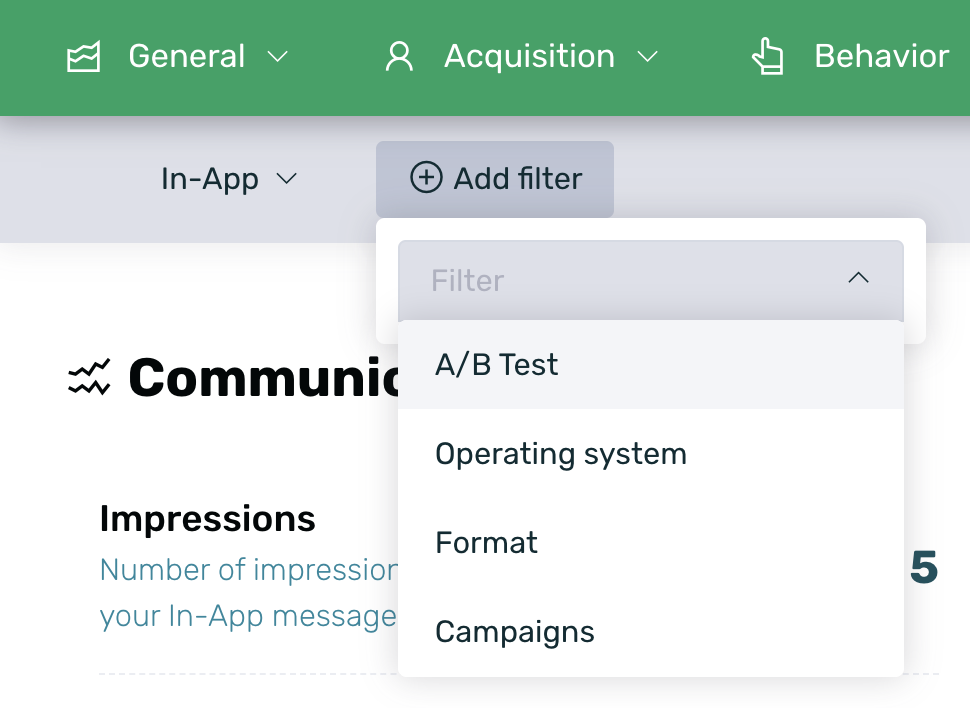
Additionally, we can add more filters if necessary to locate communications more quickly and easily. The available filters are the same for both In-App and Out-App.
-
Test A/B: With this option, we can filter and display communications that have A/B test variations or, on the contrary, those that do not have an A/B test.
-
Operating System: By selecting this option, we can filter campaigns that have data for Android or iOS. By default, the EMMA report shows combined data for both operating systems. To get the information broken down by operating system, we need to use this filter.
-
Format: We can select to display communications that belong to a specific format. In the In-App report, the formats include Adball, Banner, Coupon, Dynamictab, Native Ad, Startview, and Strip. In the Out-App report, the formats are Email and Push. By default, information from all formats is shown.
-
Campaigns: Filter the communication report results by selecting one or more specific communication campaigns.
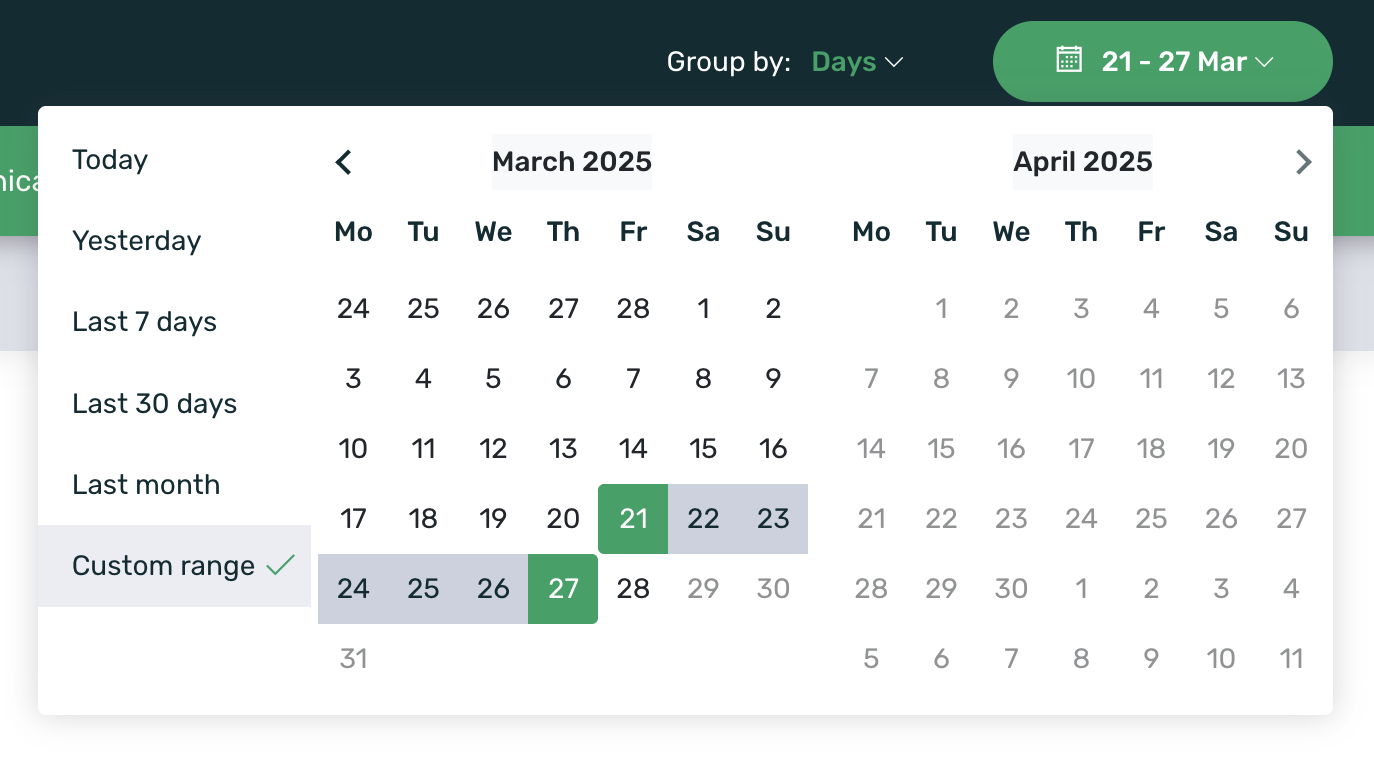
Keep in mind that EMMA will always return communications that have had activity within the selected date range. By default, when accessing EMMA, information from the last 7 days is displayed, but we can change this date range in the top-right date selector. You can find more information about this here.
¶ In-App report
In the In-App Communication Report, we can view information related to all In-App communication campaigns, meaning those communications that take place within the app.
This report consists of two clearly differentiated sections. First, we can see general aggregated information for all In-App communications displayed in the report.

In this first section, we can see the following information:
- Impressions: Total number of times the communication has been displayed (total impressions).
- Unique Impressions: Number of unique devices where the communications have been displayed.
- Clicks: Number of times users interact with the communication.
- CTR (Click-Through Rate): Percentage of devices that clicked on the communication relative to total impressions.
In the second part of the screen, there is a table displaying Individual Statistics.
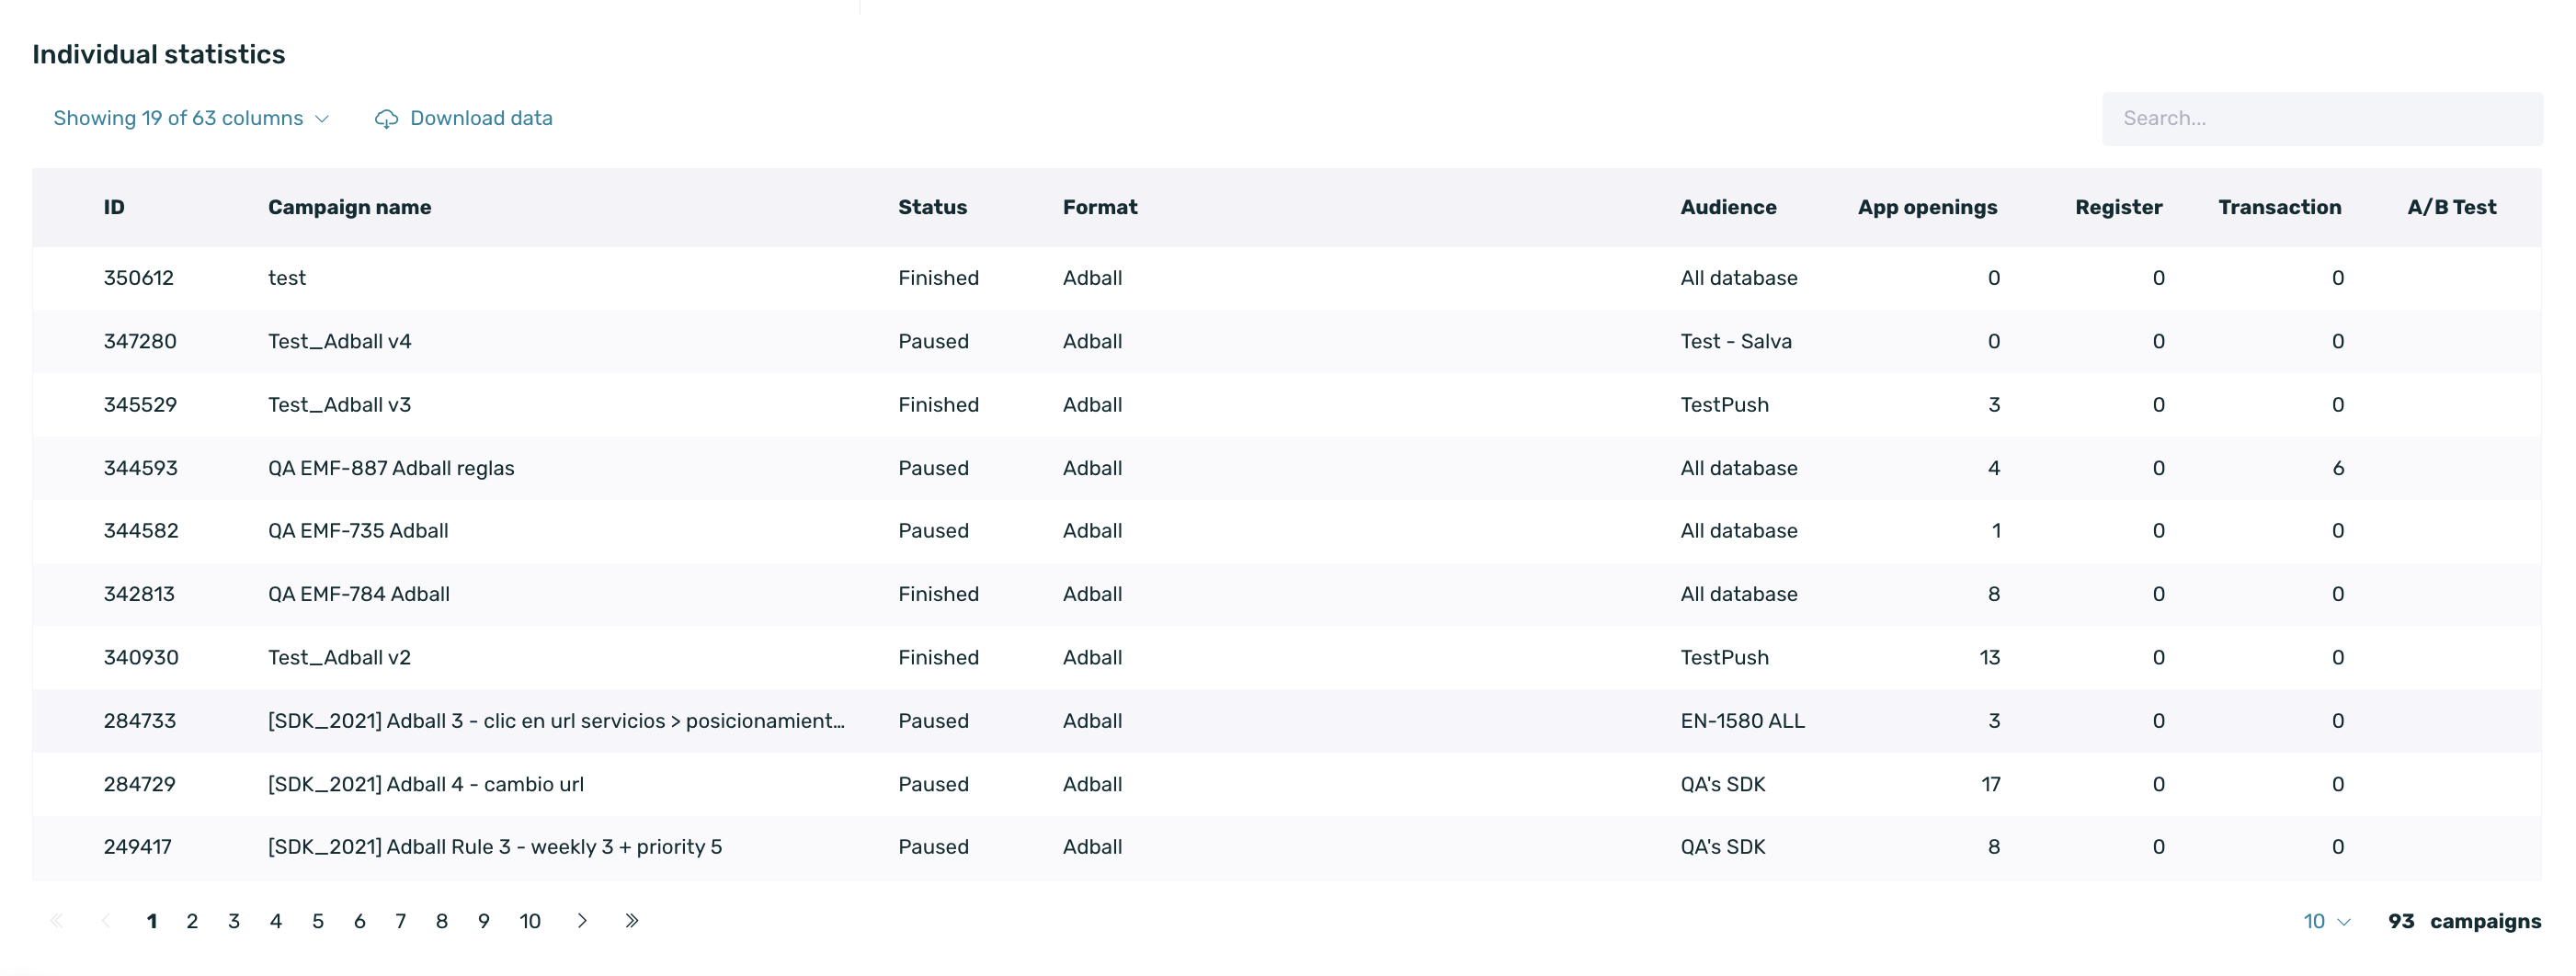
In this table, we have a selector that allows us to choose up to 16 columns to display the KPI information we need. The available KPIs are:
| Campaign name | Name of the campaign. |
| Status | Active, finished, paused, or testing. |
| Format | Communication format. |
| Audience | Name of the audience linked to the communication. |
| Start Date | Date and time when the campaign is activated. |
| End Date | Date and time when the campaign ends. |
| Impressions | Number of times the communication has been displayed (total impressions). |
| Unique Impressions | Number of unique devices on which the communication has been displayed. |
| Clicks | Number of times the user interacts with the communication. |
| Dismissals | Number of times the user has clicked the close button on the communication. This information is available for Adball, Native Ad, and Startview formats. |
| CTR | Percentage of devices that clicked on the communication relative to total impressions. |
| Redemptions | Number of times the coupon has been redeemed. |
| Average Redemptions | Total average value of redemptions per device. |
| A/B Test | Indicates whether the campaign is configured for A/B testing or not. |
| Automatic | Type of campaign (Automatic or classic). |
| Attribution window | Time for attributing events to each campaign after interacting with it (click). |
You can use the search bar at the top right of the table to locate a specific communication.
¶ Out-App report
In the case of the Out-App communication report, the structure is the same as the In-App report, but in this case, it refers to push notifications and emails. Below, we will review the specific information included in this report.
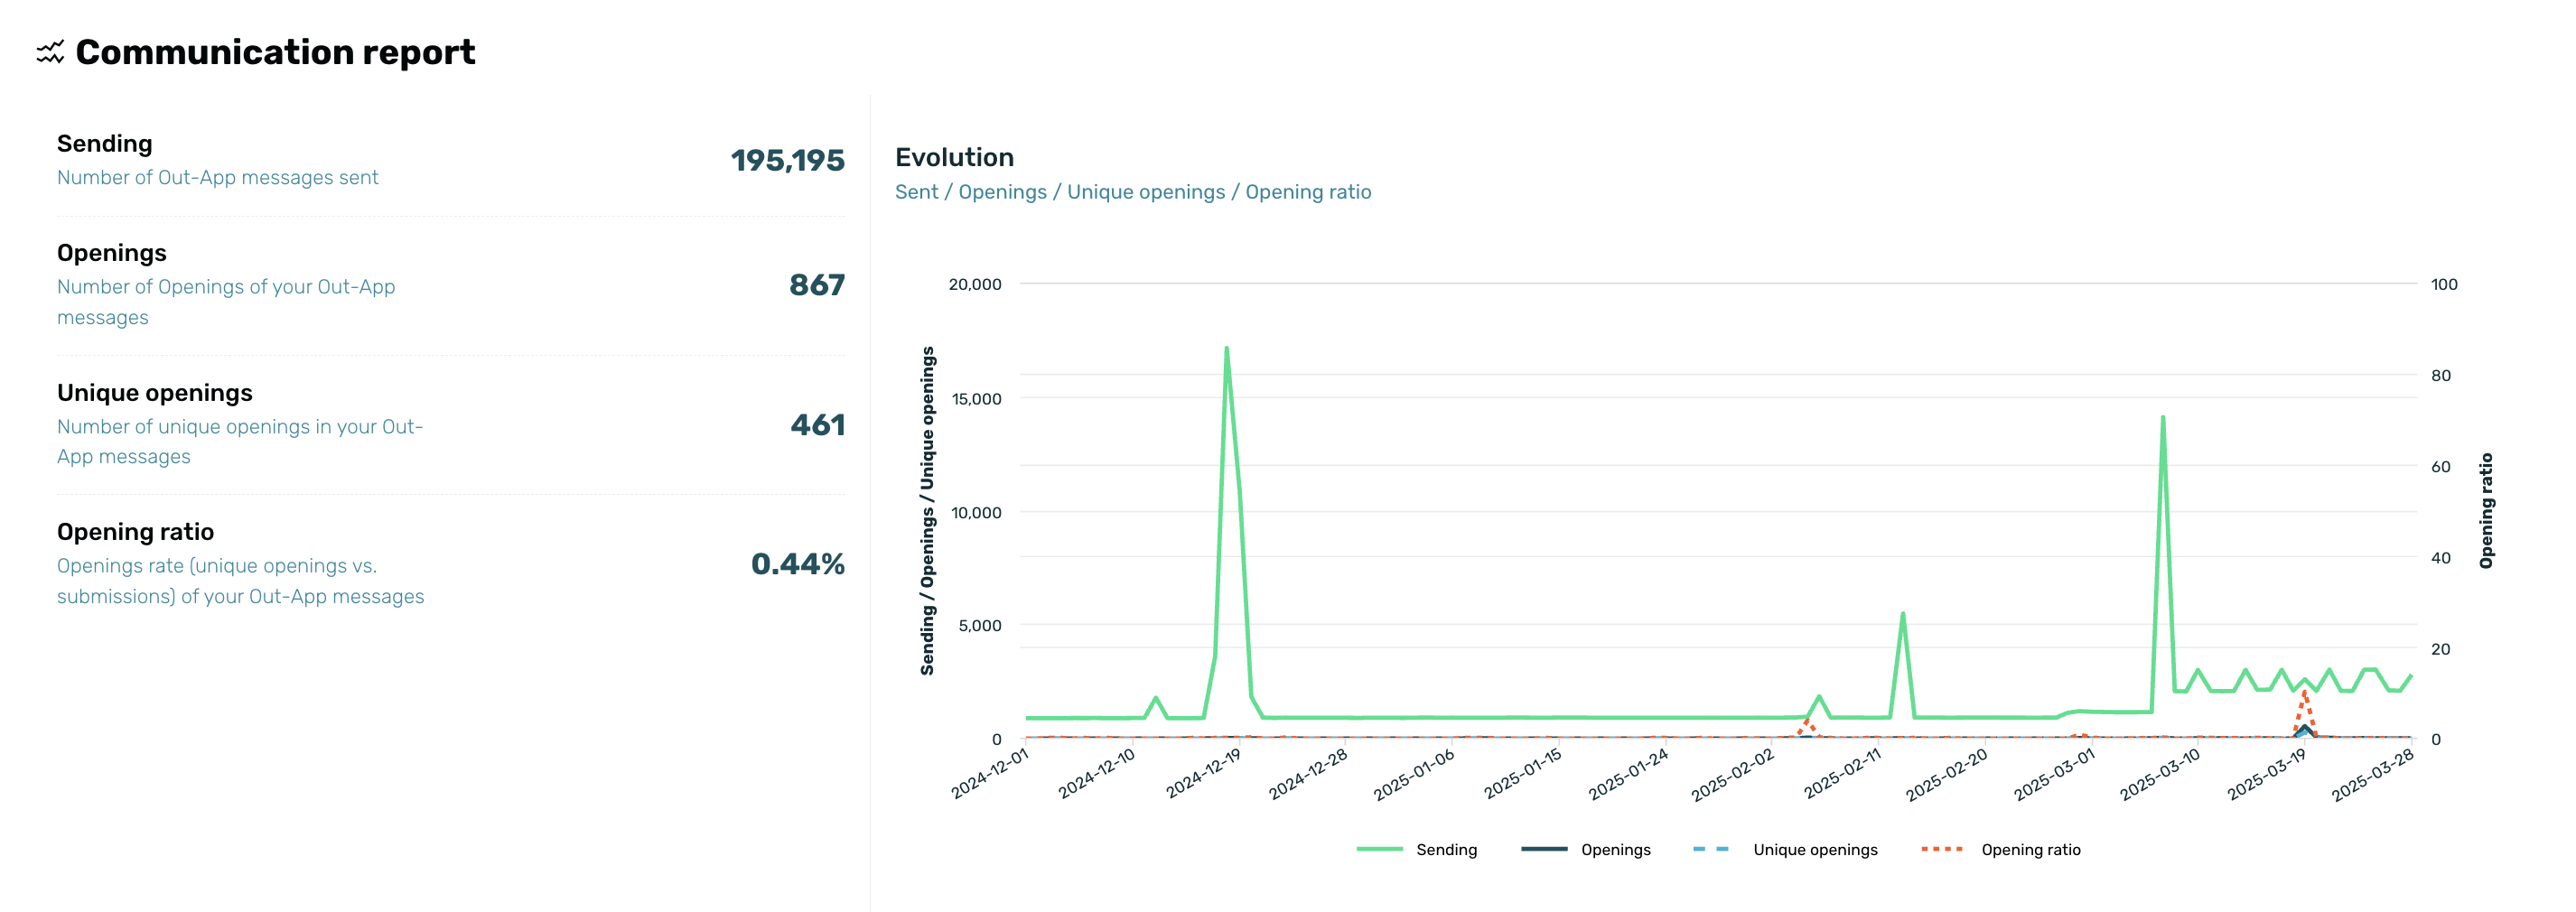
In the first section, we can see aggregated general information from all campaigns:
- Sent: Number of push notifications and emails attempted to be sent through EMMA.
- Opens: Number of devices that have opened the Out-App messages.
- Unique Opens: Number of unique devices that have opened the Out-App messages.
- Open Rate: Percentage of devices that have opened the Out-App messages relative to the total deliveries per campaign (unique opens).
In the Individual Statistics table, we can see the following information:
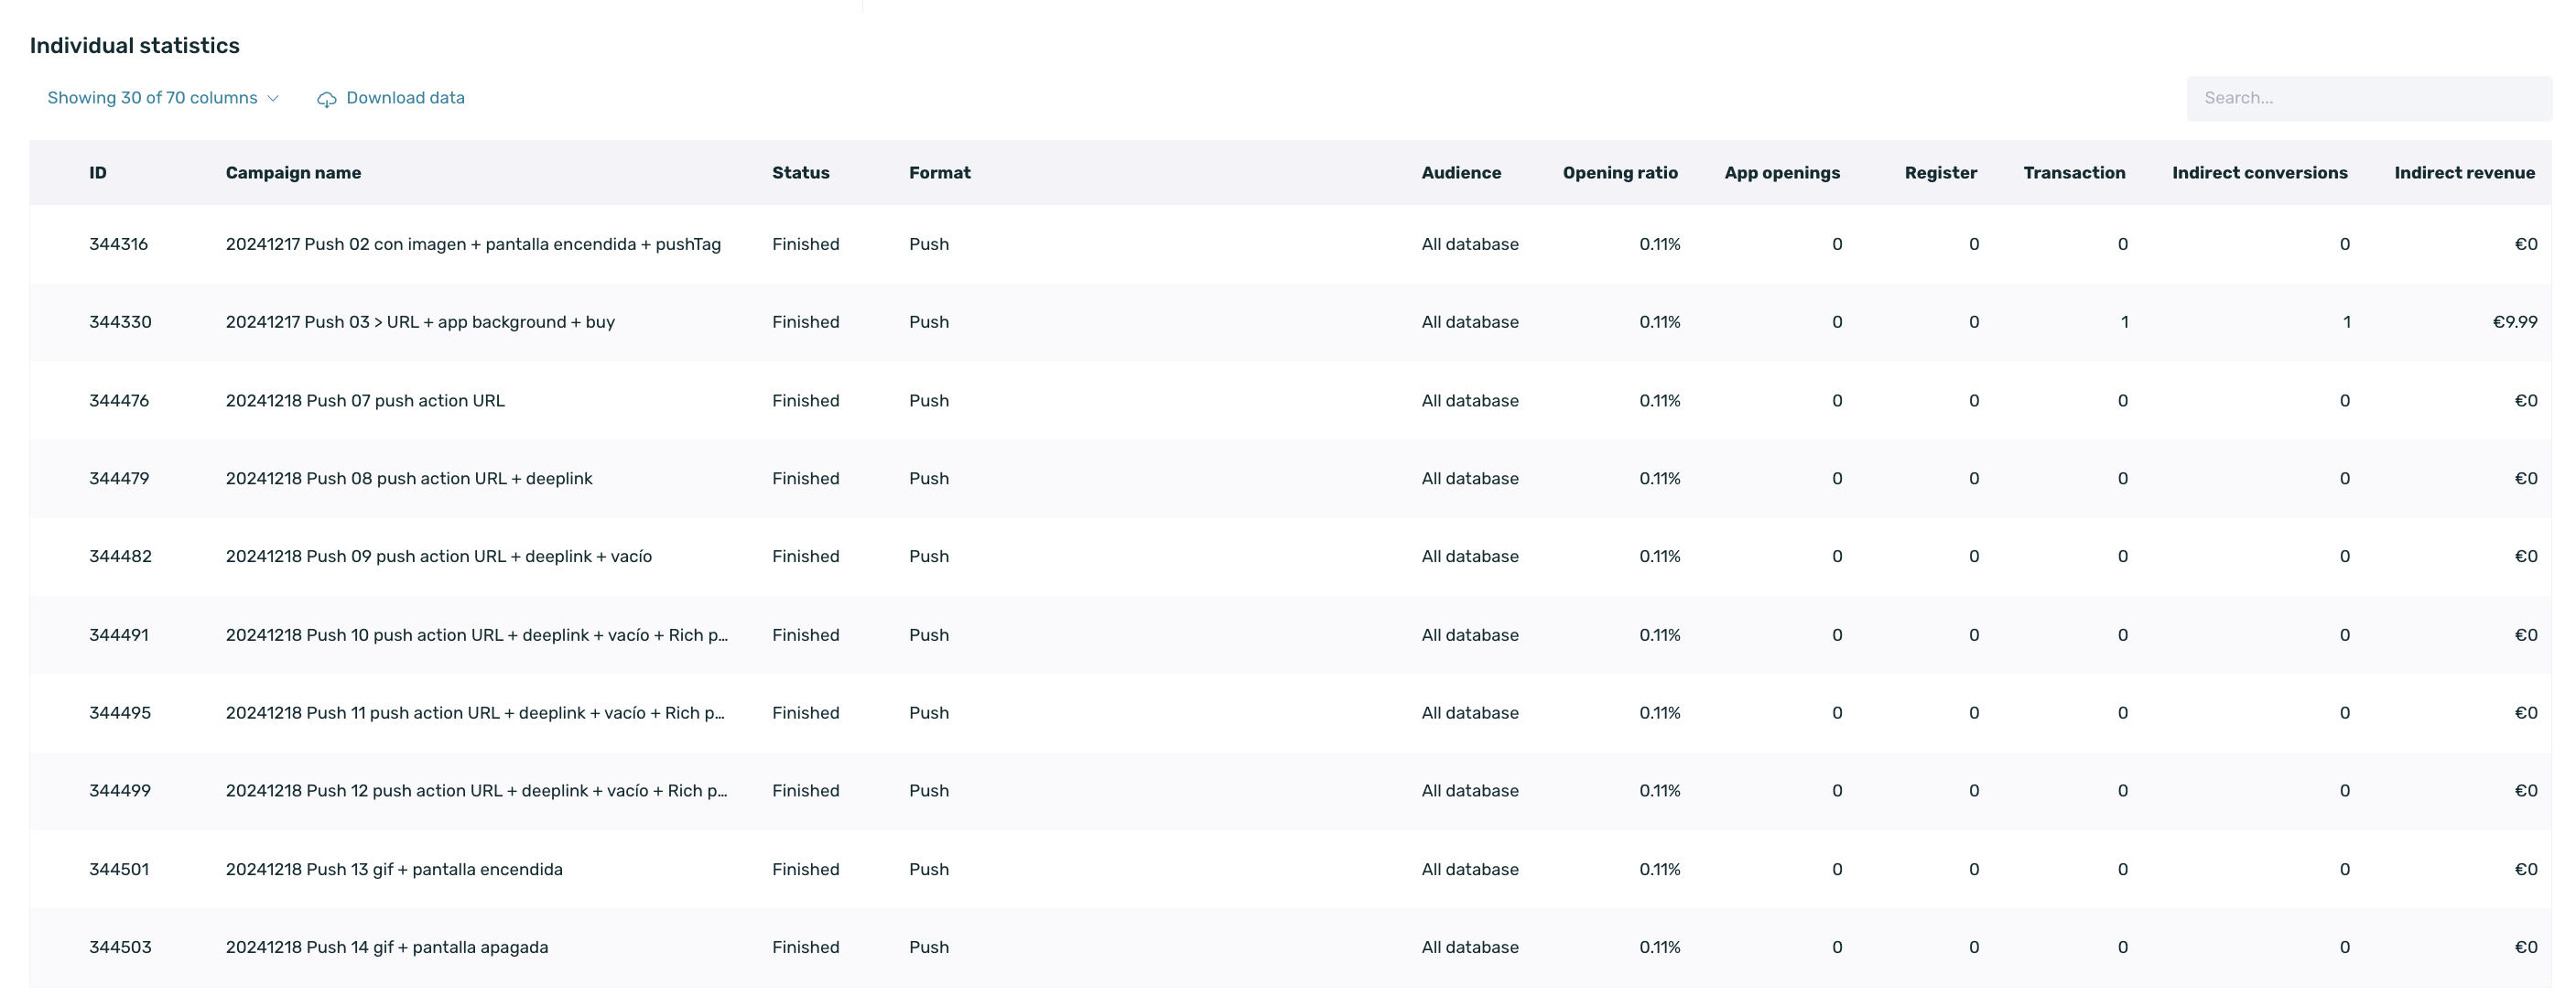
| ID | Campaign identifier in EMMA. |
| Campaign Name | Name of the campaign. |
| Status | Active, finished, paused, scheduled, or testing. |
| Format | Communication format. |
| Audience | Name of the audience linked to the communication. |
| Sent | Number of push notifications attempted to be sent through EMMA. |
| Delivered | Number of devices that received the push notification. |
| Opens | Number of devices that clicked on the notification. |
| Open rate | Percentage of devices that opened the push notification out of the total deliveries per campaign. |
| Unique opens | Unique users who opened the communication. |
| Opens within attribution window | Number of times the notification was opened within the configured attribution window. |
| AOV | Average Order Value: Total revenue/total sales. |
| Scheduled Date | Date for which the push notification was scheduled. |
| Sent Date | Date and time when the push notification was sent. |
| Time Zone | Time zone selected for sending. |
| A/B test | Whether the campaign has an A/B test configured or not. |
| Automated | Type of campaign (Automated or Classic). |
| Attribution window | Attribution time for events to each campaign after interacting with it (click). |
¶ A/B Test analysis
To view the report of campaigns that have a configured A/B Test, simply go to the communication in question and click on the A/B Test analysis option shown in the contextual menu of that communication. In this guide, you can find all the details of the communication report for communications with A/B Test.
¶ Users imapcted by campaigns
If we want to know information about the users who have been impacted by our campaigns, whether In-App or Out-App, there is a filter in Behavior > Explorer that allows us to see which users have or have not been impacted by a specific communication. It is the Communication filter, and you can find more information about it in this guide.
¶ Considerations communications report
- The data is displayed according to the dates you have selected. It is NOT cumulative.
- Even if a campaign is active, if it has not collected data within the selected date range, it will not appear in the table.
- Campaigns that were deleted before collecting data will not appear.
- If an export is made of the "Individual Statistics" table, it will be as seen in the table itself, showing only the columns for the selected KPIs and campaigns.
- The Communications Report is updated every 2 hours. Keep in mind that the update time may vary depending on the volume of data being collected.